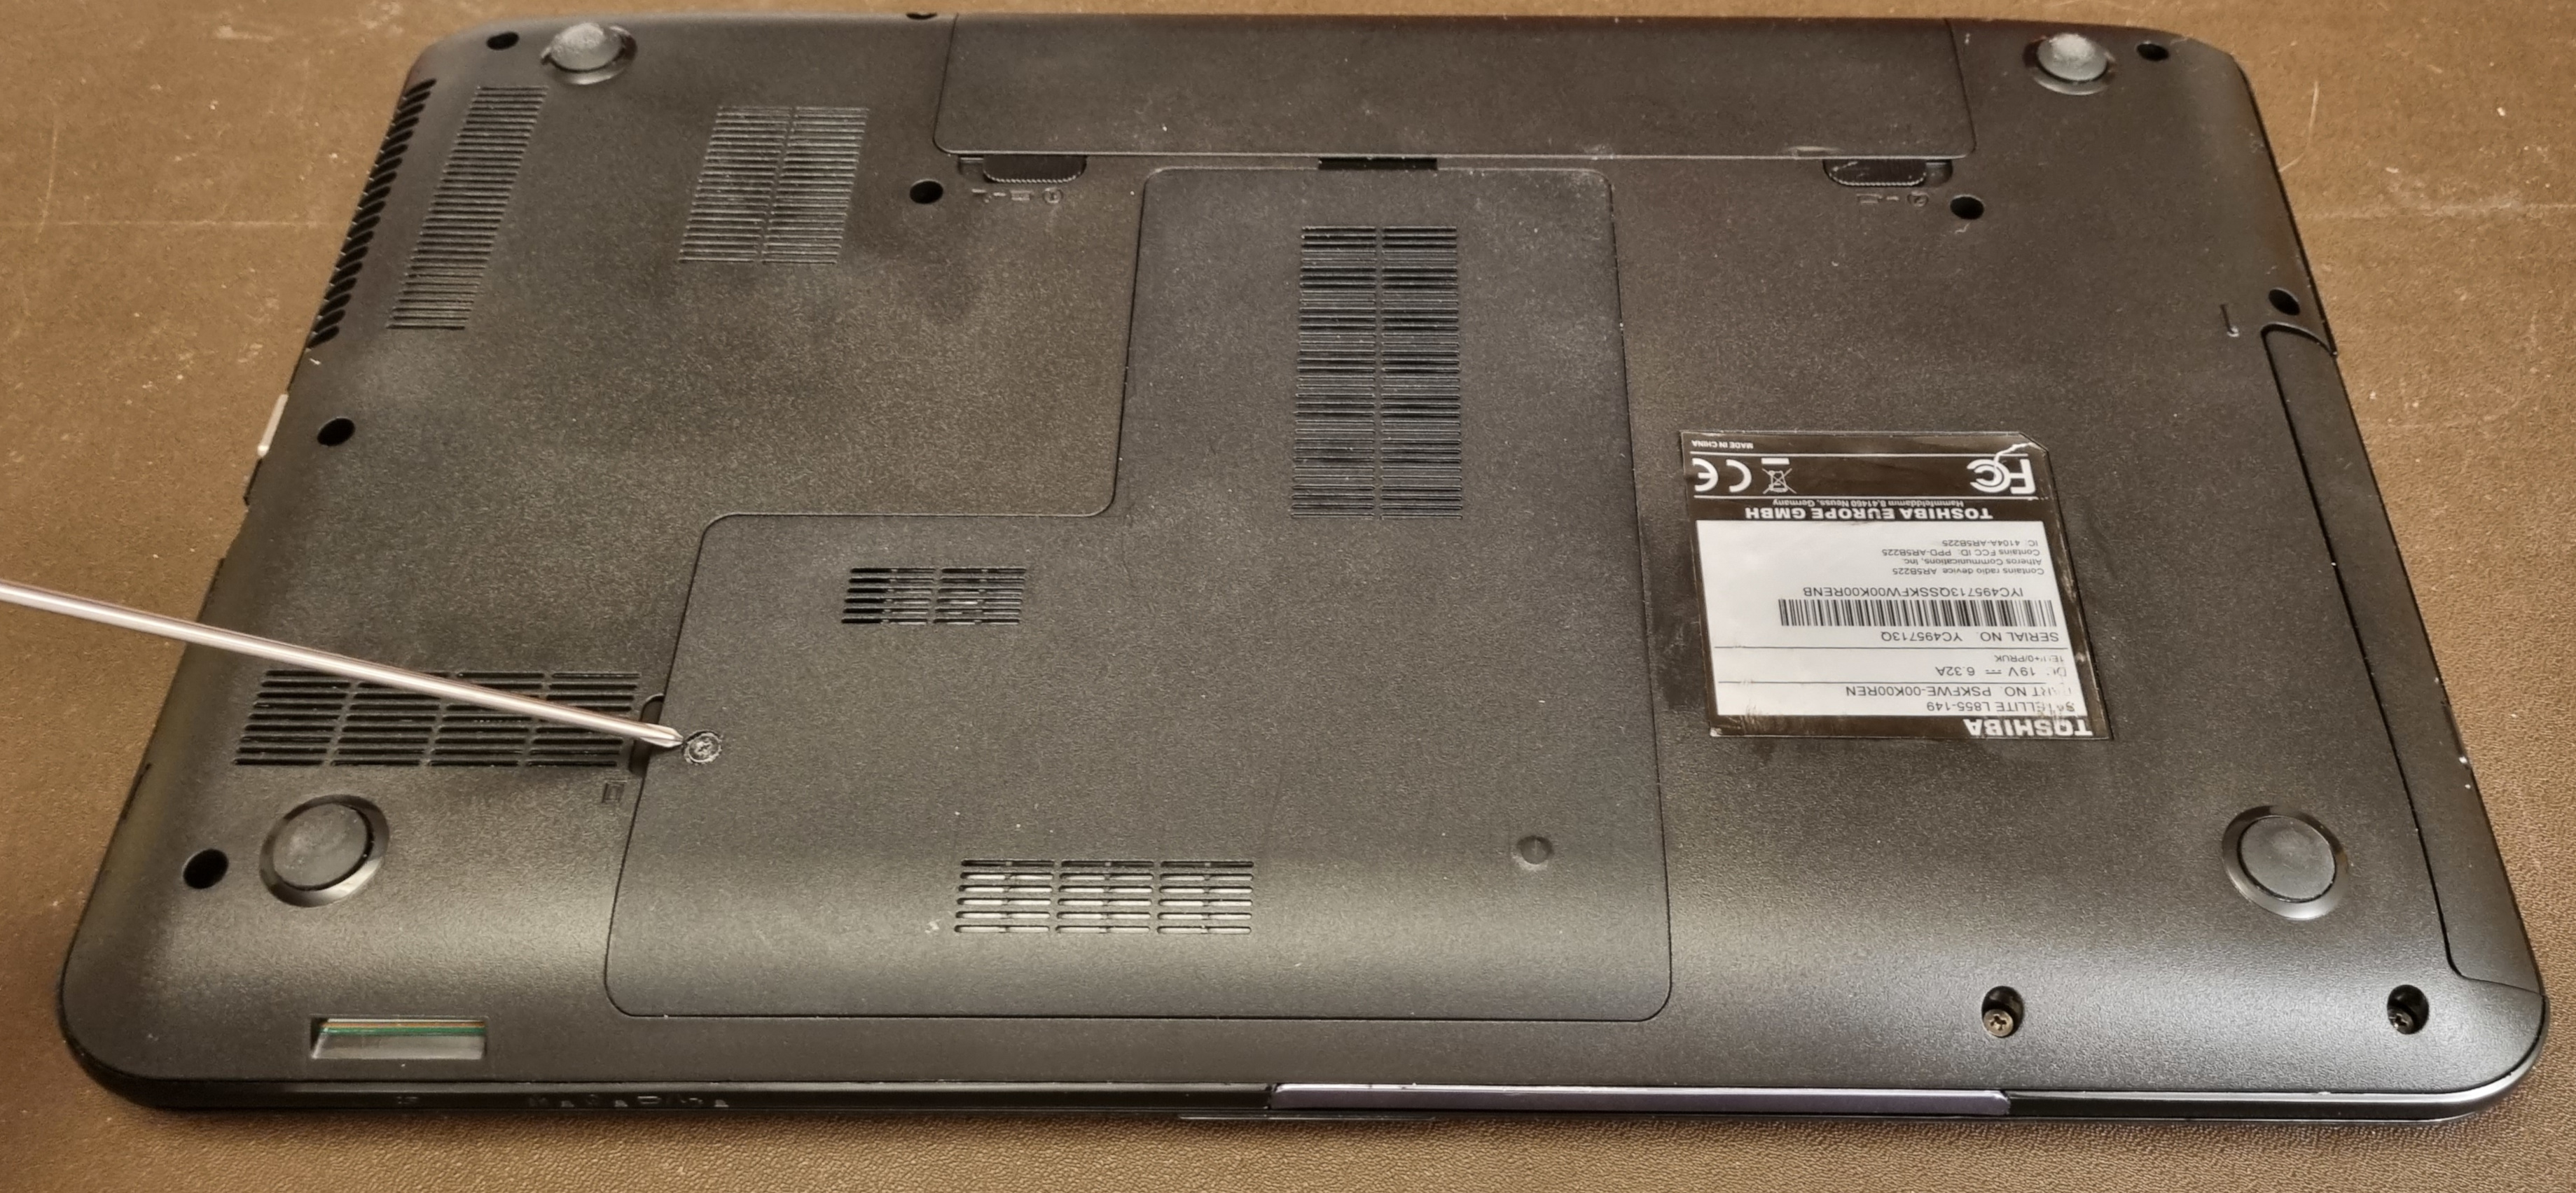
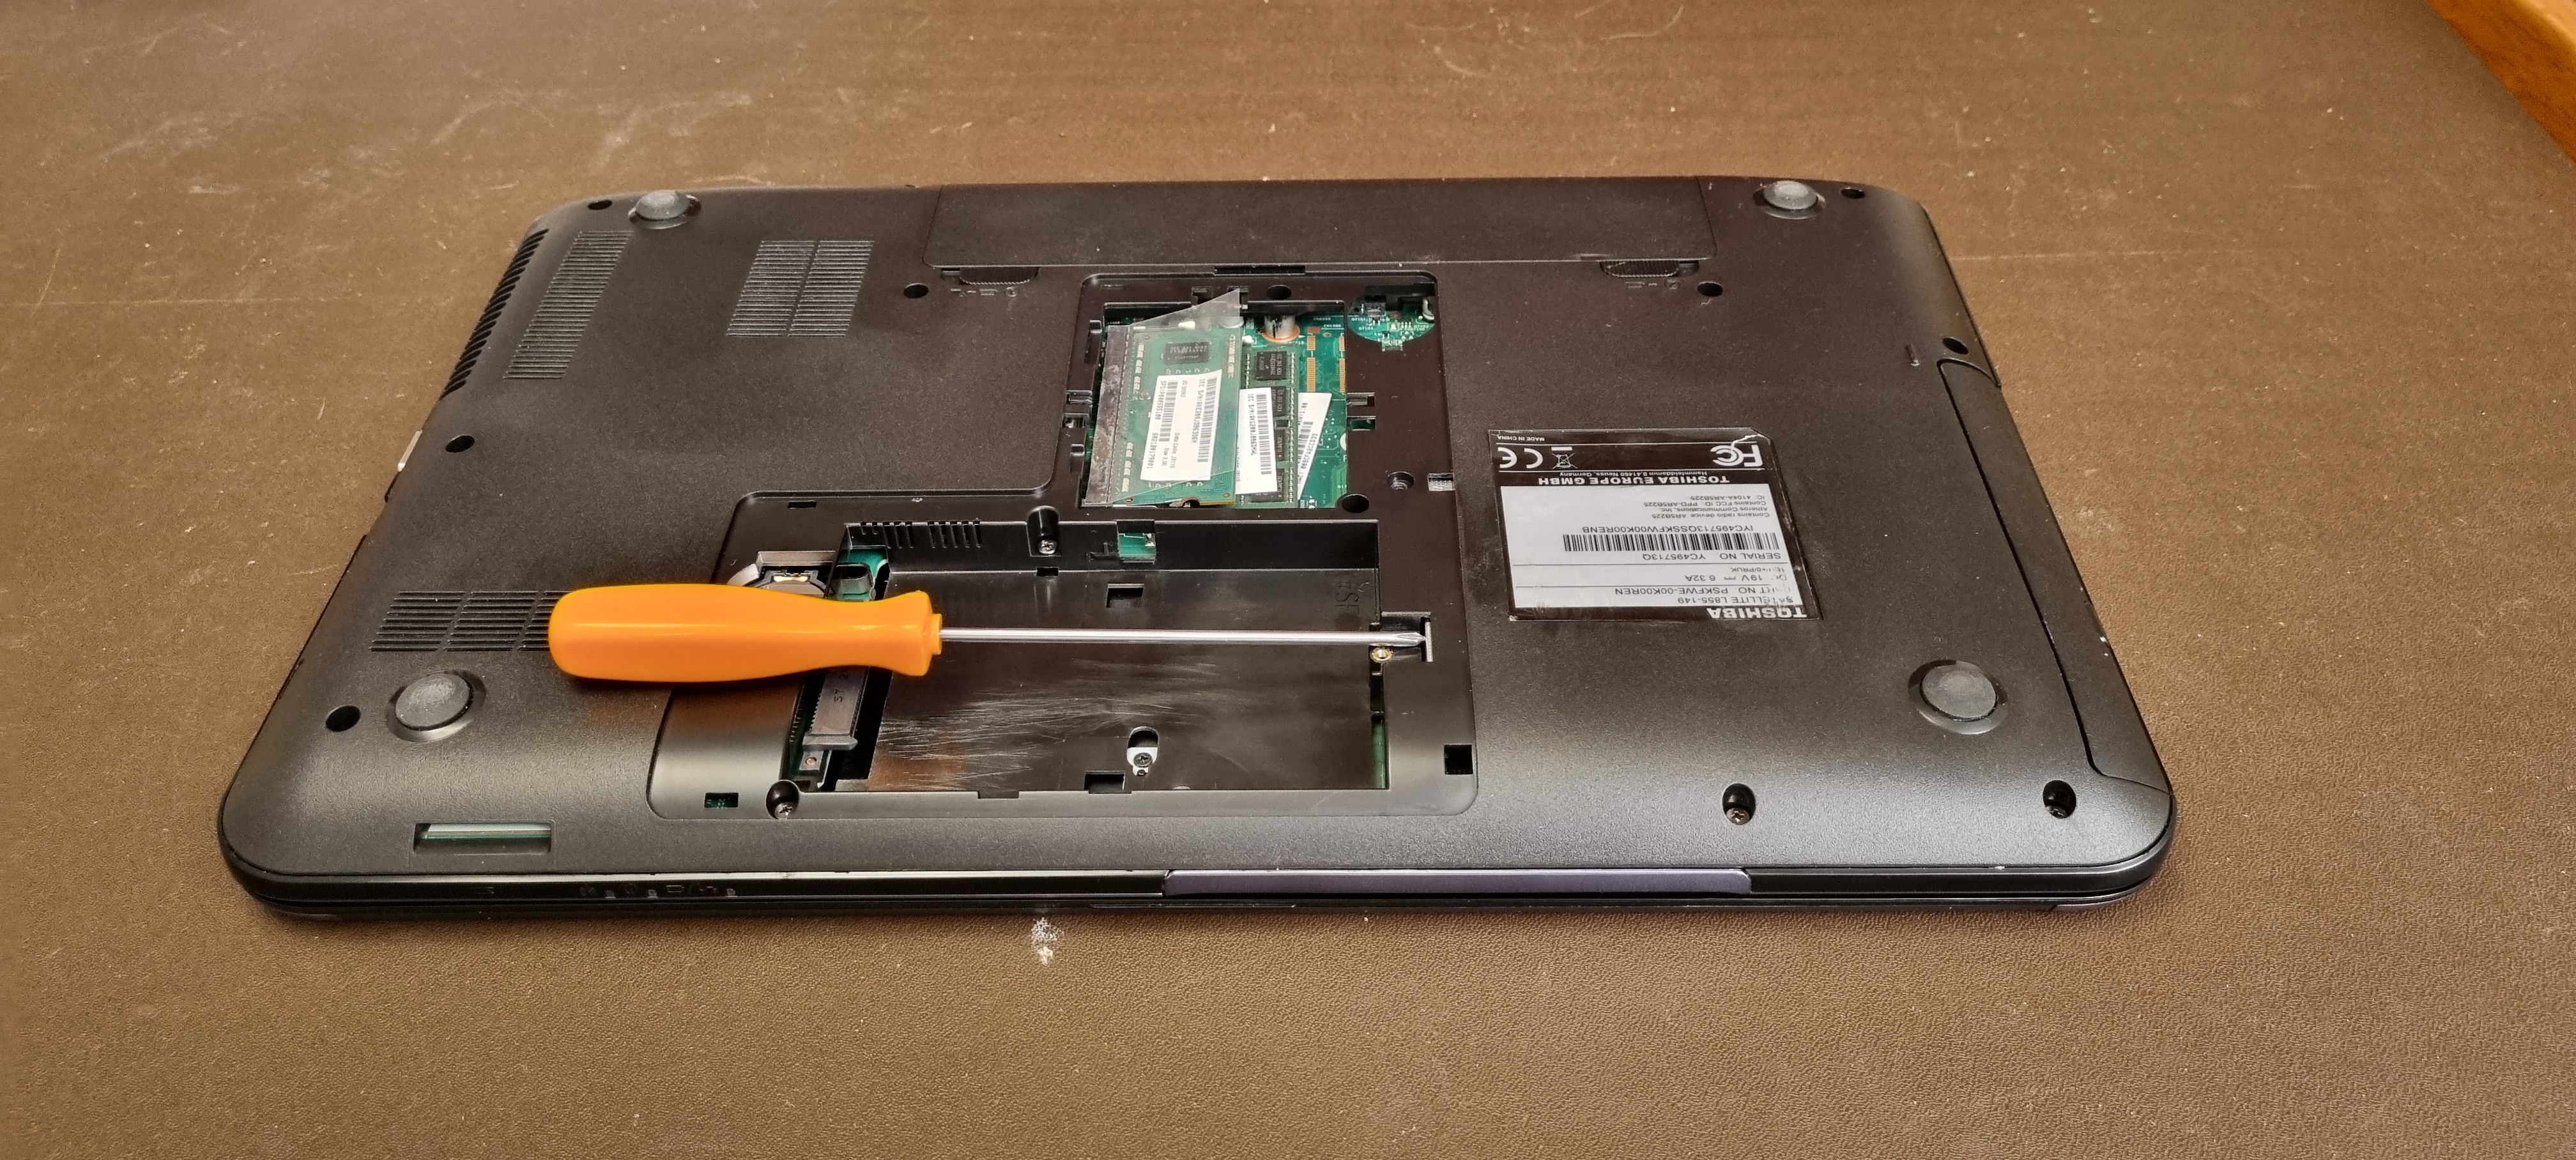
First turn the laptop
upside down with the non-hinge side towards you.
Then remove the
large panel which is secured with one screw.
You will then see a silver
harddrive holder.
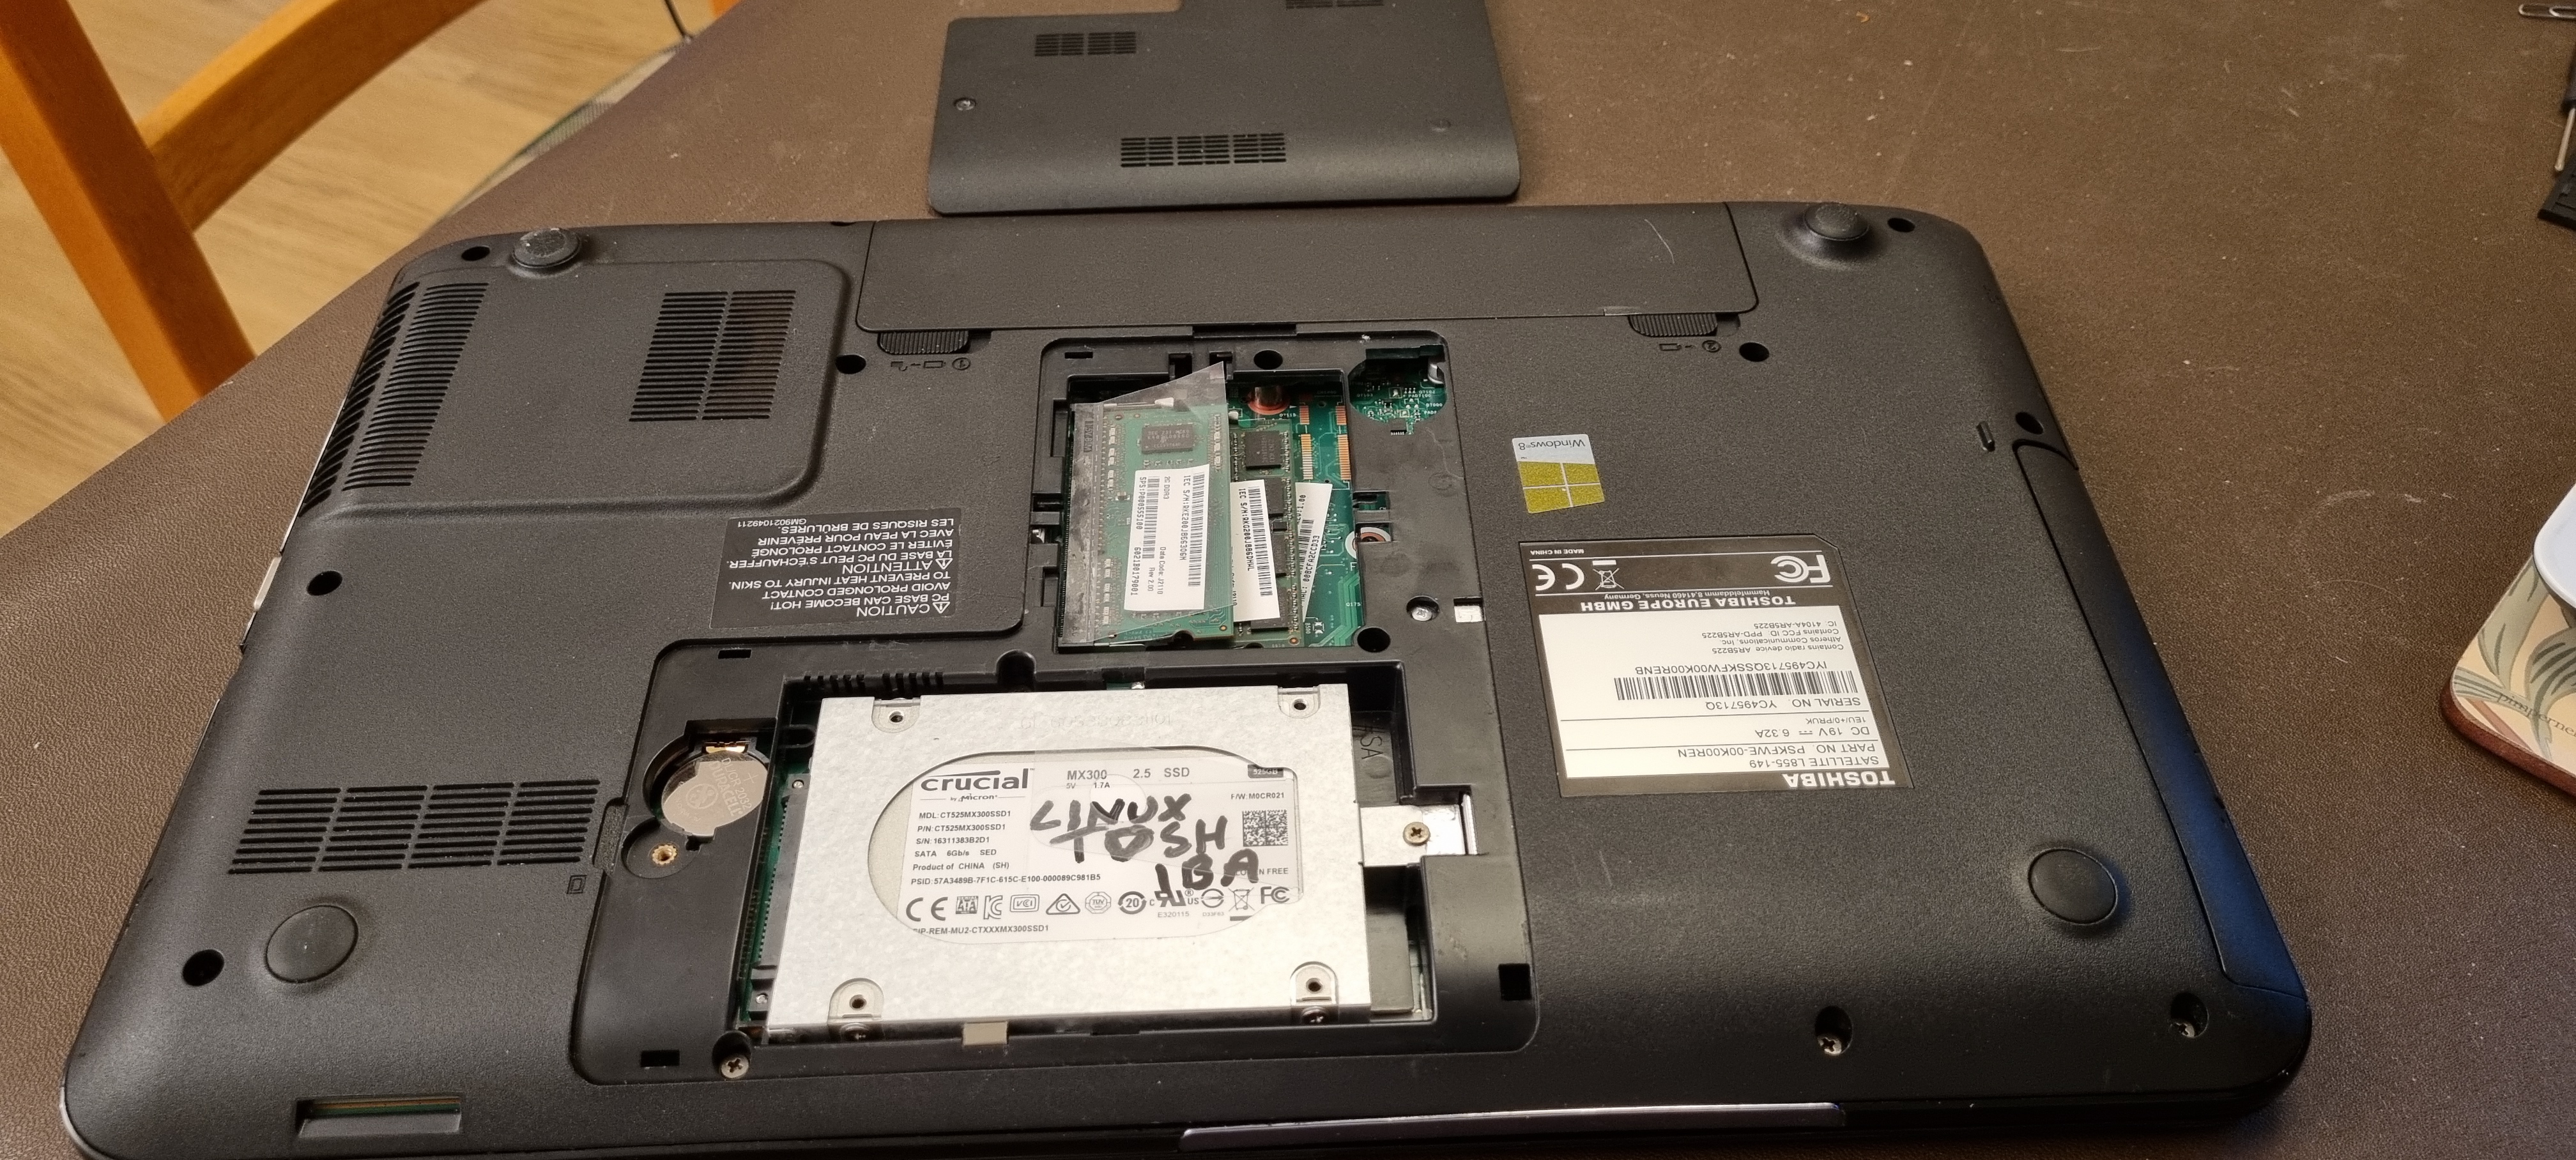
Remove the screw to the right of the harddrive and slide
the drive to the right
so that it is clear of the connector
block on the left hand side.
The drive can now
be lifted out. I suggest you don’t take it out of the holder yet as
it will be helpful
to check which way it is fitted when you put
the new harddrive (SSD) in, ready to get rid of the computer.
Just
leave it on one side until later.
Now remove the silver
screw just above the drive to the right as shown below.
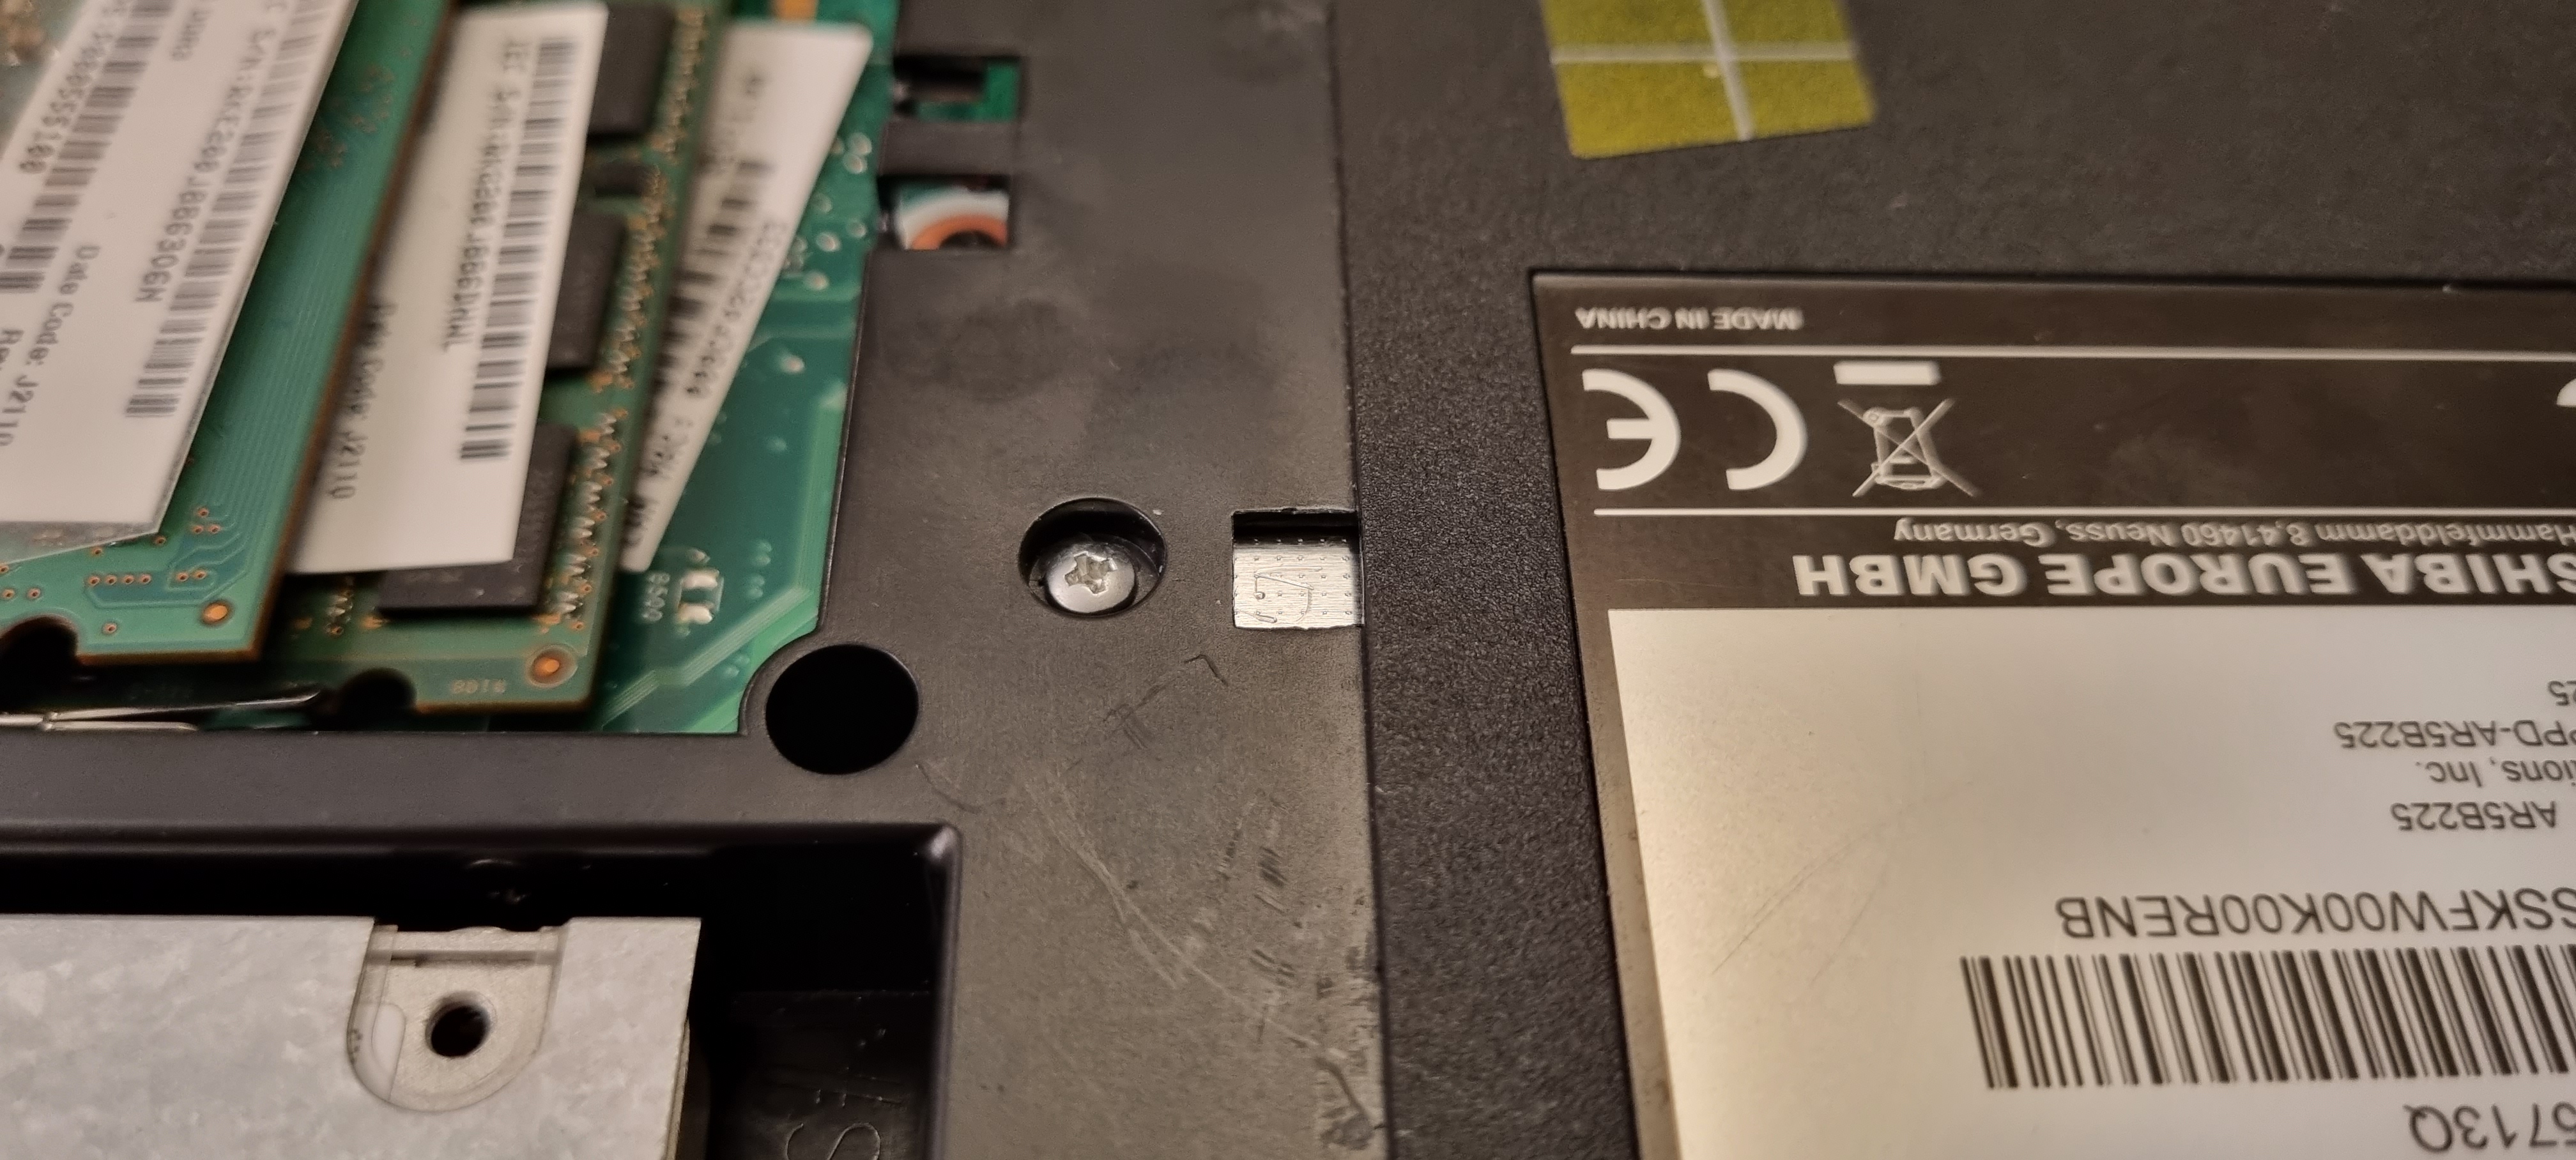
You can now easily
push the drive holder part of the way out with a screwdriver as shown
below.
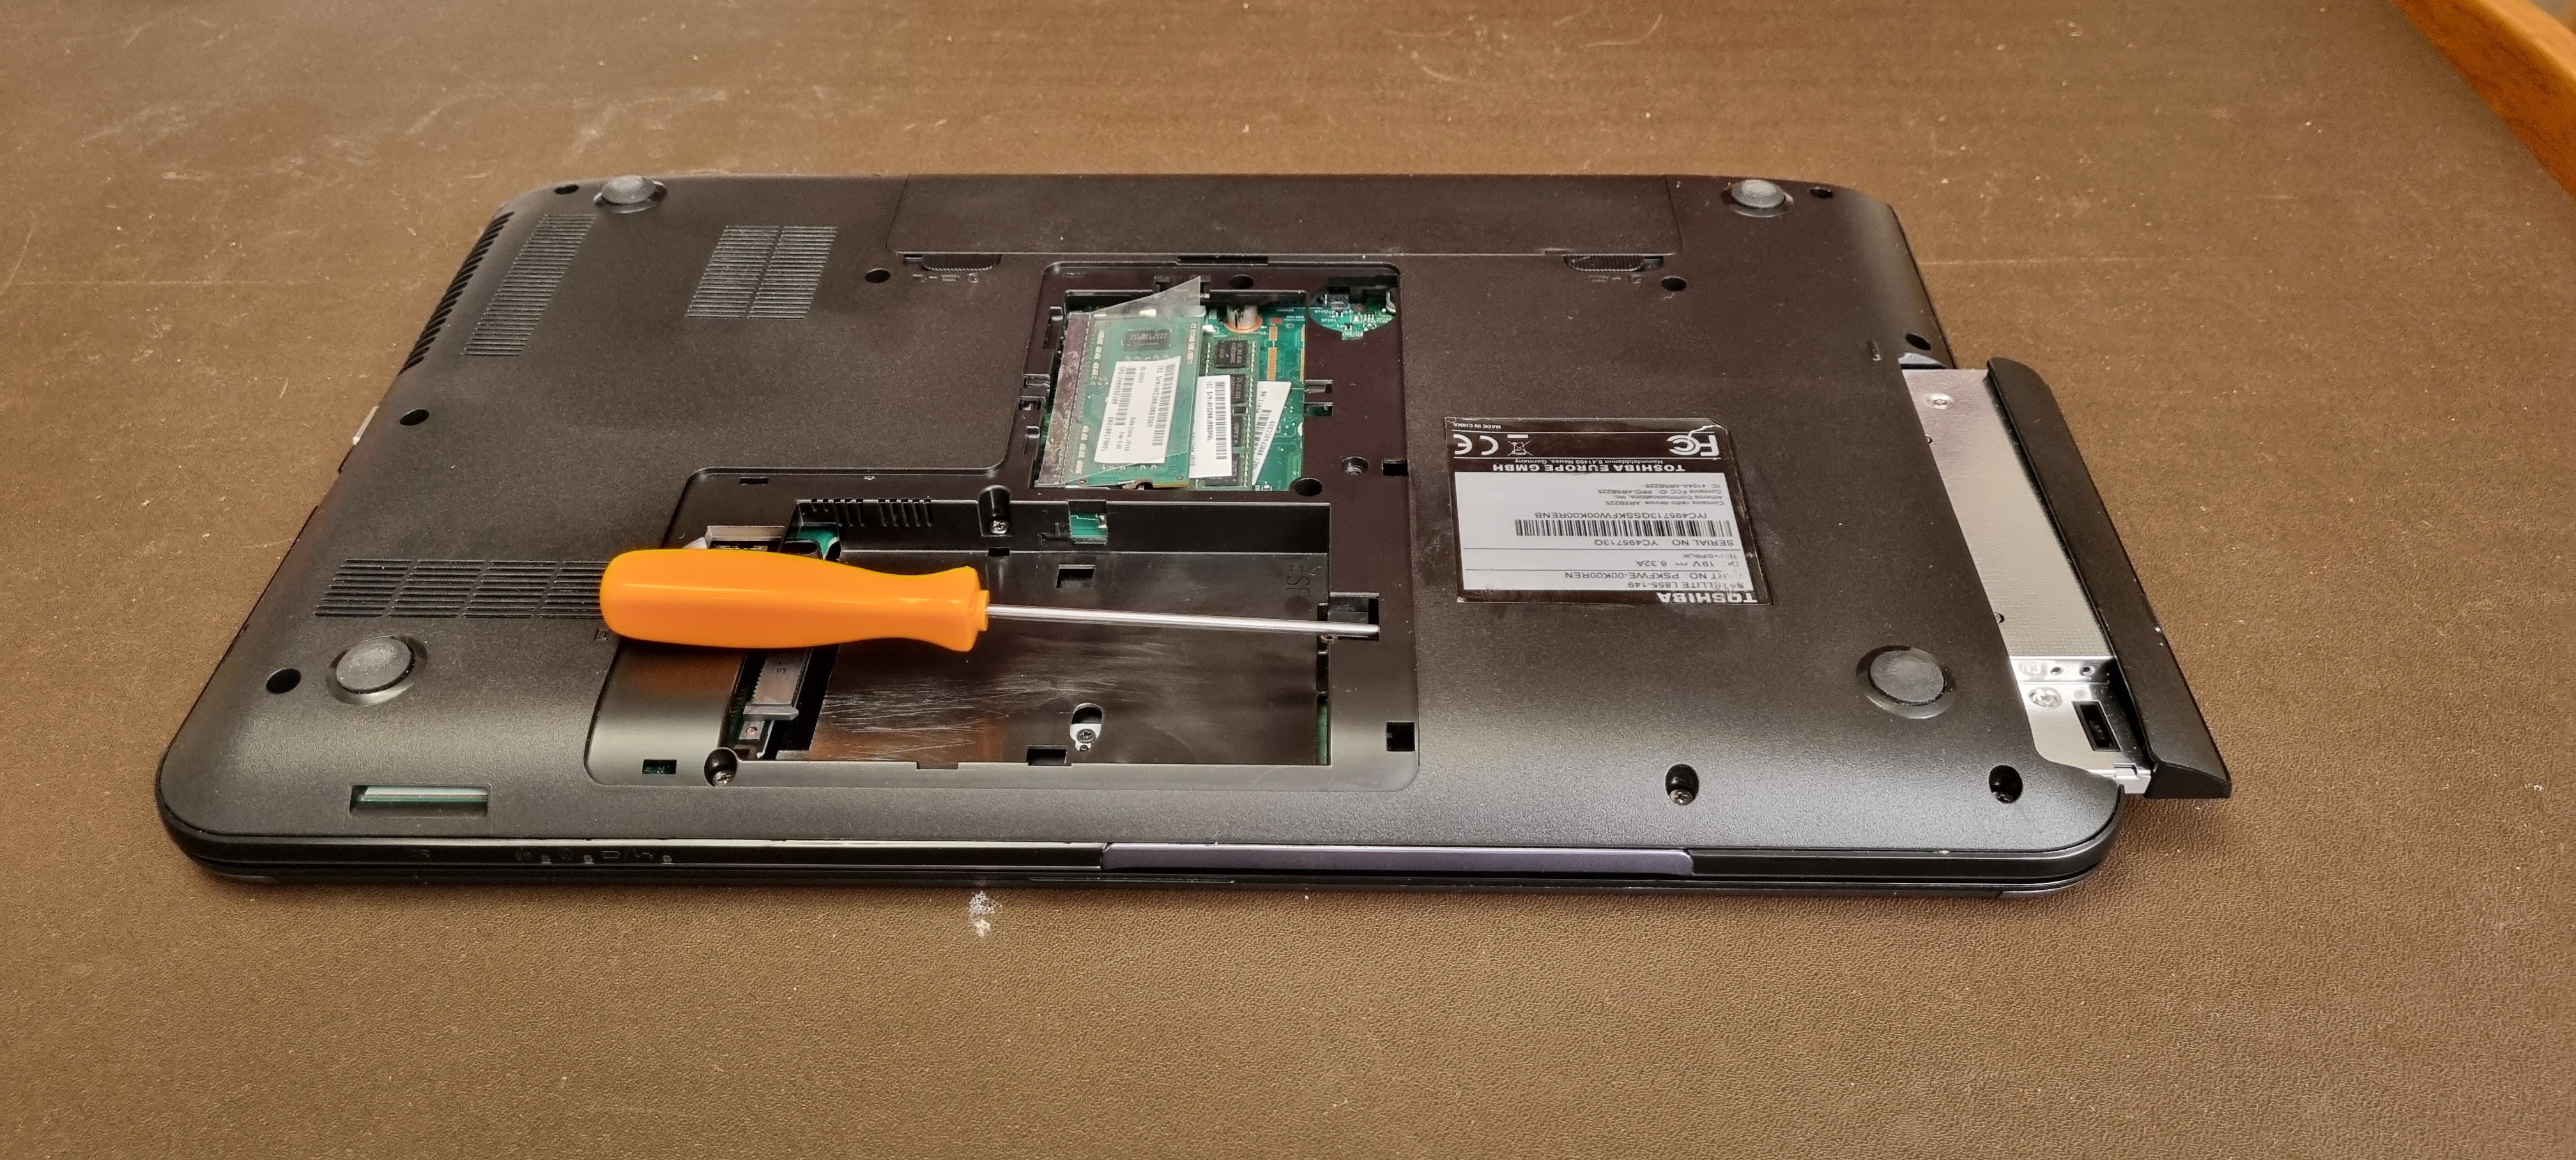
Once the drive is out, you
can remove the 4 screws in the slotted holes that hold the drive in
place.
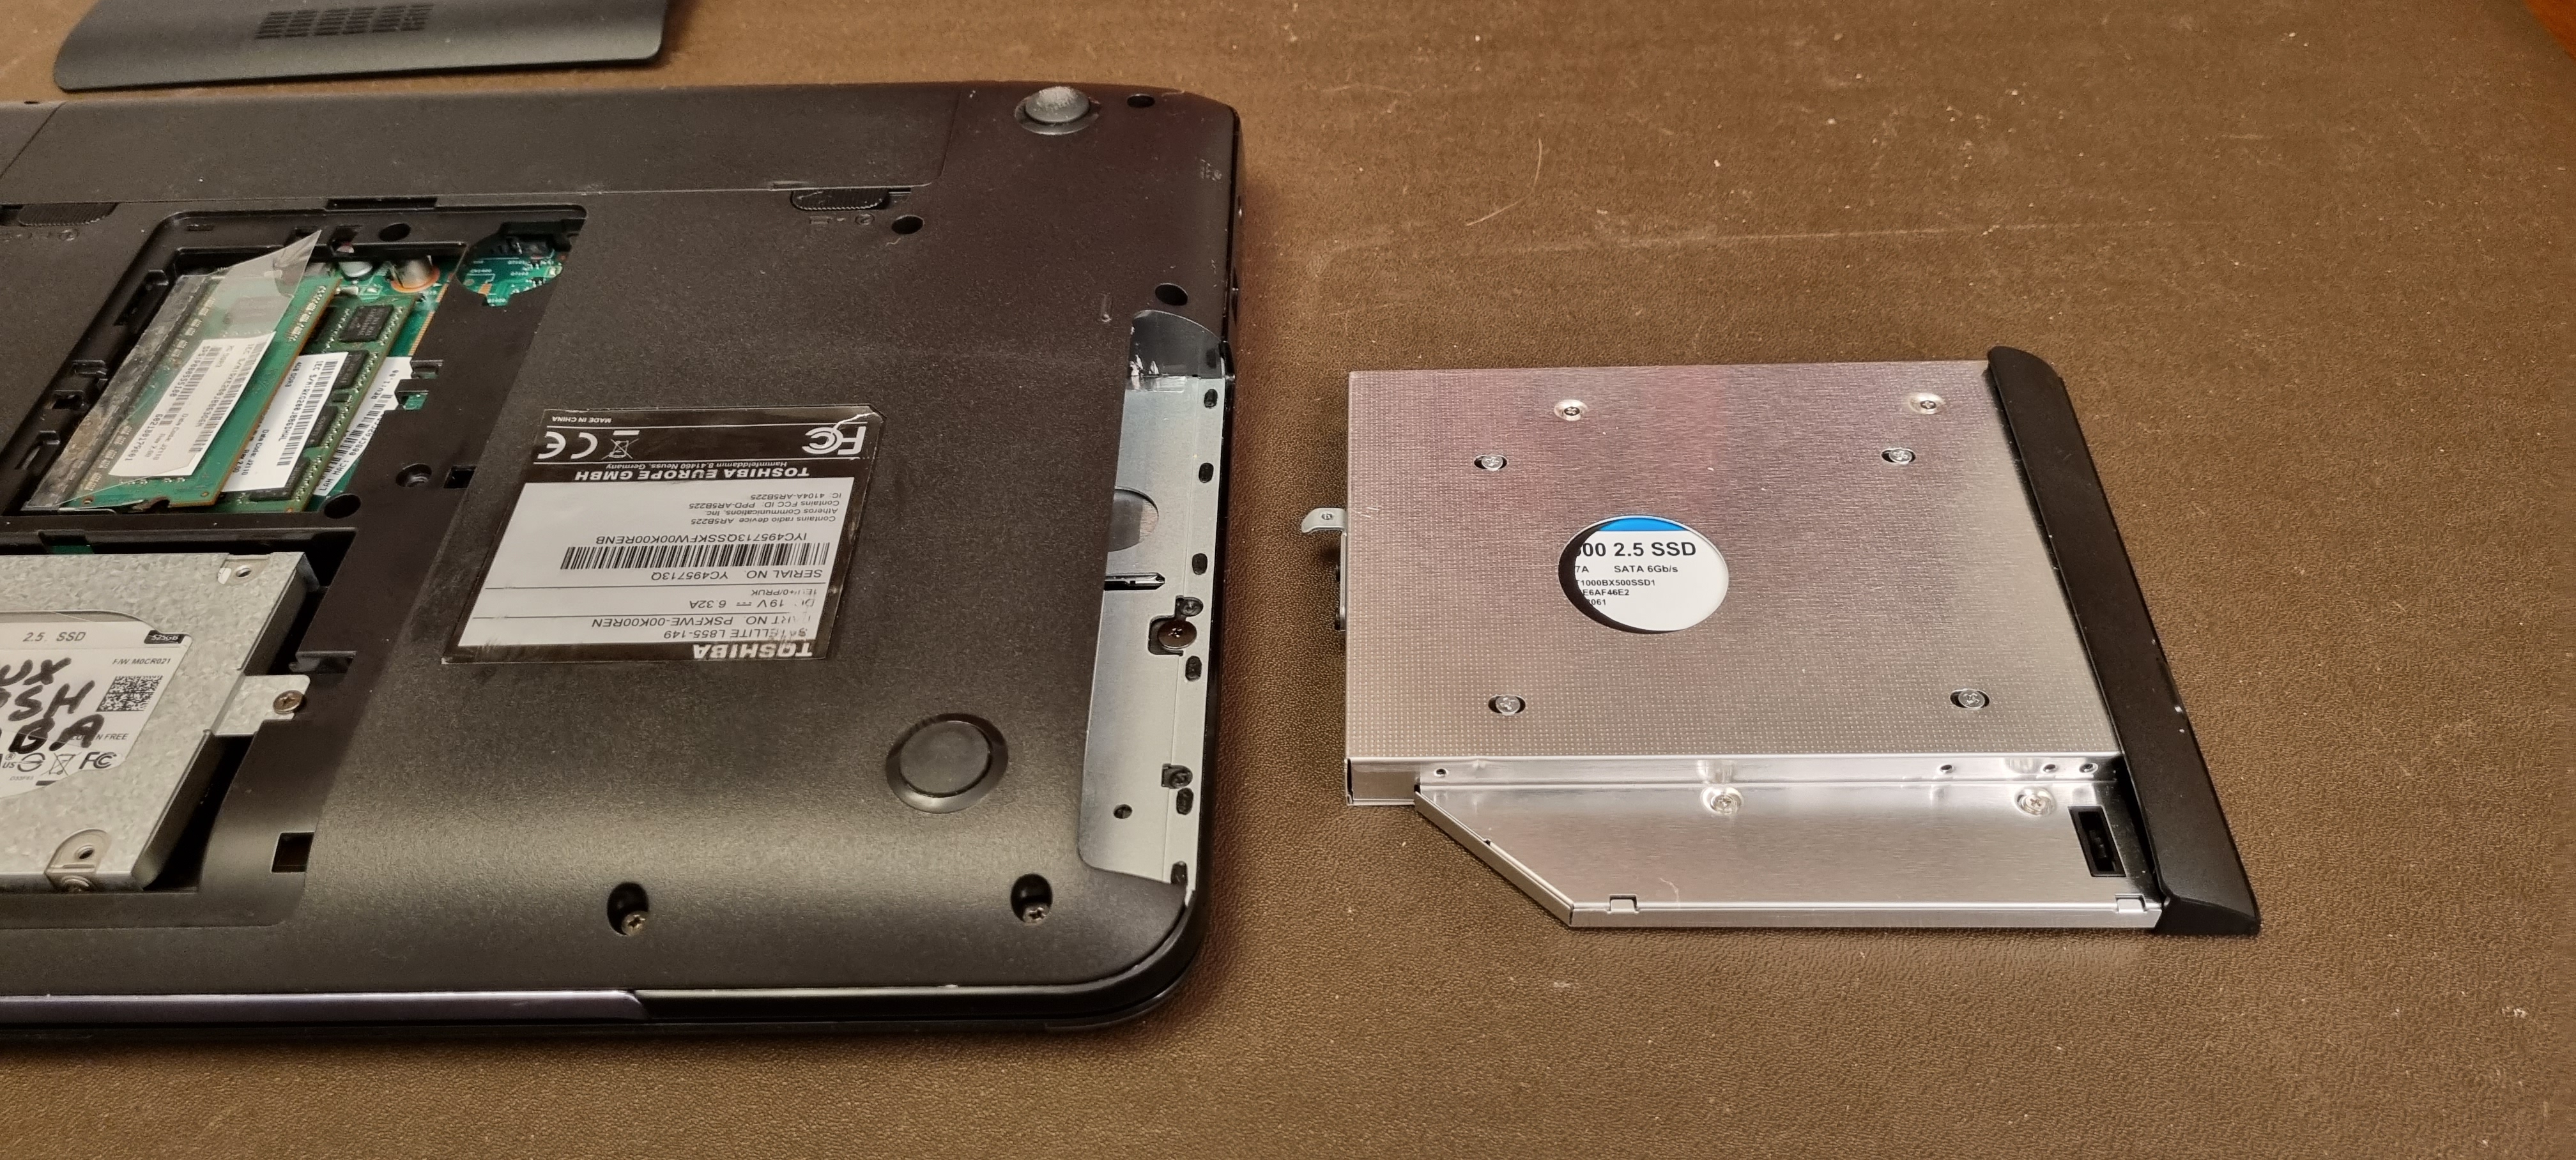
Then turn the
holder over and remove the drive. You will need to slide it away from
the end
where the connector is, so if you have it the way round
that it is shown in the picture below,
slide it from right to
left.
This is a bit stiff, so you will probably find it easier
to hold the drive from above and below,
using the circular hole
shown in the picture above to help with this.
This next picture below shows the position after the drive has been pulled clear of the connectors.
You can now refit the DVD
drive and the new harddrive (SSD) with a clean installation of
Windows 10 on it.
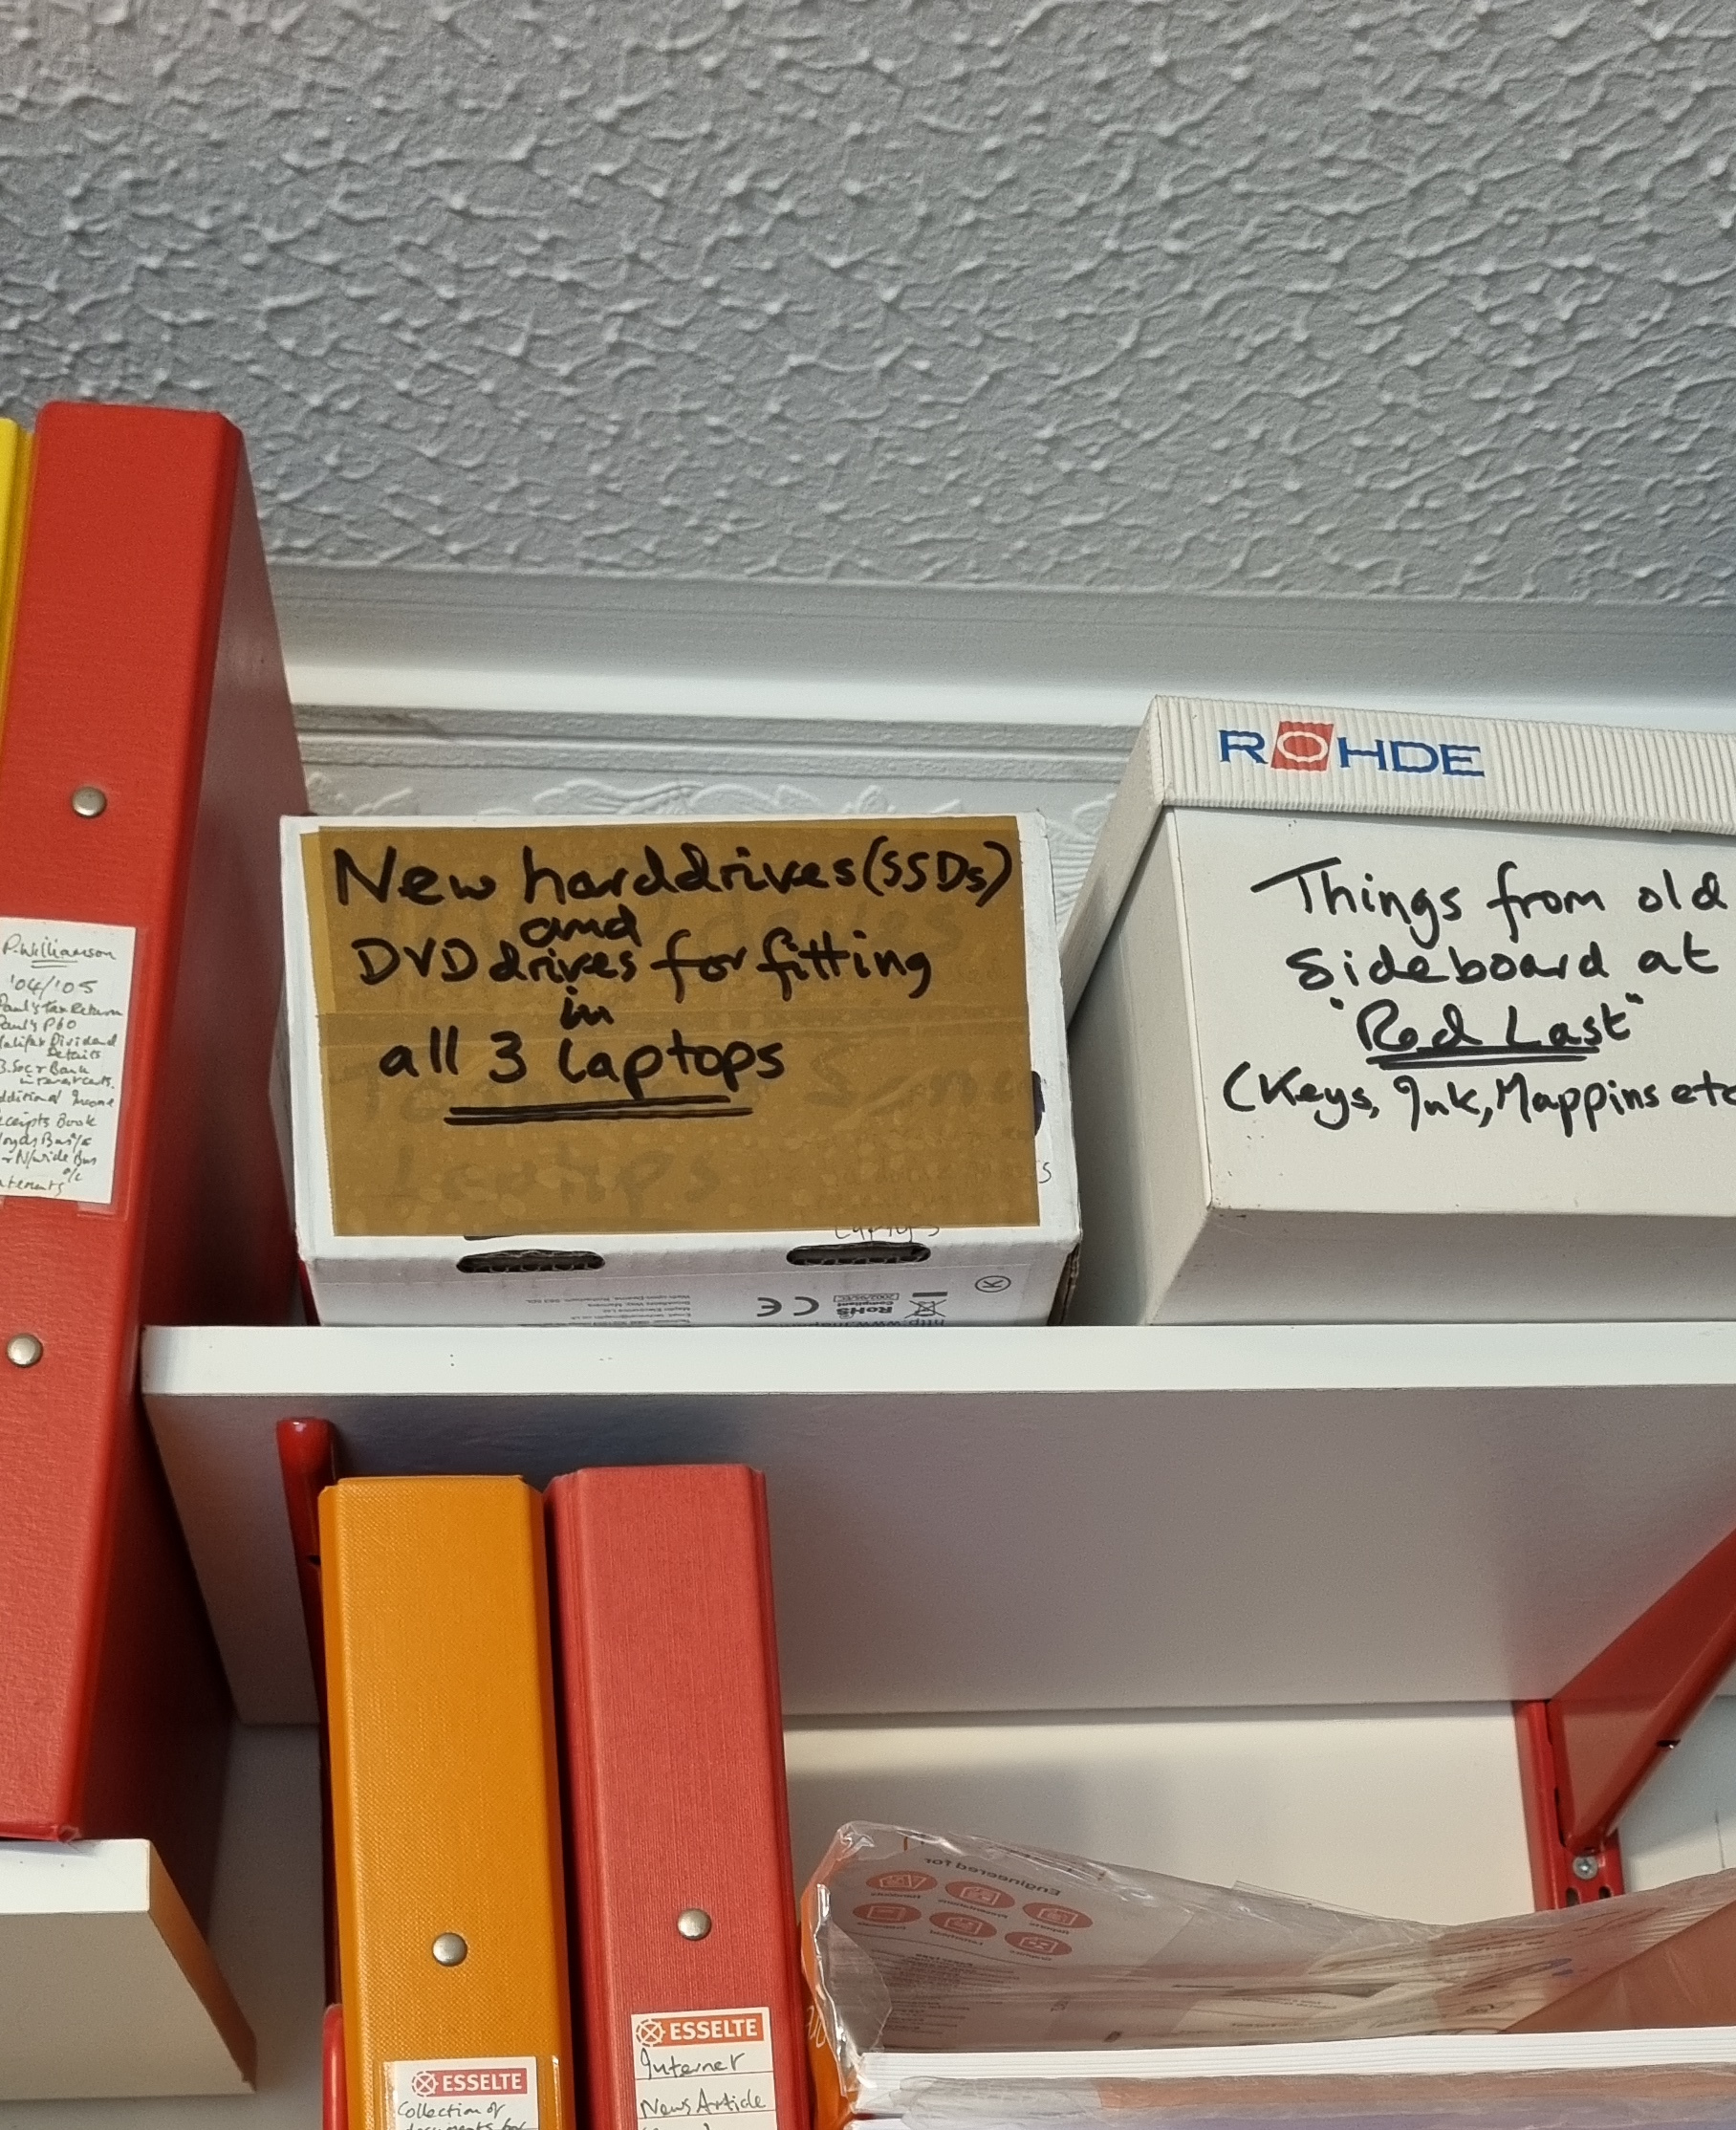
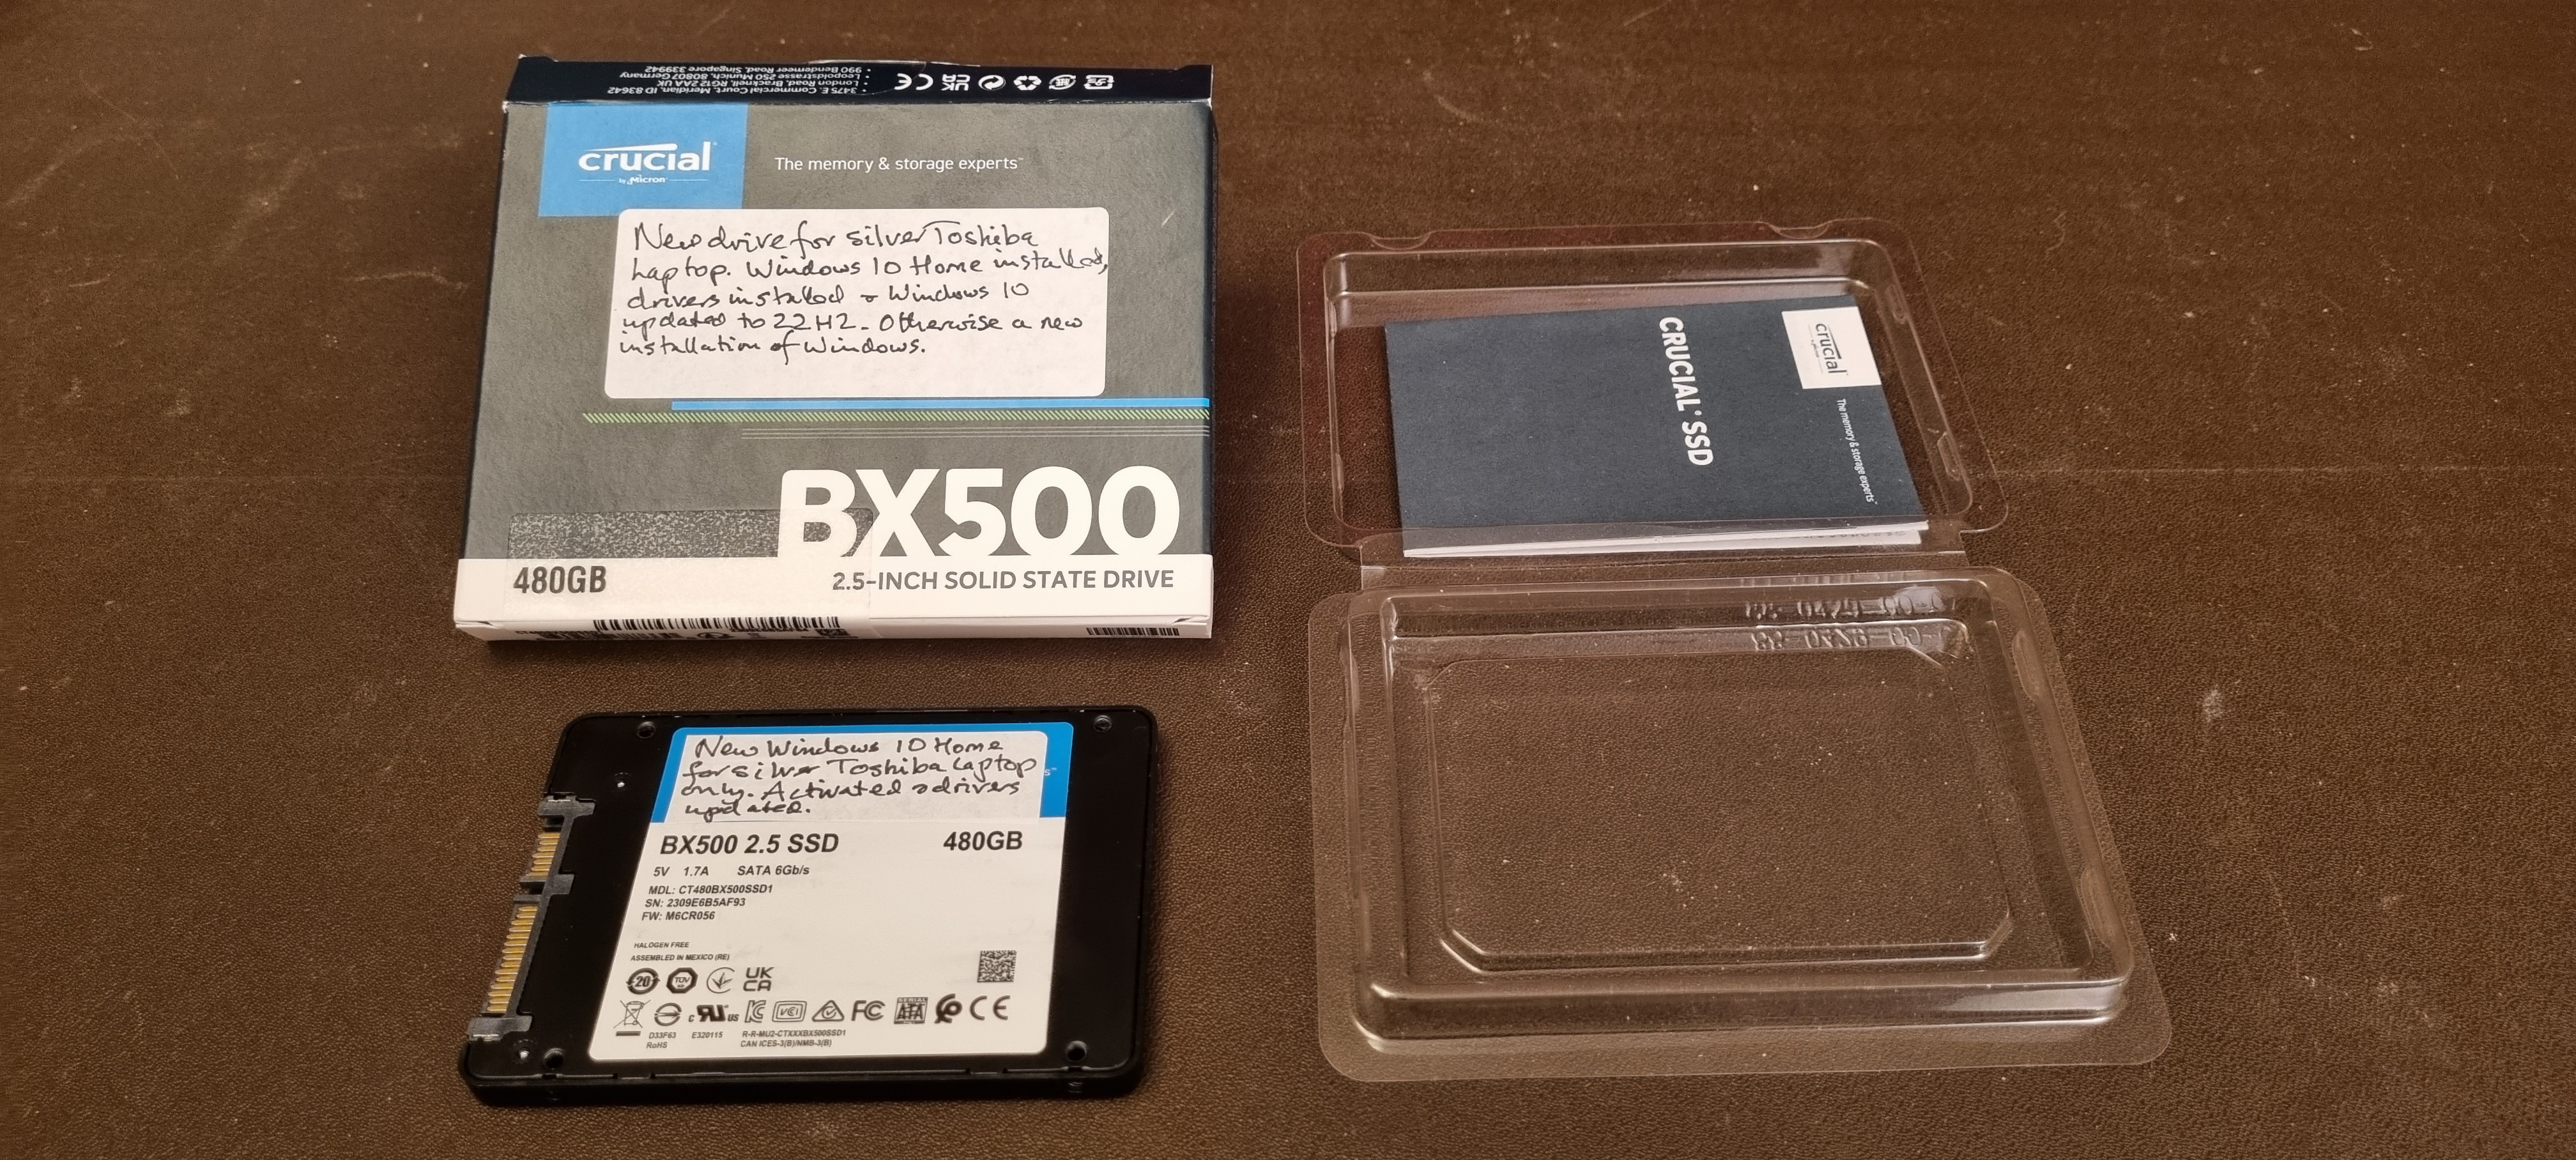
These are kept in a box which is on the
top shelf in the office to the right of the serving
hatch
labelled - "New harddrives (SSDs) and DVD drives for fitting in
all 3 laptops."
To refit the DVD drive, you
need to transfer the small fitting on the end of
the
drive holder onto
the DVD drive. Take care to check which way round it goes and
which
fitting holes to use. (See below).
You
will see that there are screws already in place on
this DVD
drive. Make sure you use them and refit the ones being used in the
harddrive
holder in case someone else wants to use it at any
time. It’s only necessary
for this computer. (Be gentle when
tightening these screws as the
threads strip very easily in the
soft metal used in the holder and DVD drive.)
Then take off the black
plastic end piece (shown below),
still on the
harddrive holder), and fit it to
the DVD drive. It’s
not immediately
obvious how to remove this, but you will see a
couple of places where
you can use a flat screwdriver to release
a clip, which helps.

Once you’ve replaced the
drive in the computer, don’t forget to refit the small screw to
hold it in place.
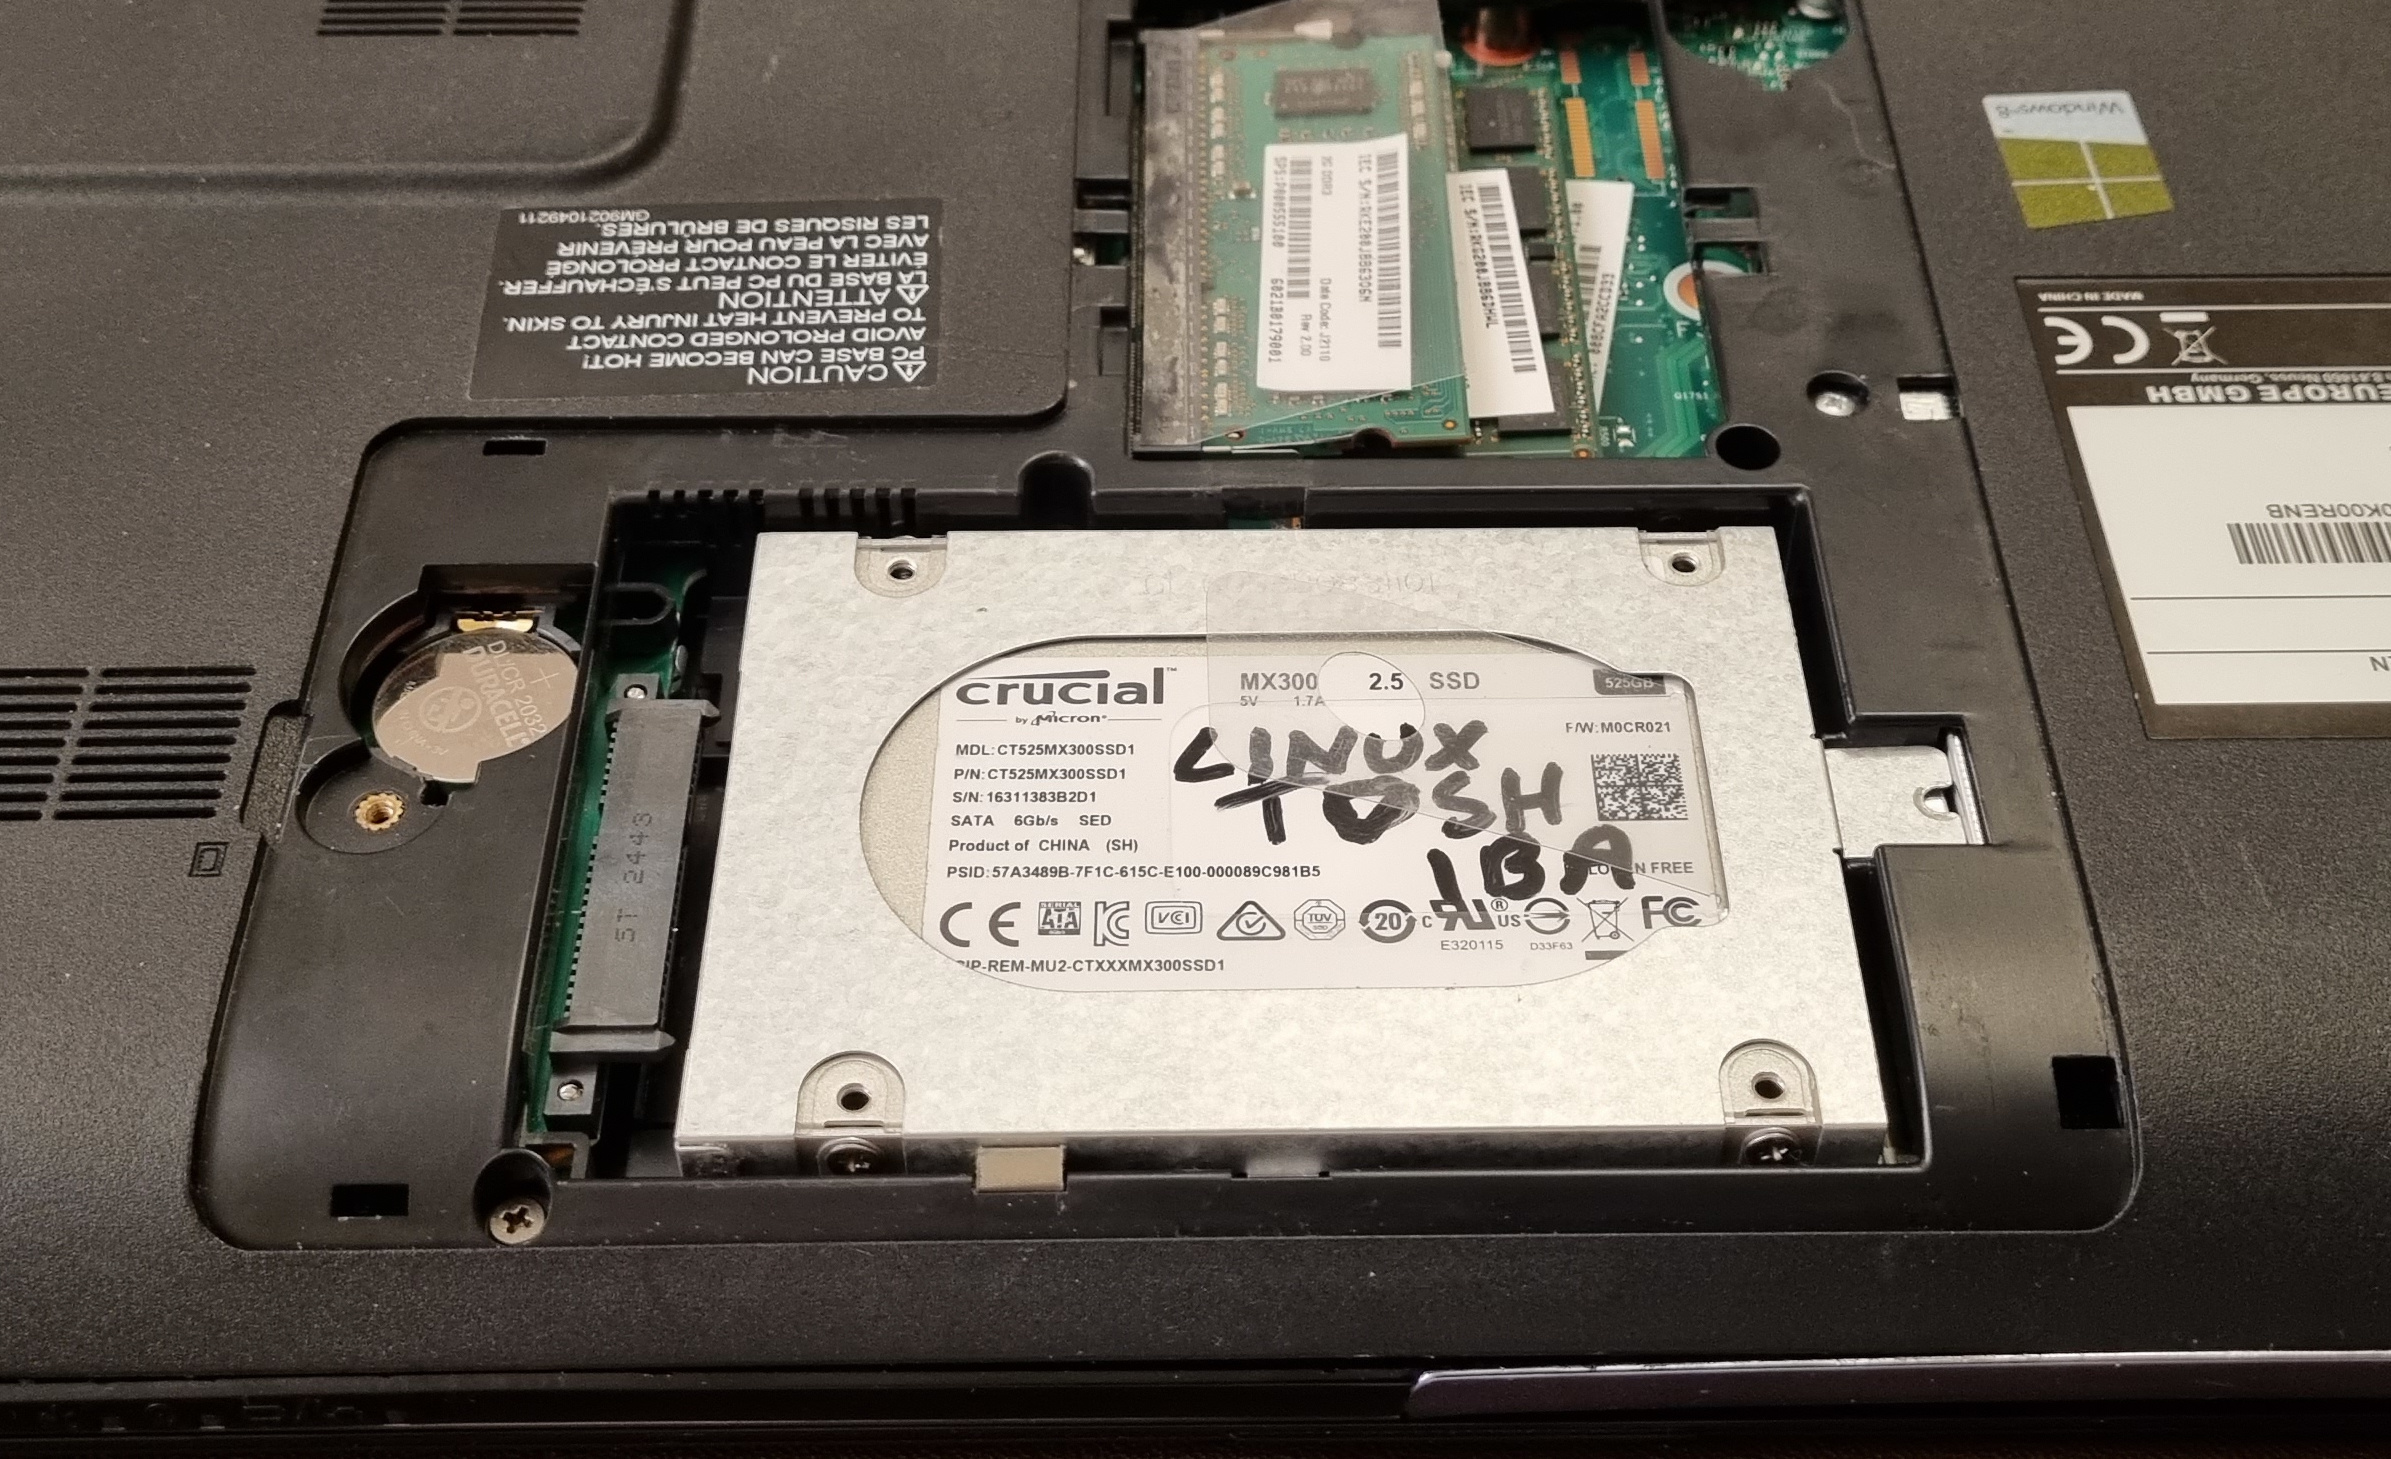
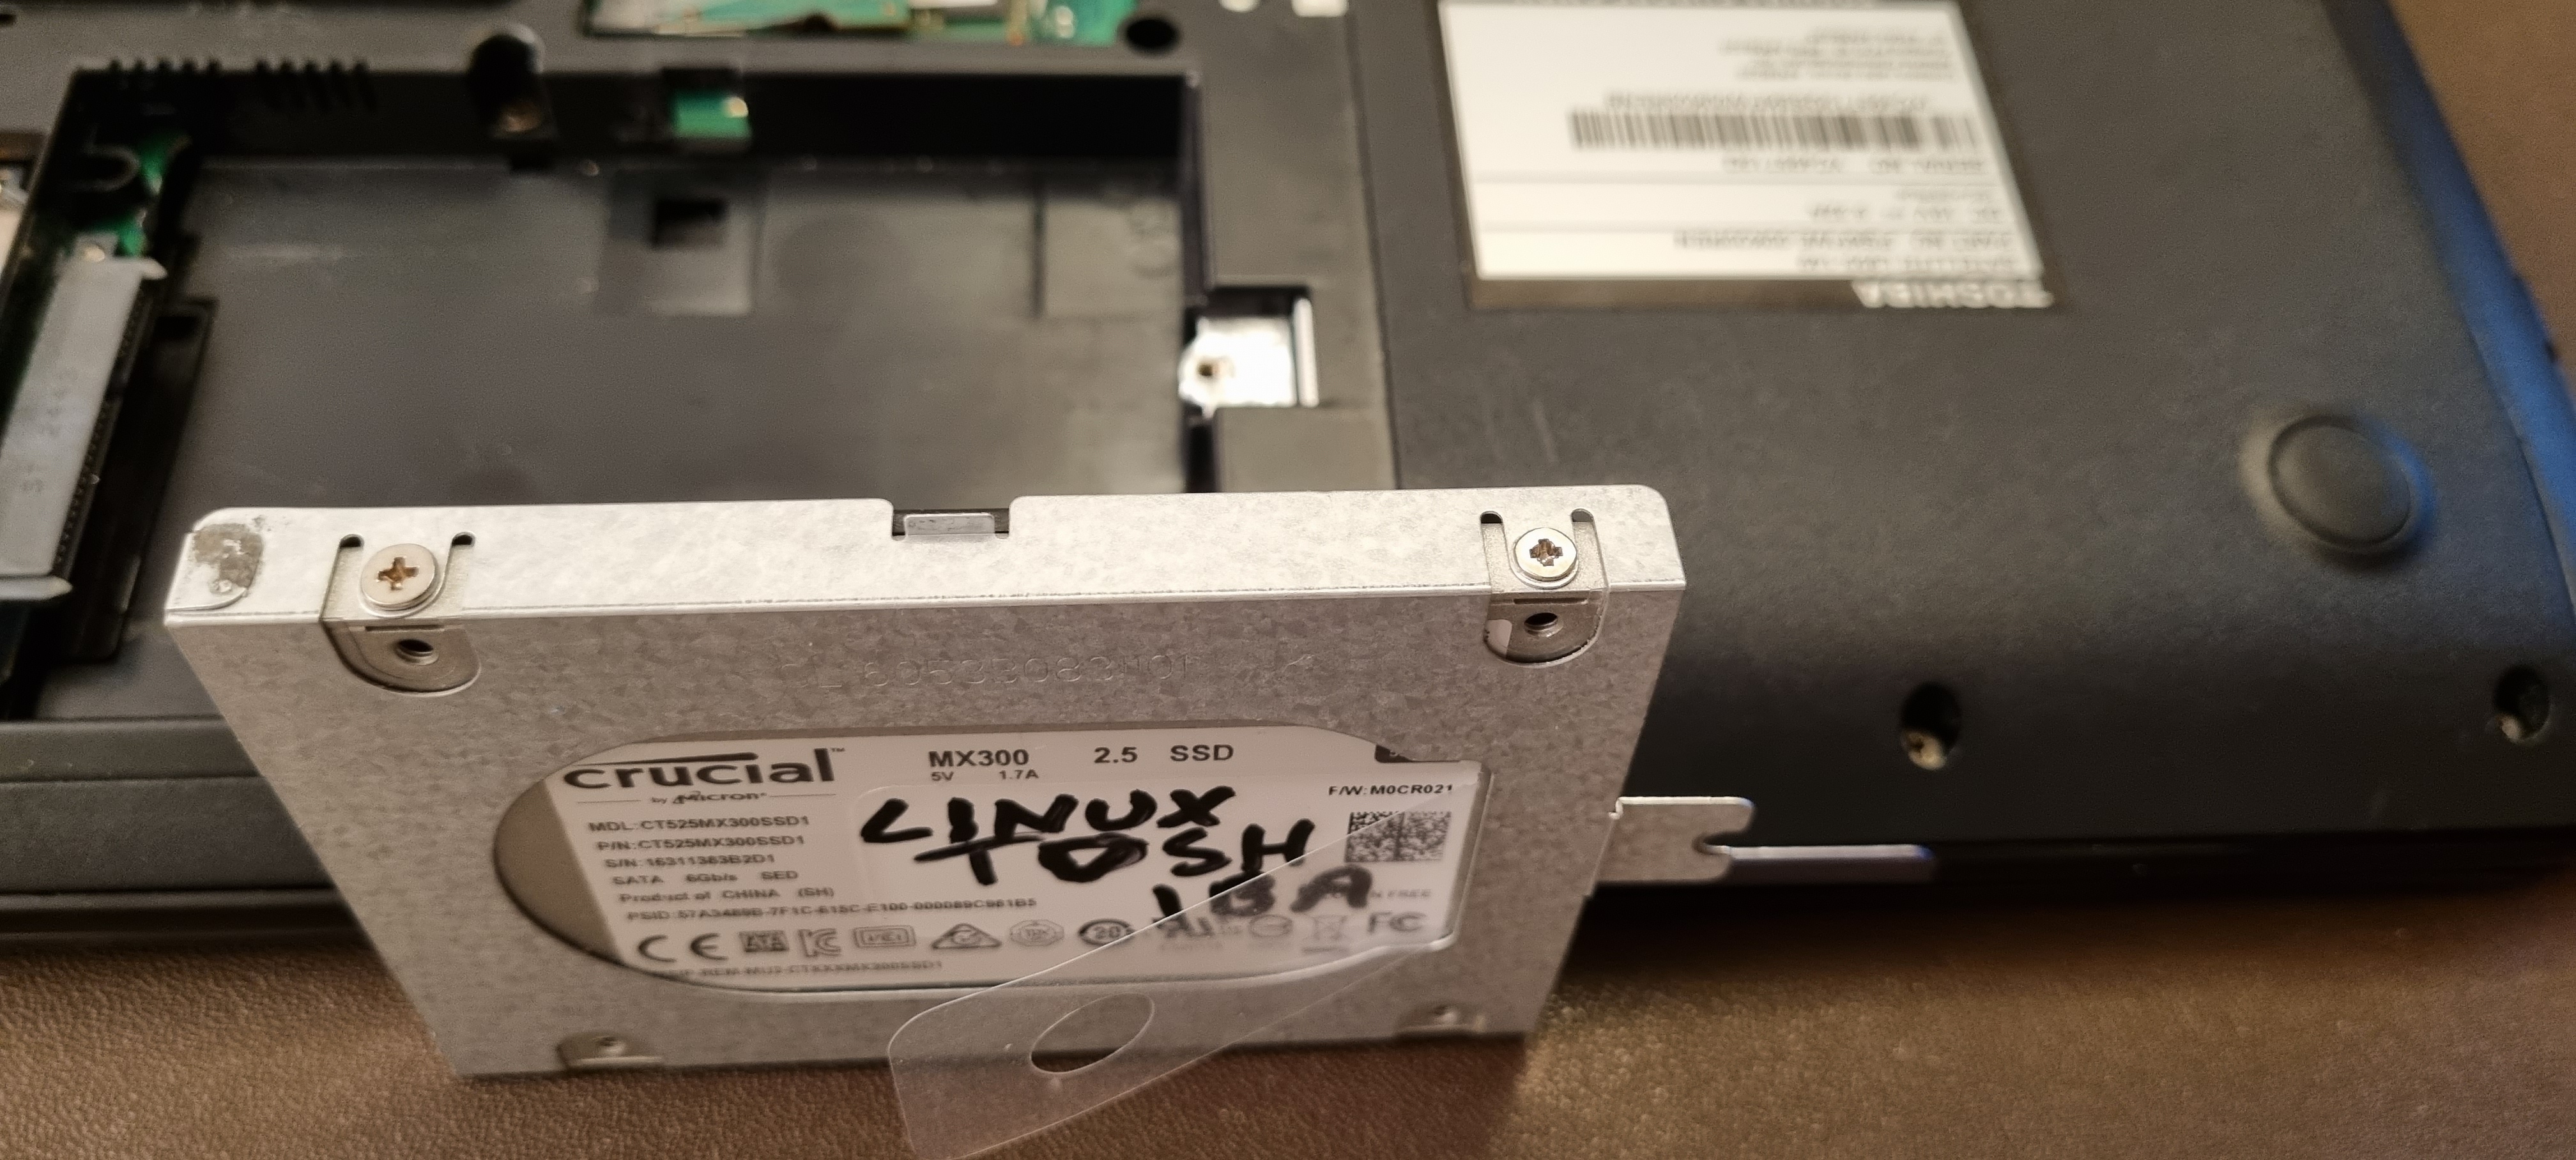
You now need to remove the 4 screws
holding the harddrive in the holder you removed at the start.
Two
of those screws can be seen in the picture below. Make sure you know
which way round it is fitted,
ready for when you fit the new
drive.
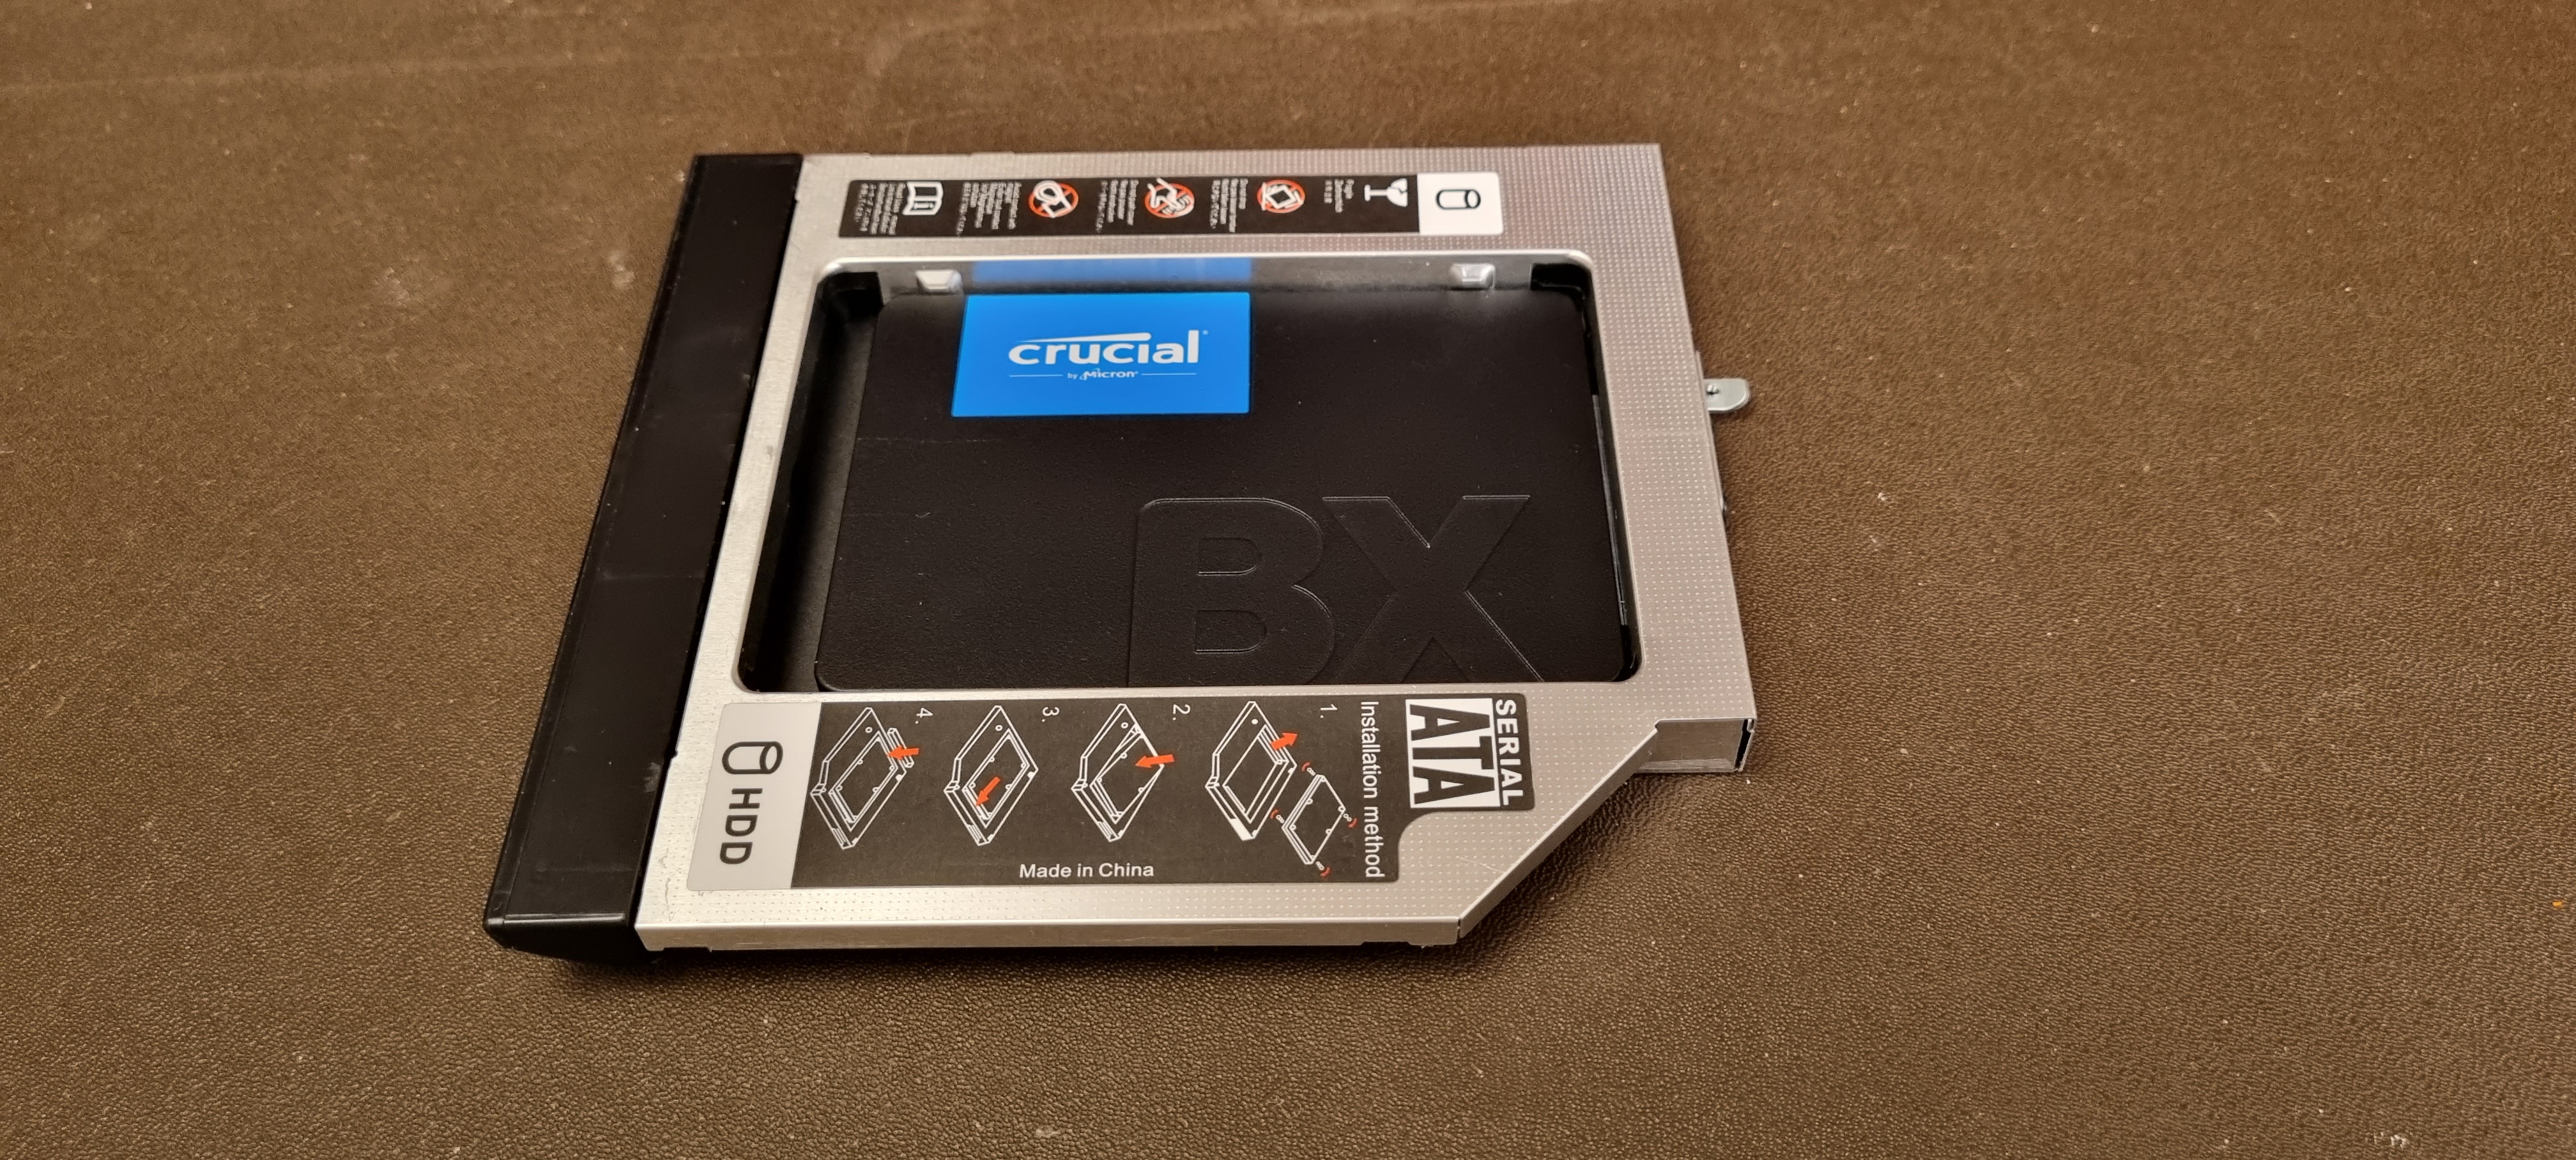
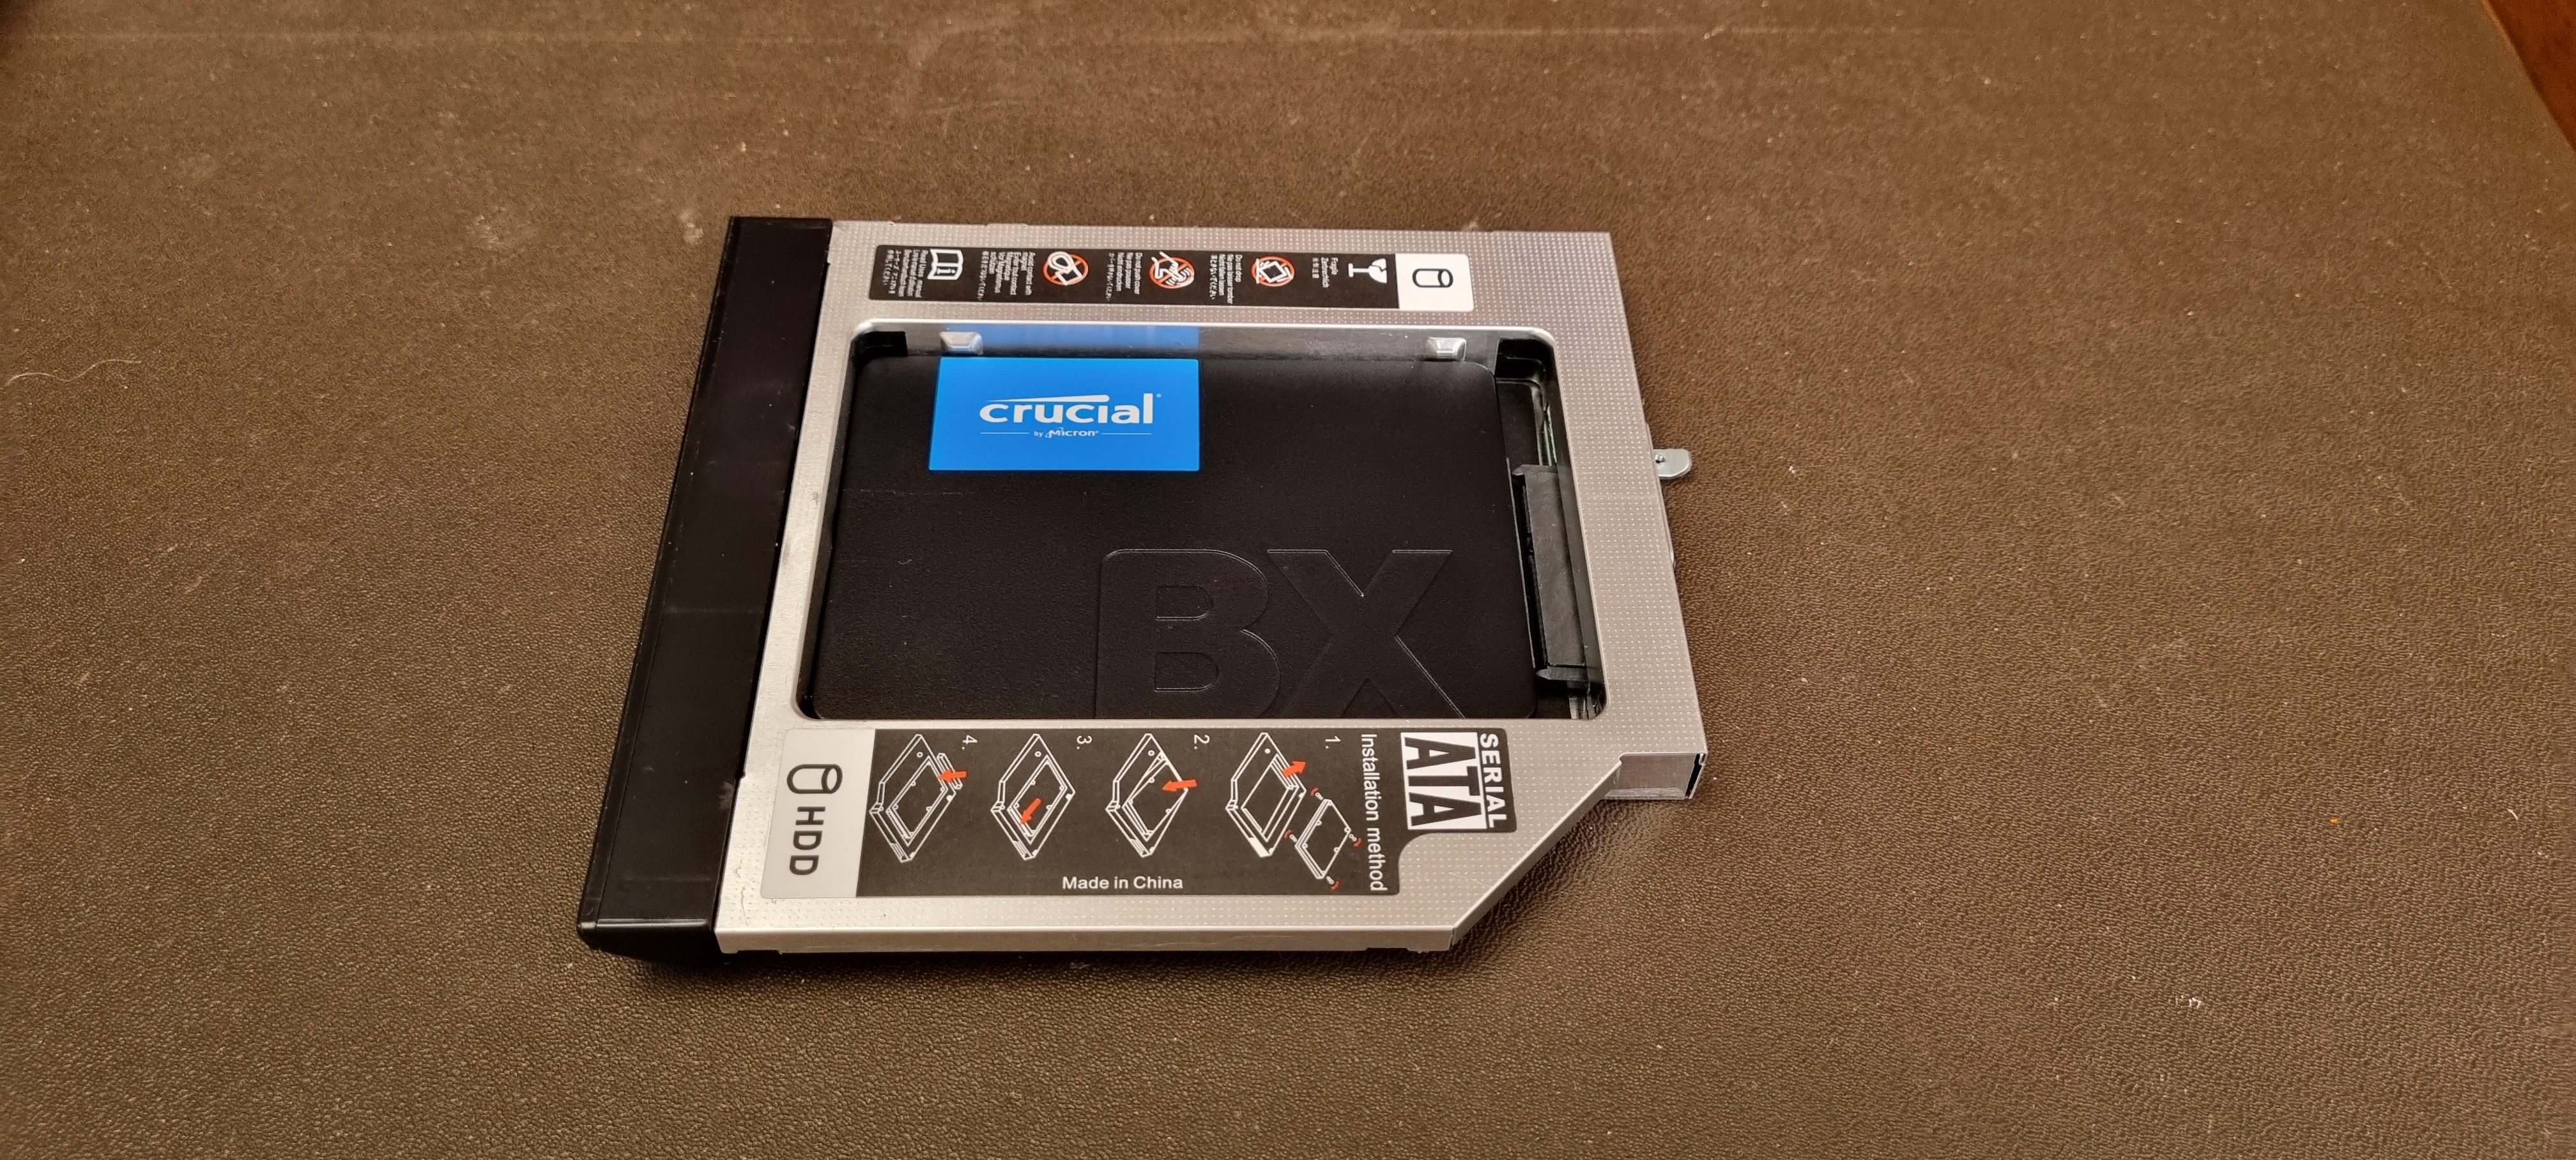
Now you need to fit the new
harddrive shown below, which you will find in the box
that had
the DVD drive in it. Some of the screws are not easy to put in
straight (one in particular)
because the holder and the drive
don;t exactly match each other.
It can be done ok – you just
have to insist on the screw going in straight.
Once the screws are all in,
just refit the drive in the computer, by holding it with the clear
plastic
in your right hand, putting it in place and sliding it
to the left so it fits in the connector.
Refit the screw on the
right hand side, then refit the cover you removed at the start.
Turn
the computer over and press the button top right of the keyboard to
switch it on. As long as
the computer was booting into Windows
before you did this, it will boot into the clean
installation of
Windows 10 now.
If it was booting into Linux before, then you
need to read the instructions on the piece of paper
in the
larger laptop bag to make a change to a BIOS setting. It should then
boot into the clean
installation of Windows 10.