
Then remove the large panel which is secured with one screw.
First turn the laptop upside down with the non-hinge side towards you.
Then remove the
large panel which is secured with one screw.
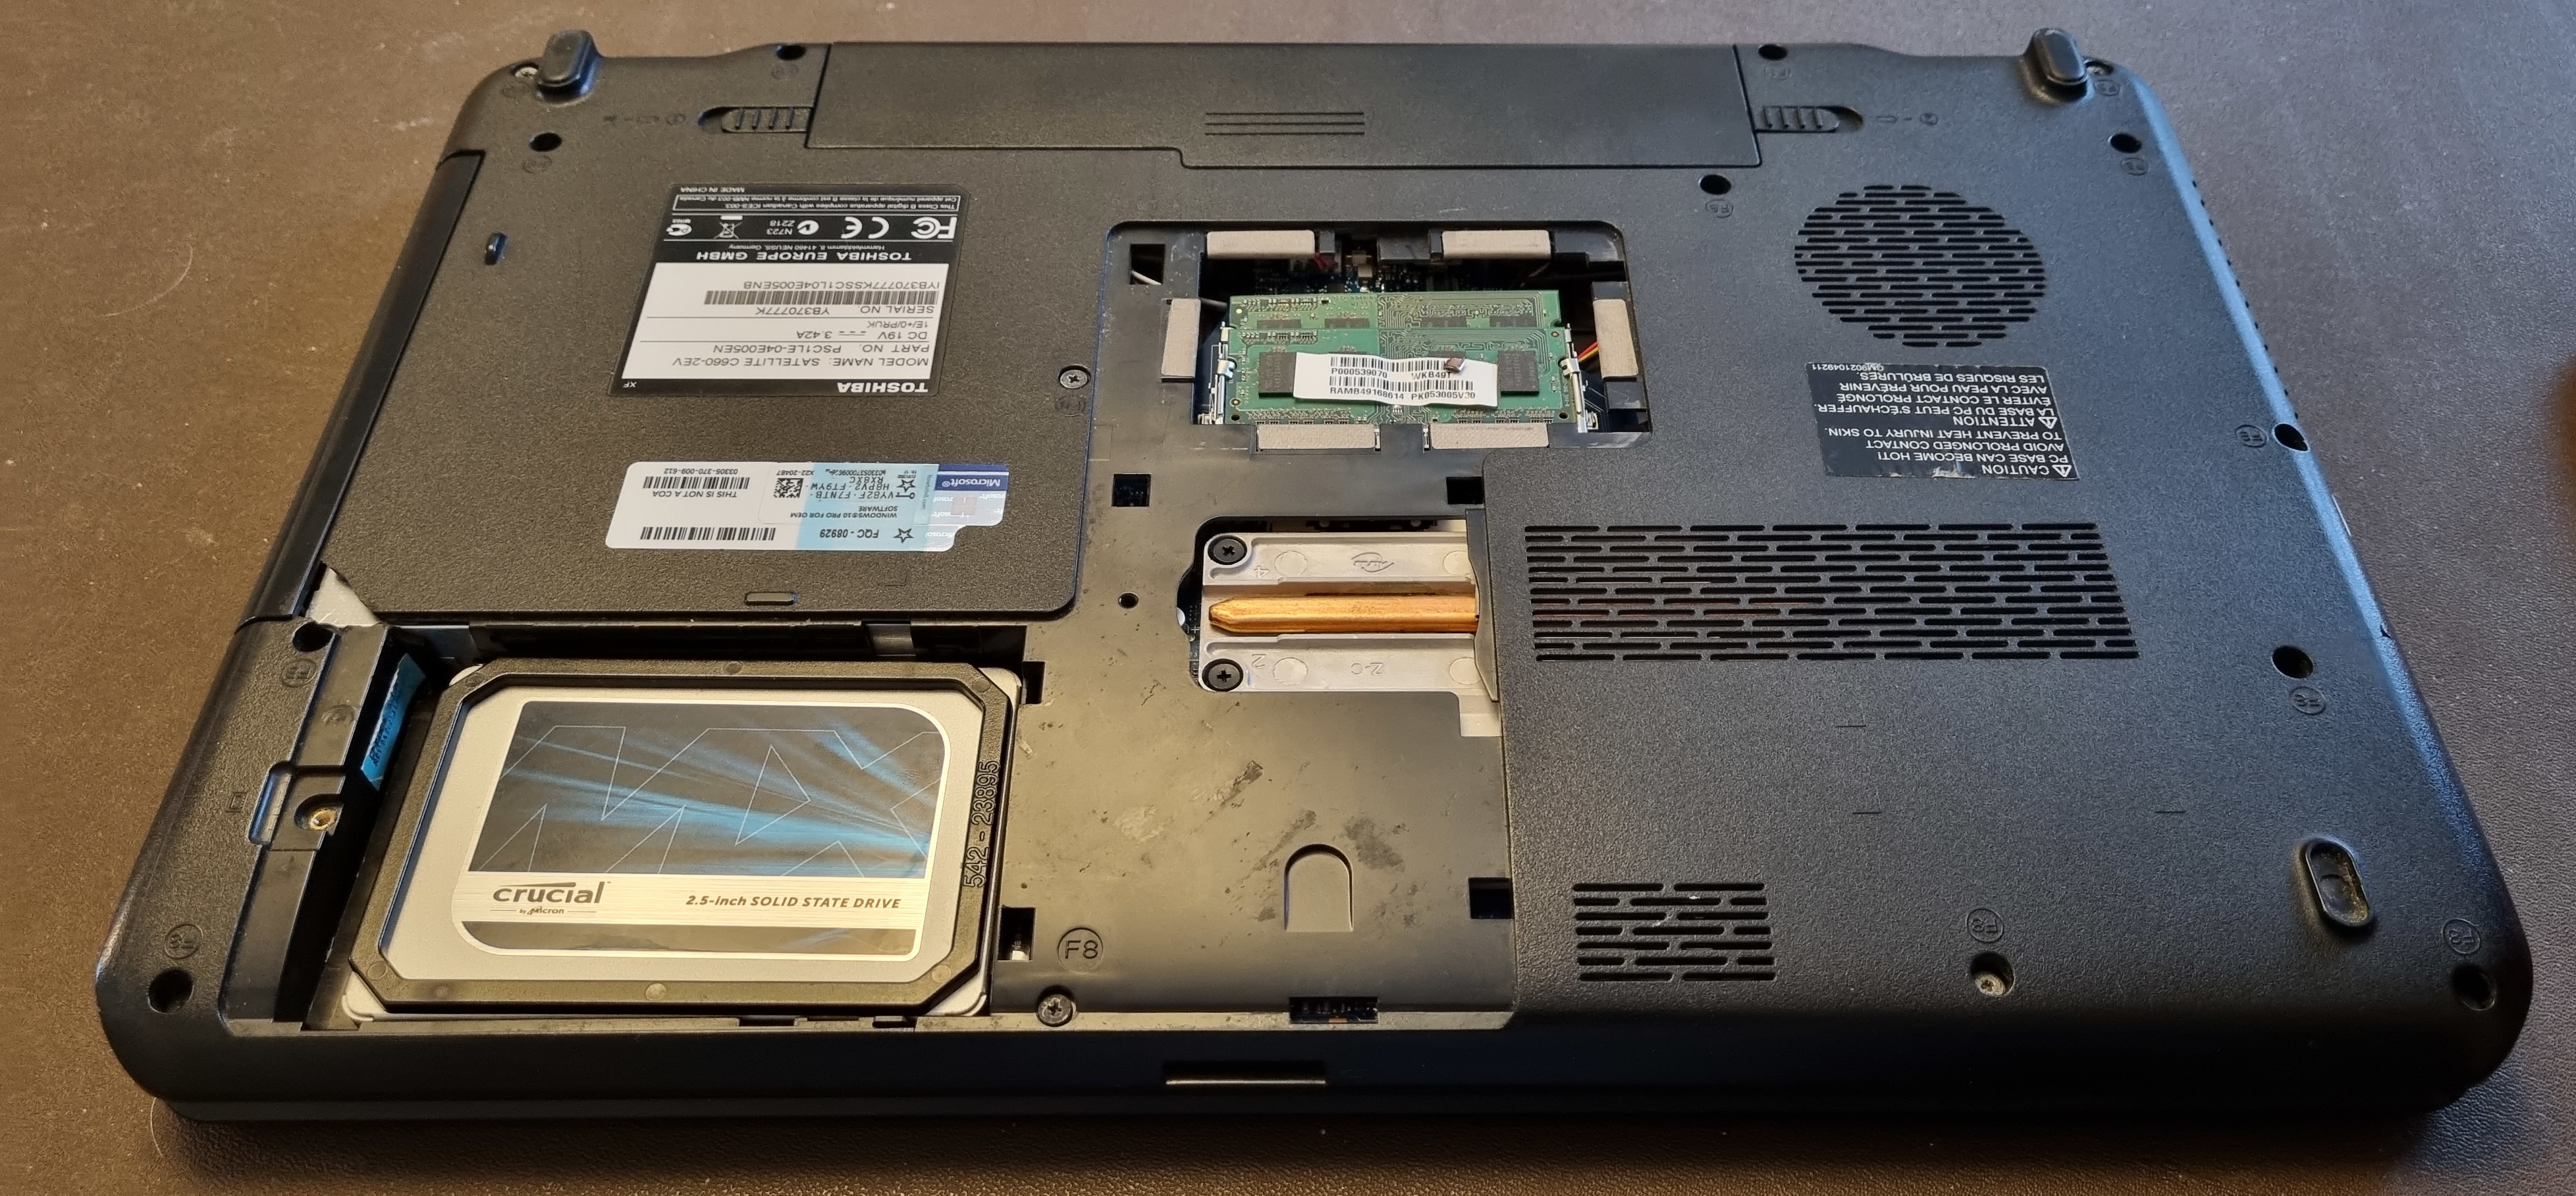
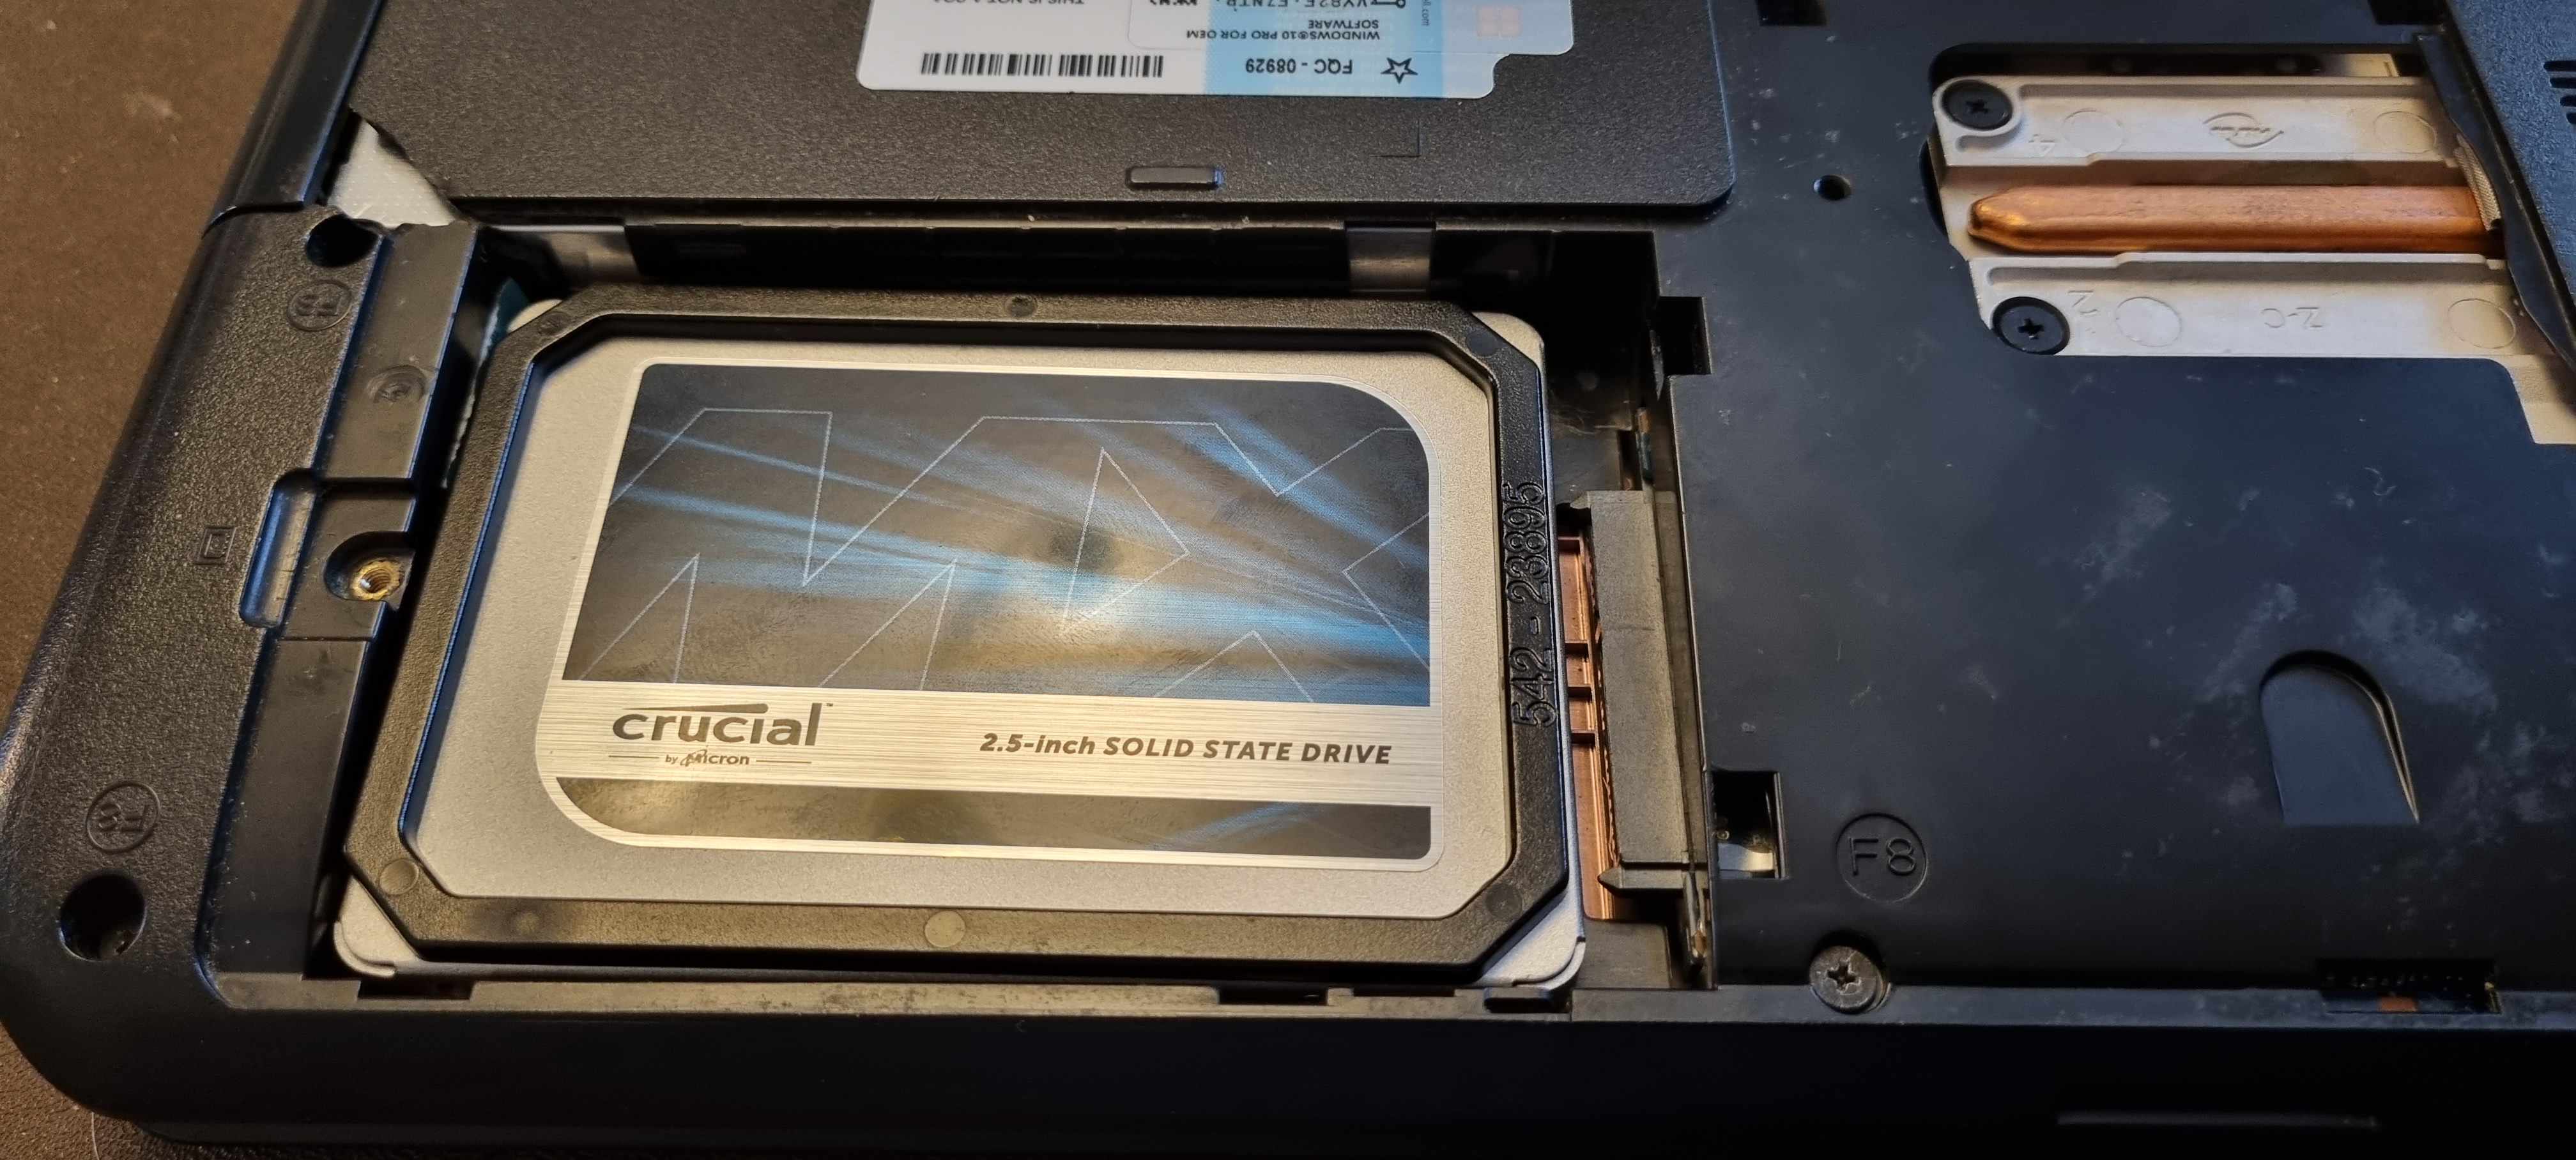
Next slide the
harddrive right in front of you to the left, so that it is clear
of
the connector block on the right hand side, then lift out the
drive.
This drive should have a label on it (not shown in the
pictures) saying to destroy it,
so please do that, as you won’t
be needing it at all.
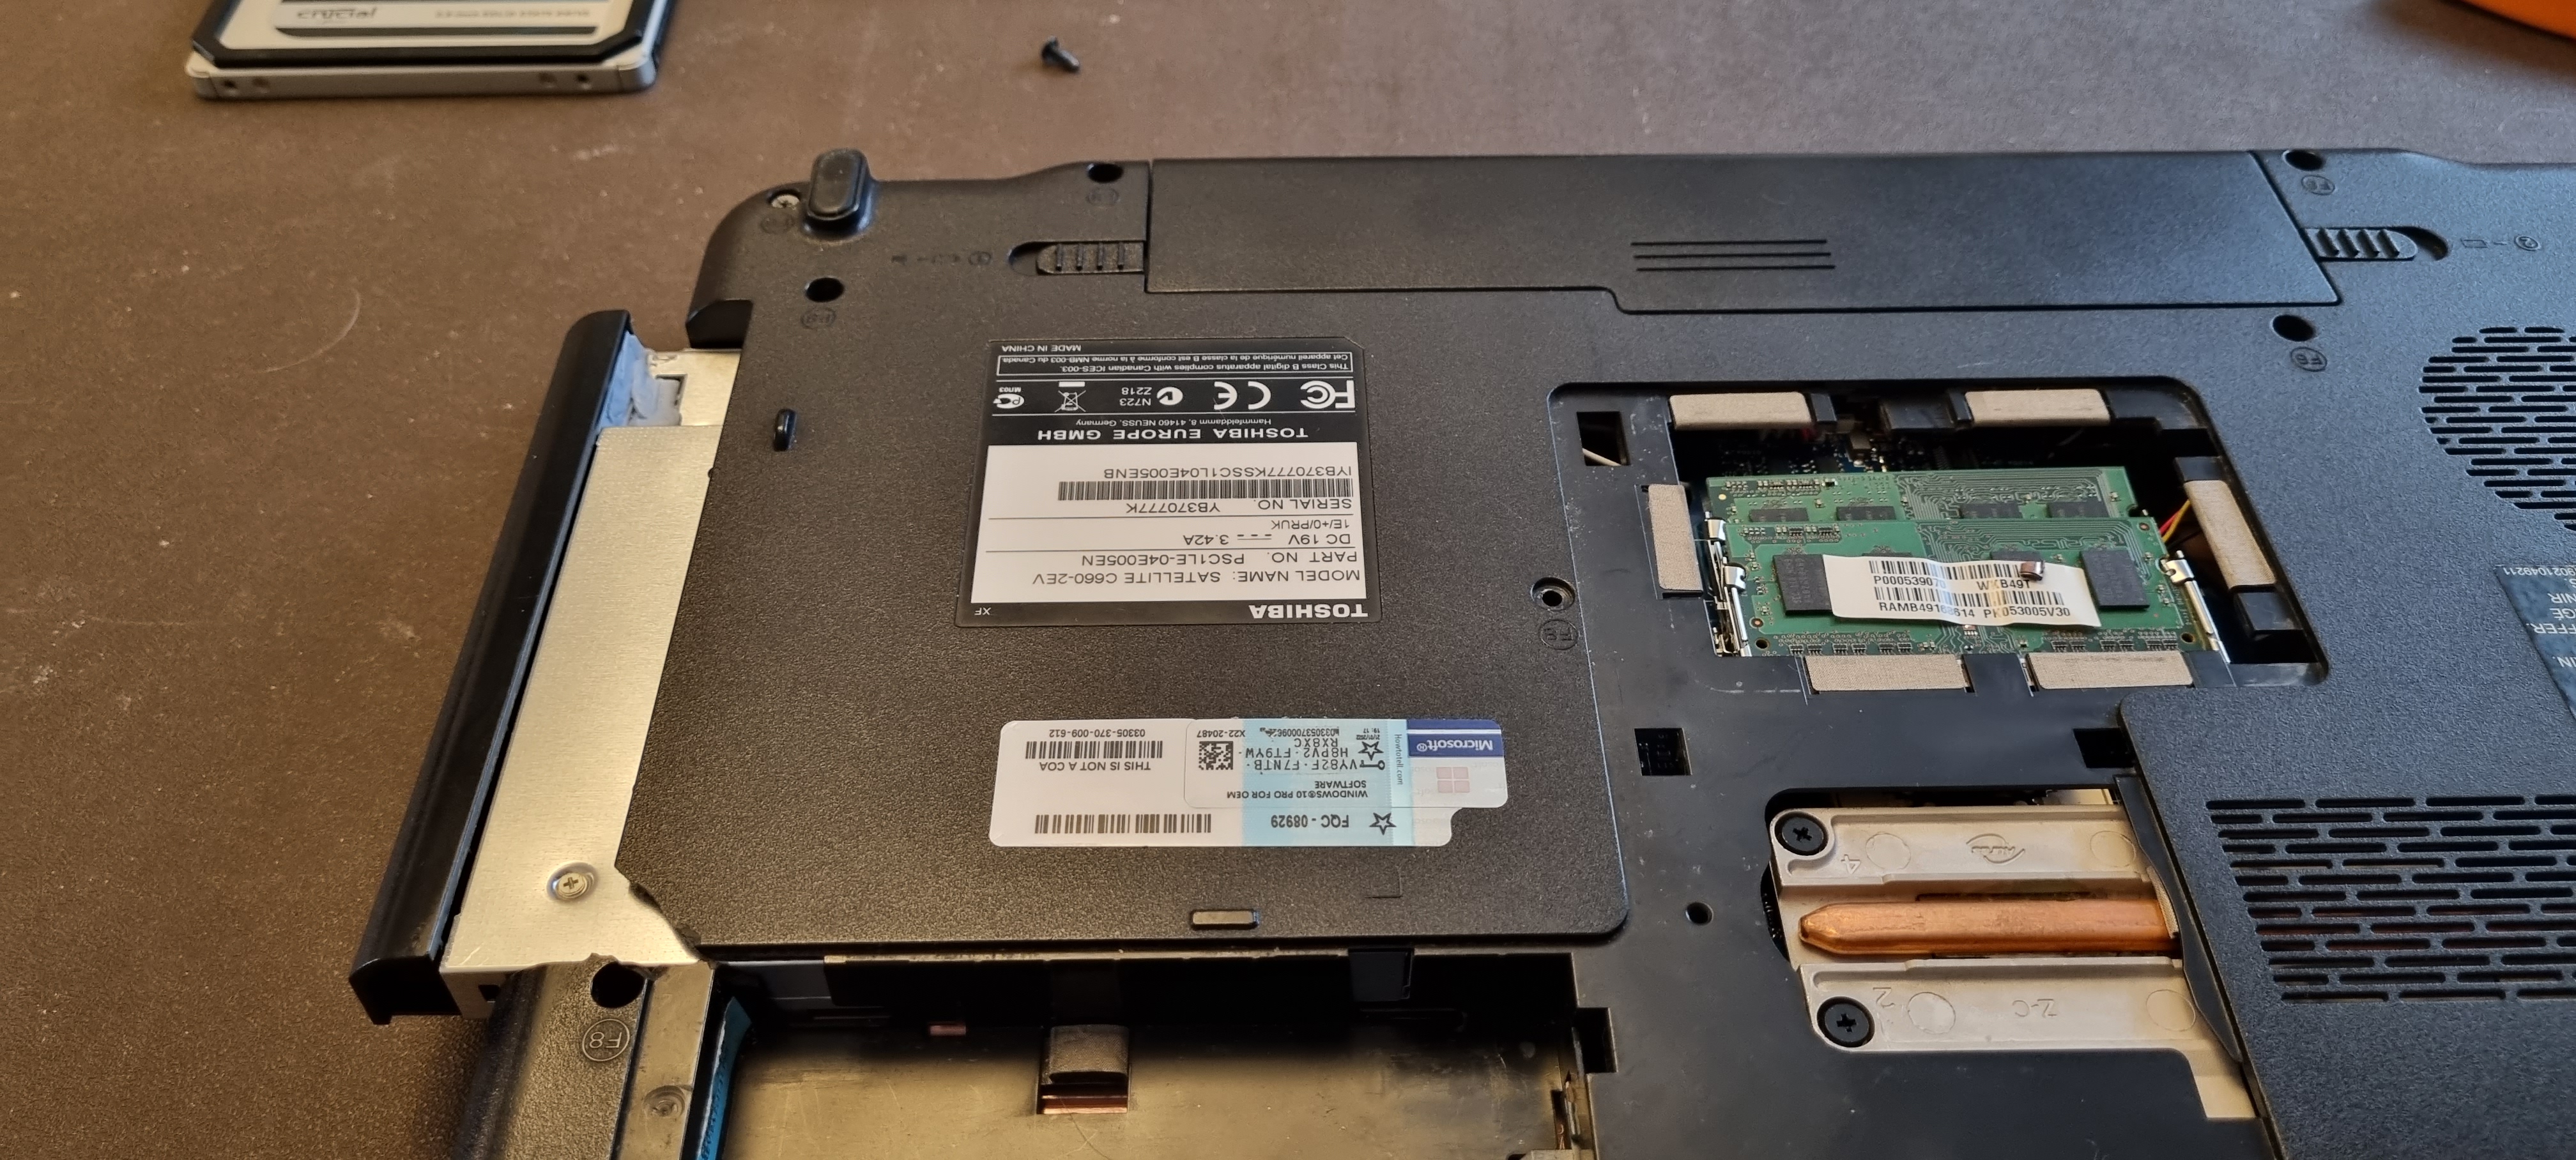
Now remove the black screw just above the drive as shown below.
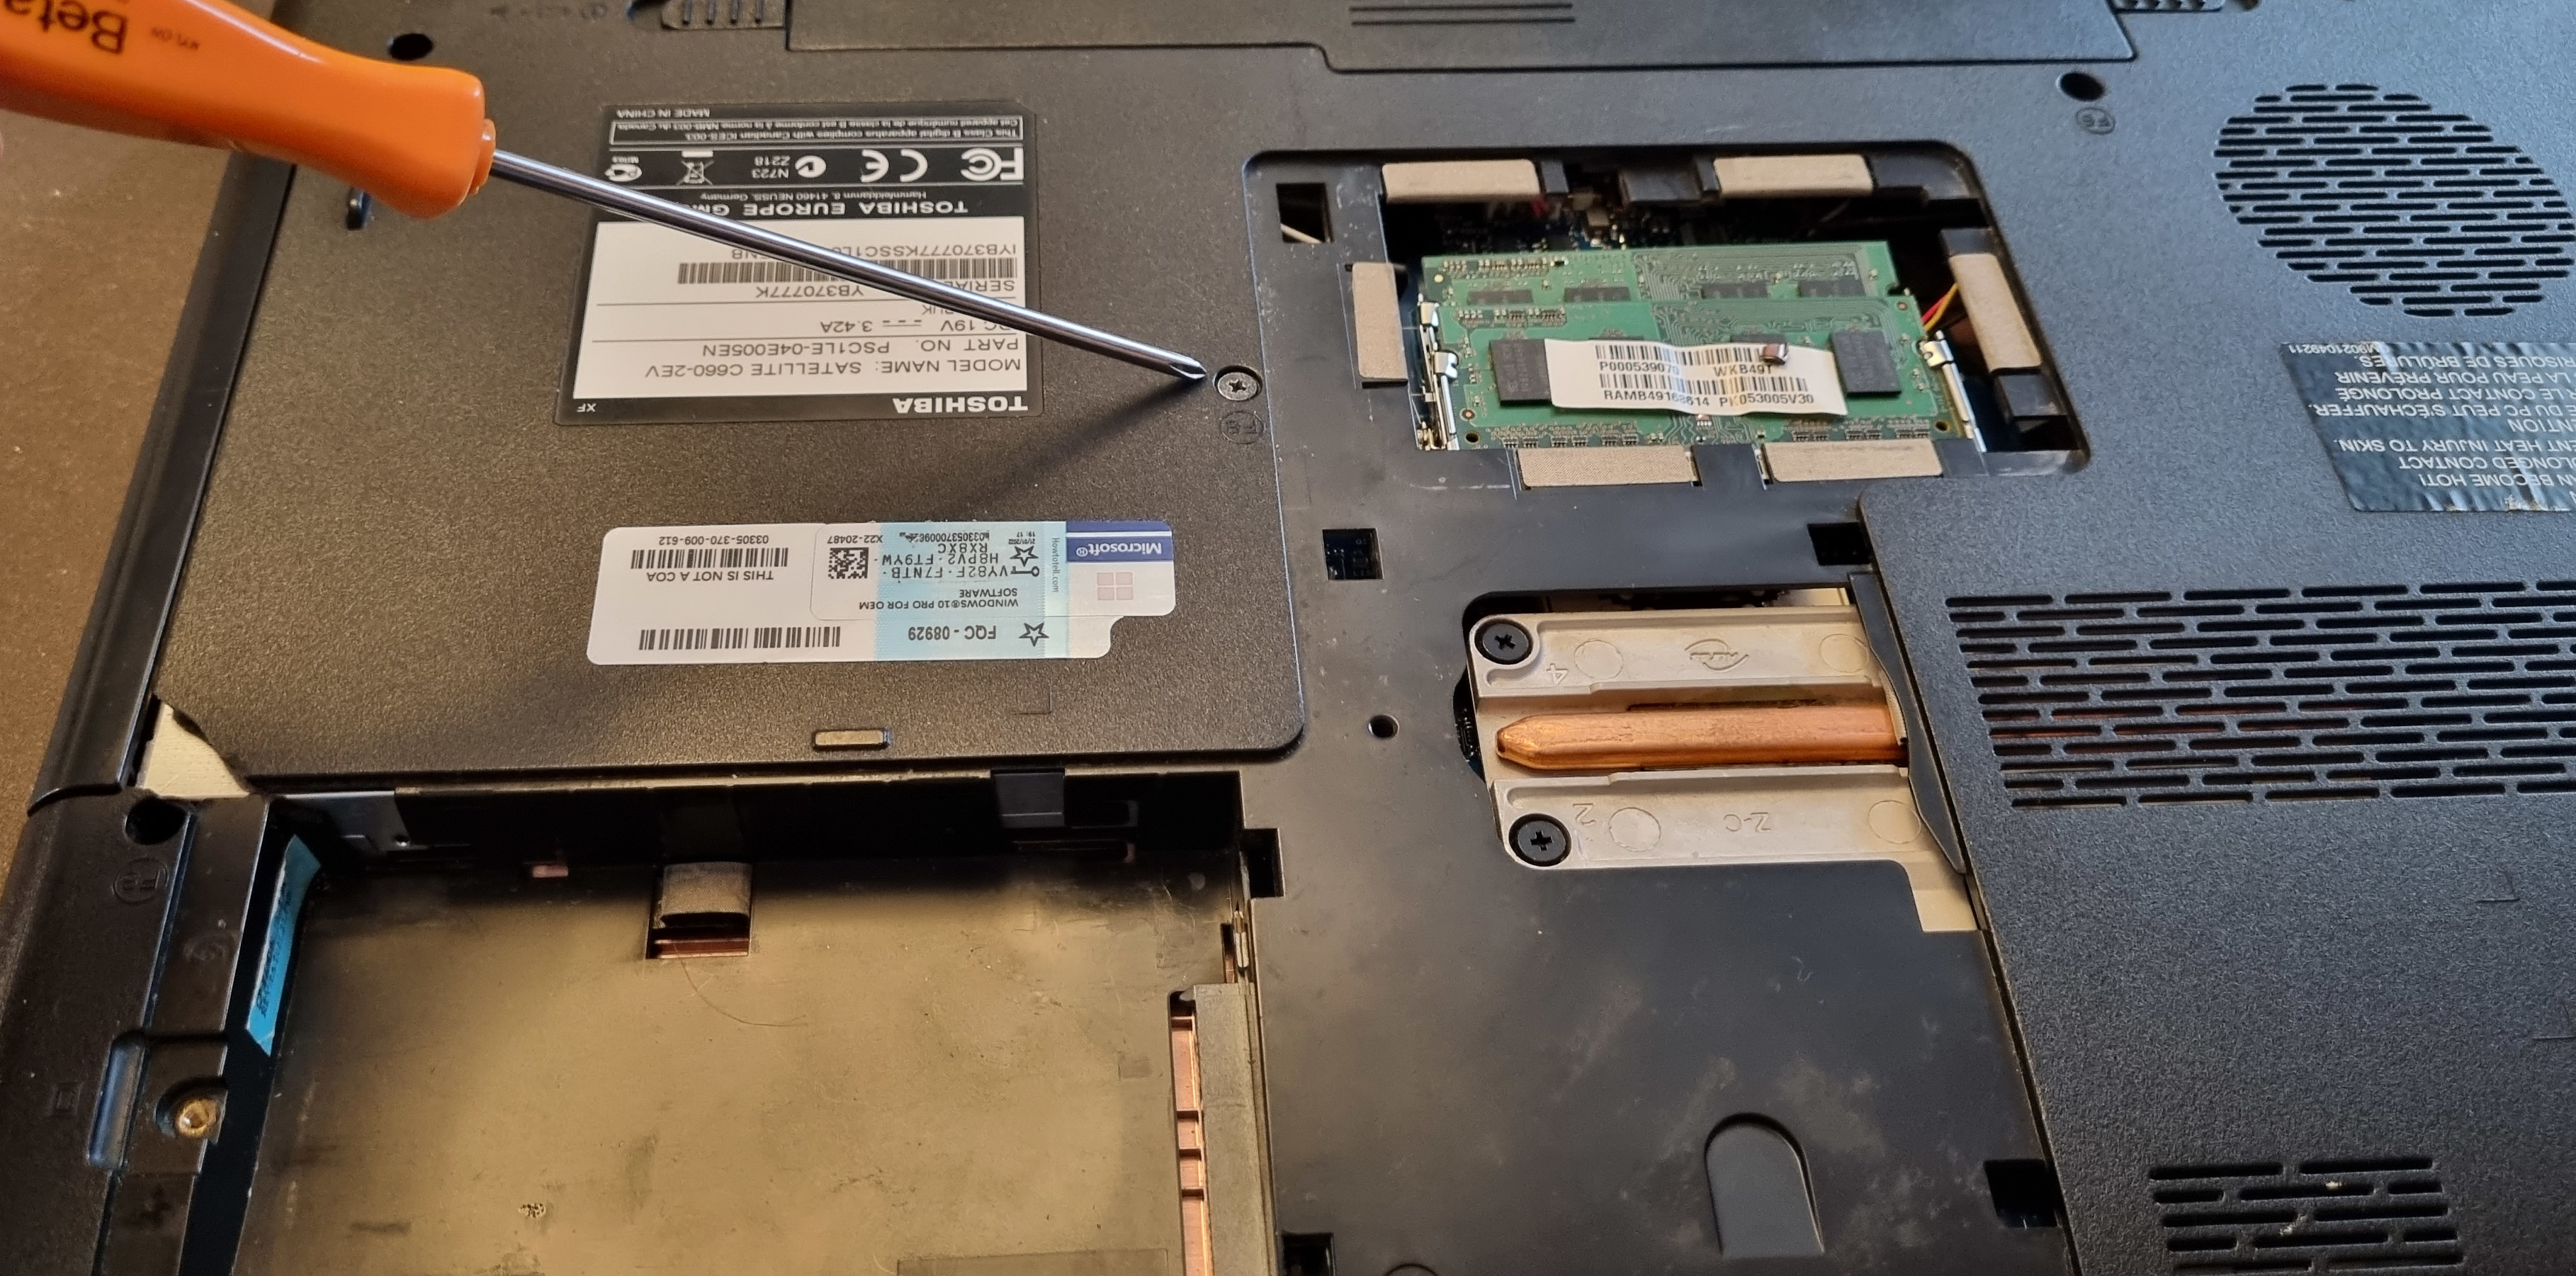
You can now easily
pull the drive holder
out.
Remove the 4 screws in the slotted holes that are securing the harddrive in the holder.
Then turn the holder over
and remove the drive. You will need to slide it away from the
end
where the connector is, so if you have it the way round that
it is shown in the picture below,
slide it from right to
left.
This is a bit stiff, so you will probably find it easier
to hold the drive from above and below,
using the circular hole
shown in the picture above to help with this.
The next picture below show the position after the drive has been pulled clear of the connectors.
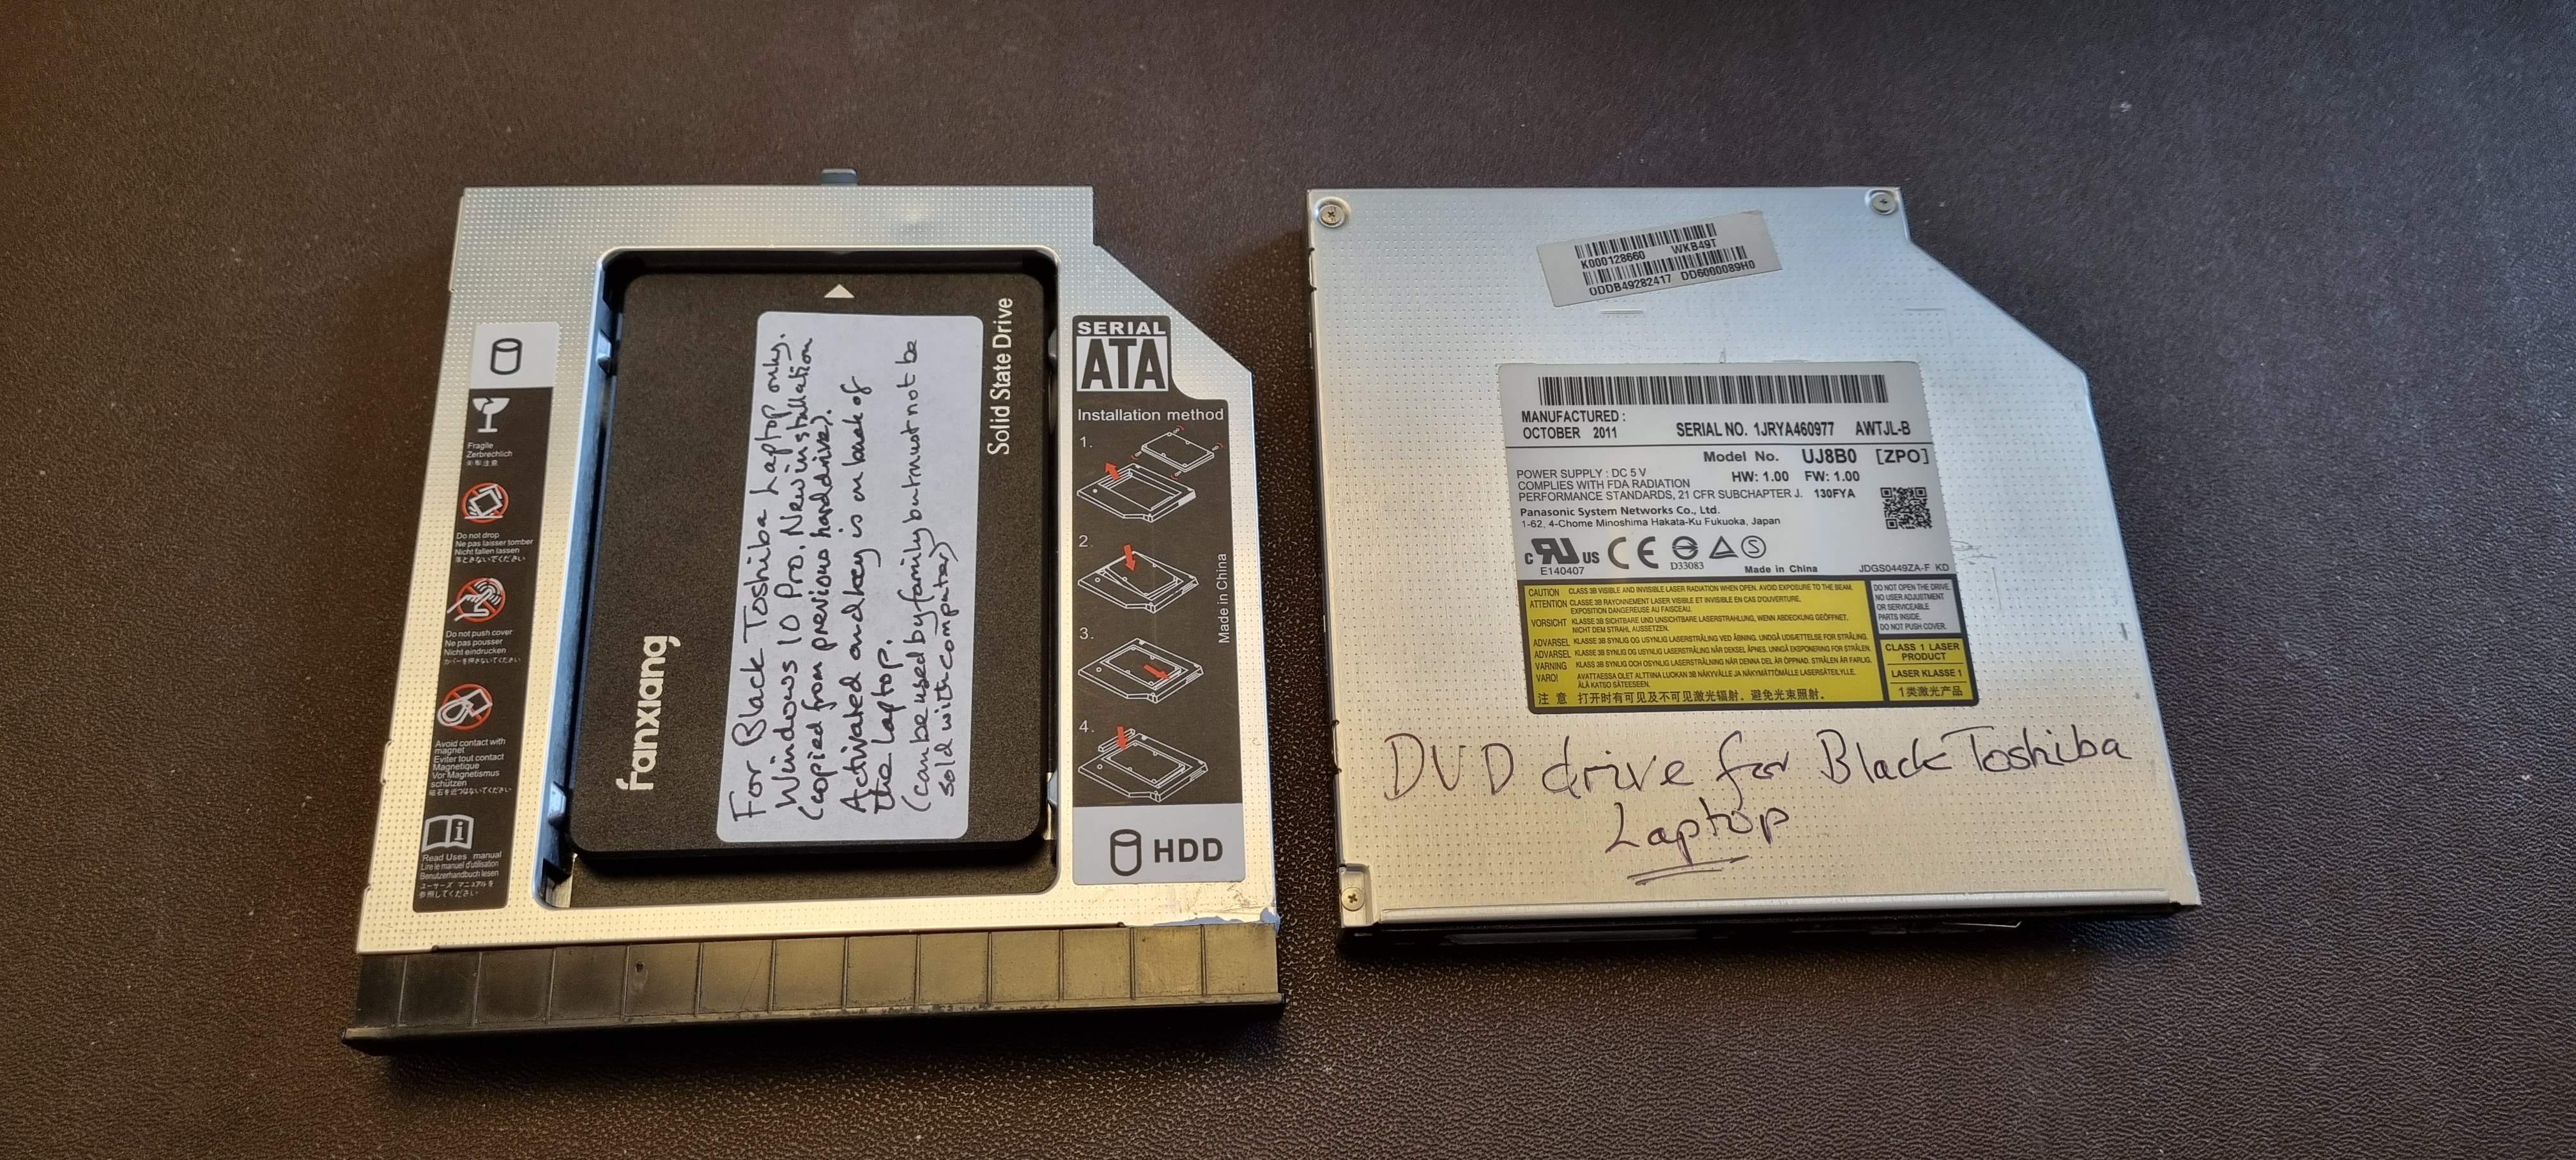
Once the drive has
been removed, you can fit it in place of the main harddrive
(SSD)
that you removed at the start, as this drive is fine for
use with family.
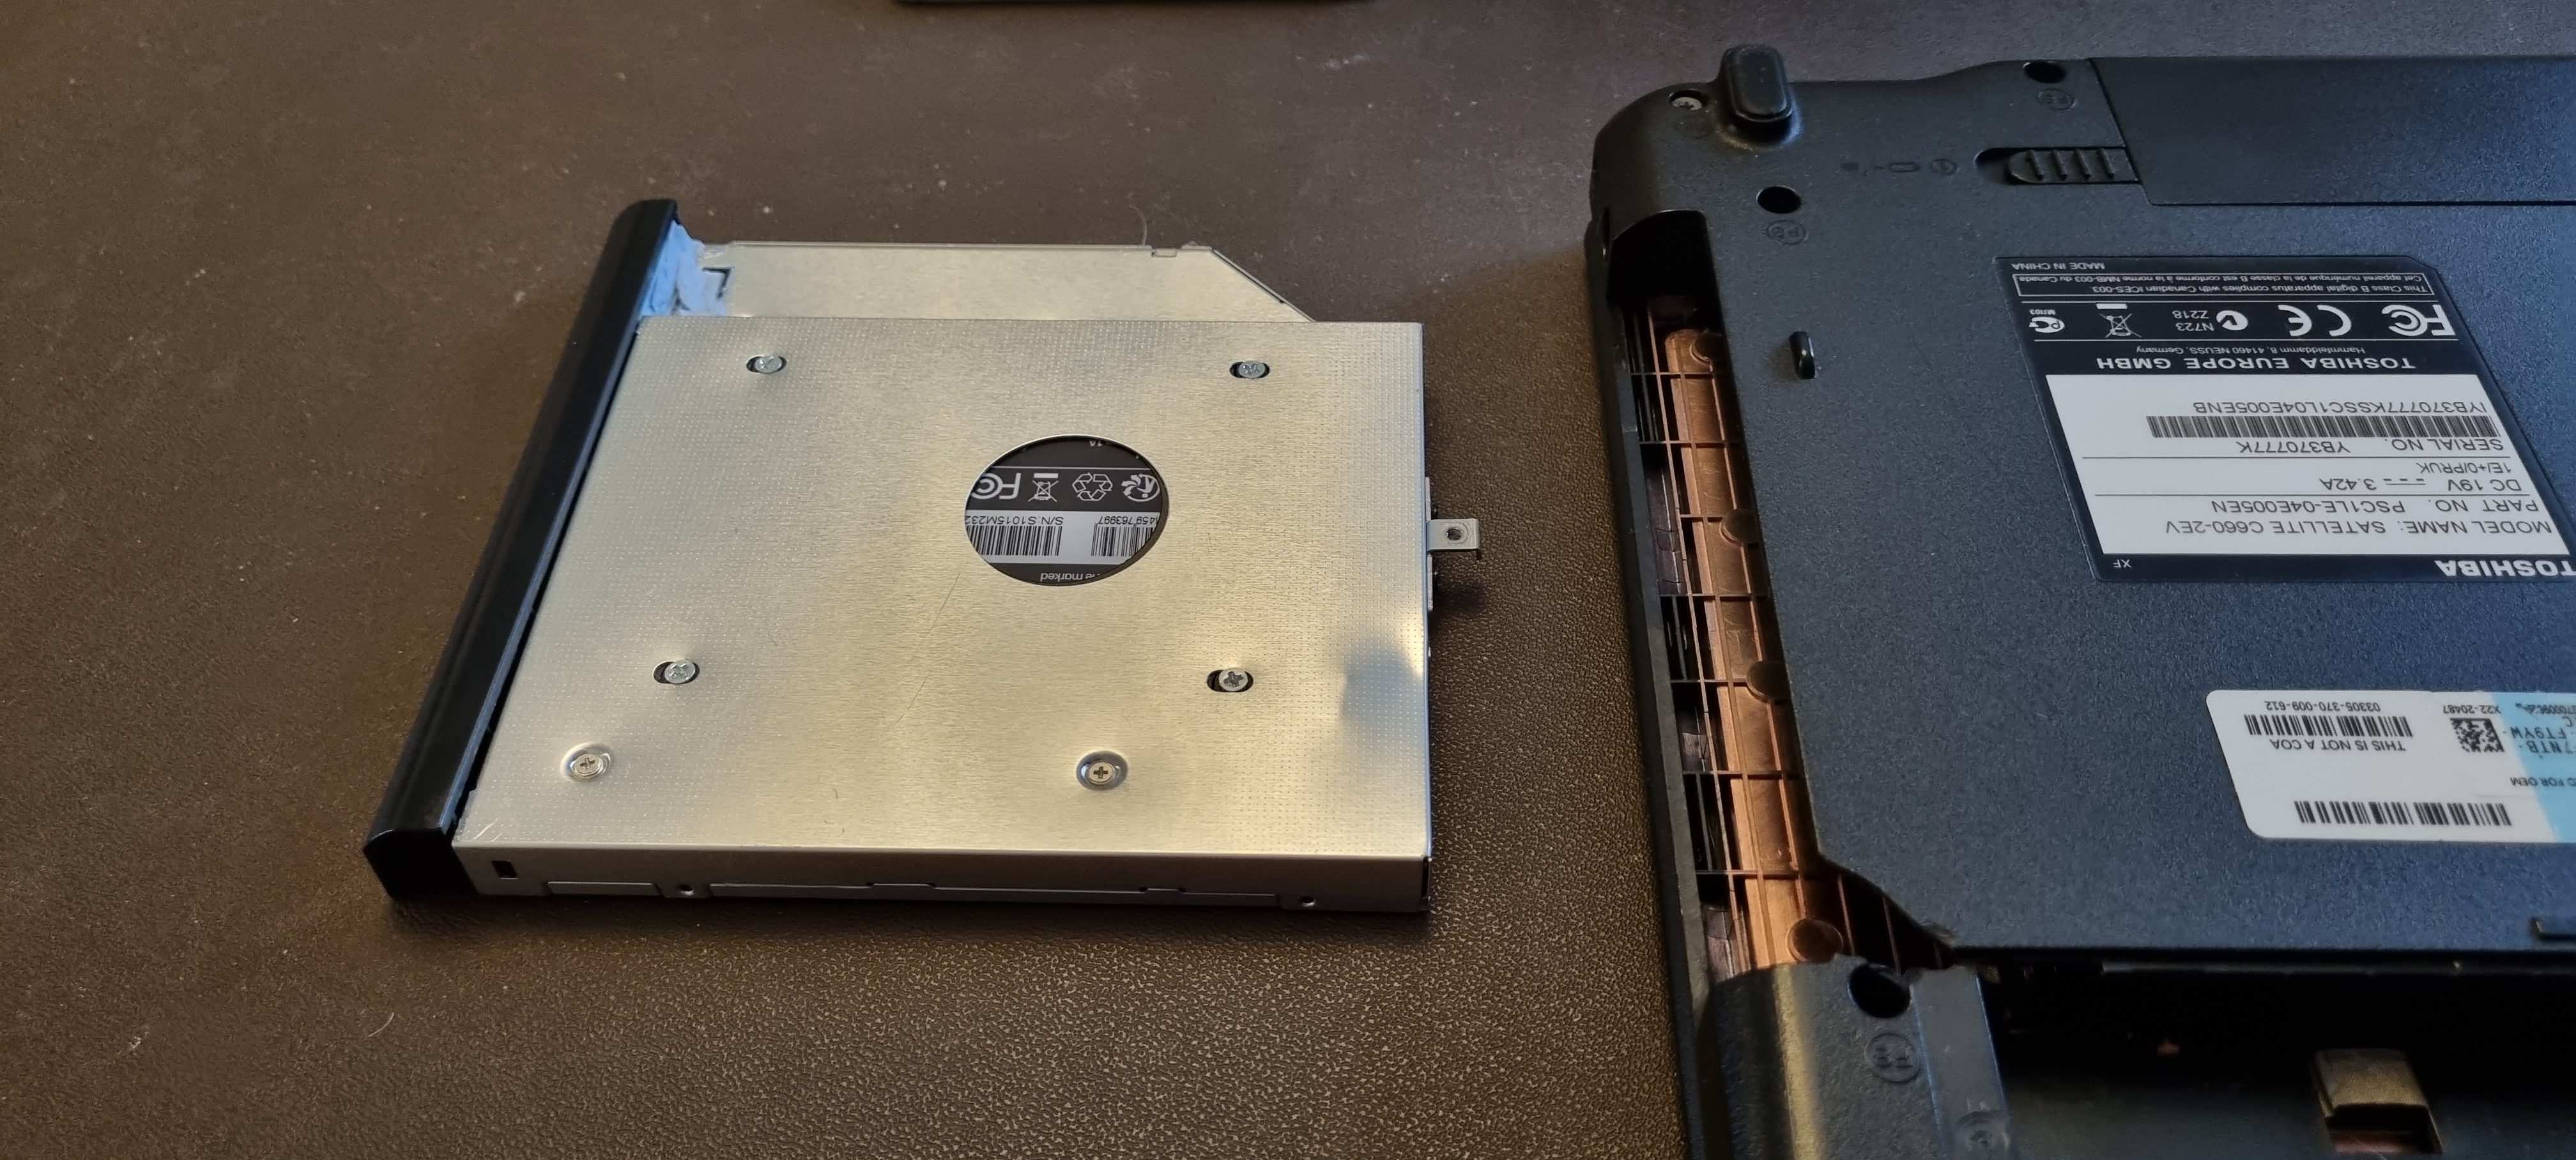
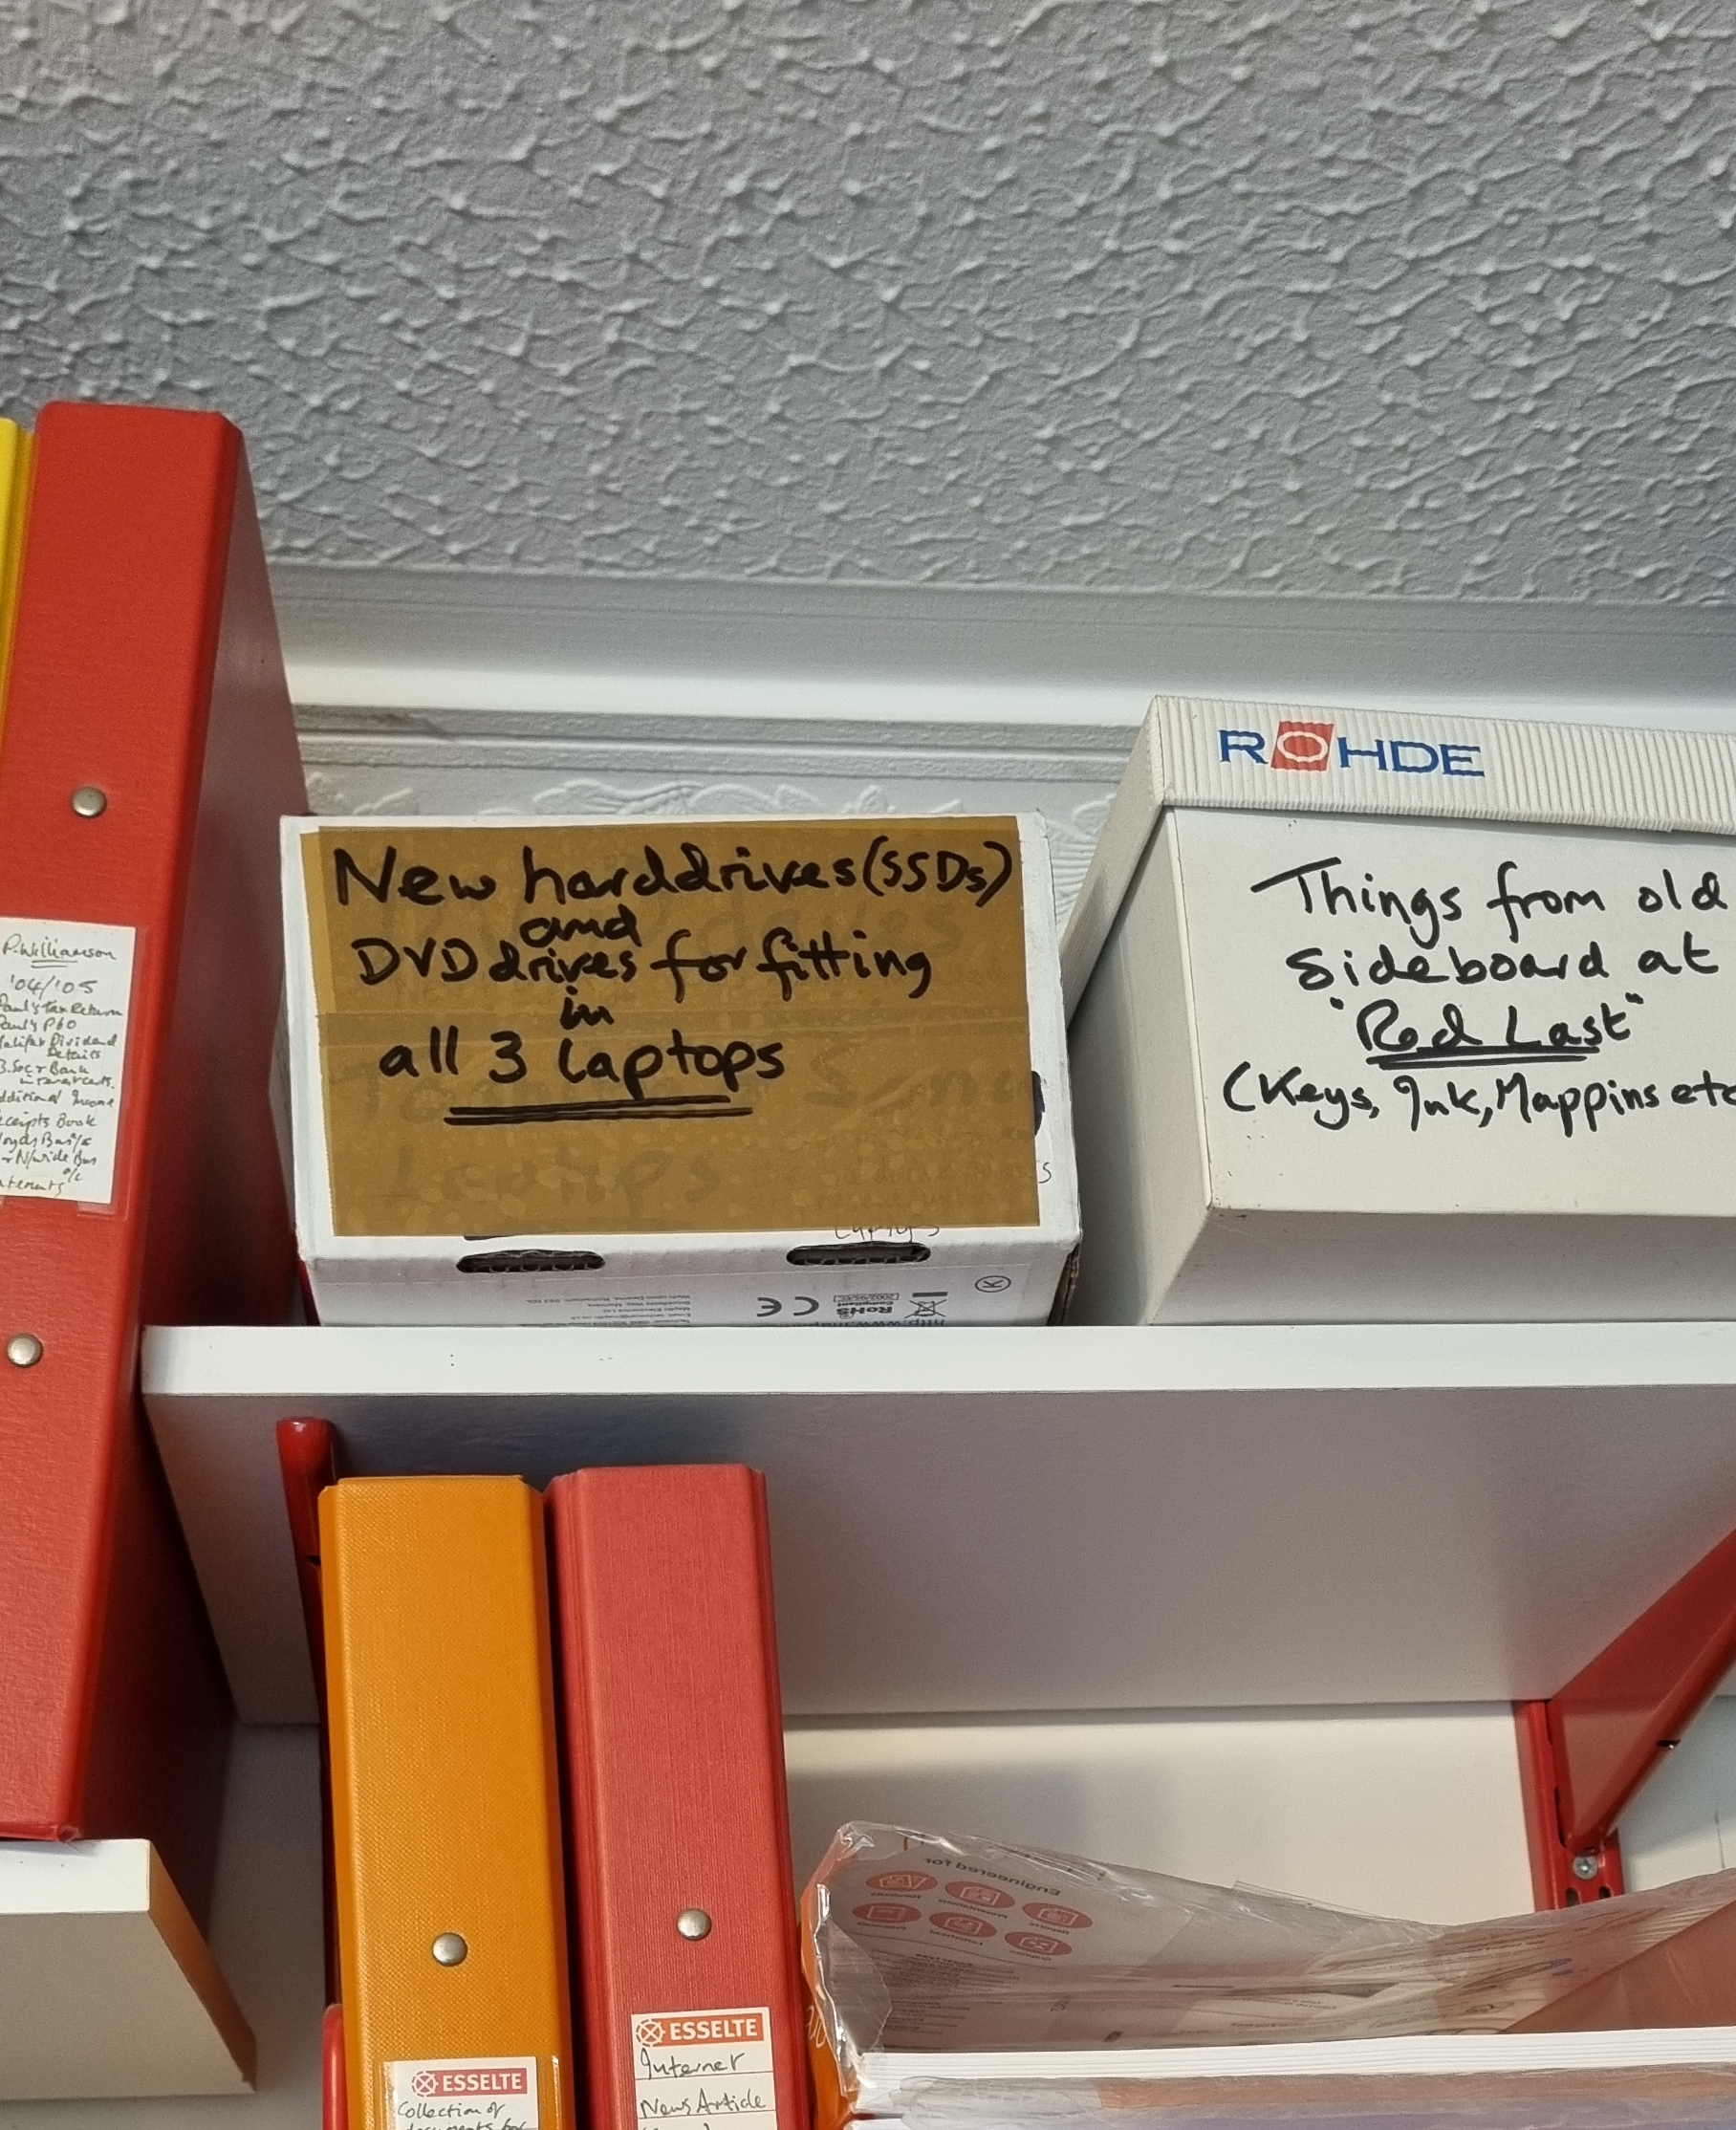
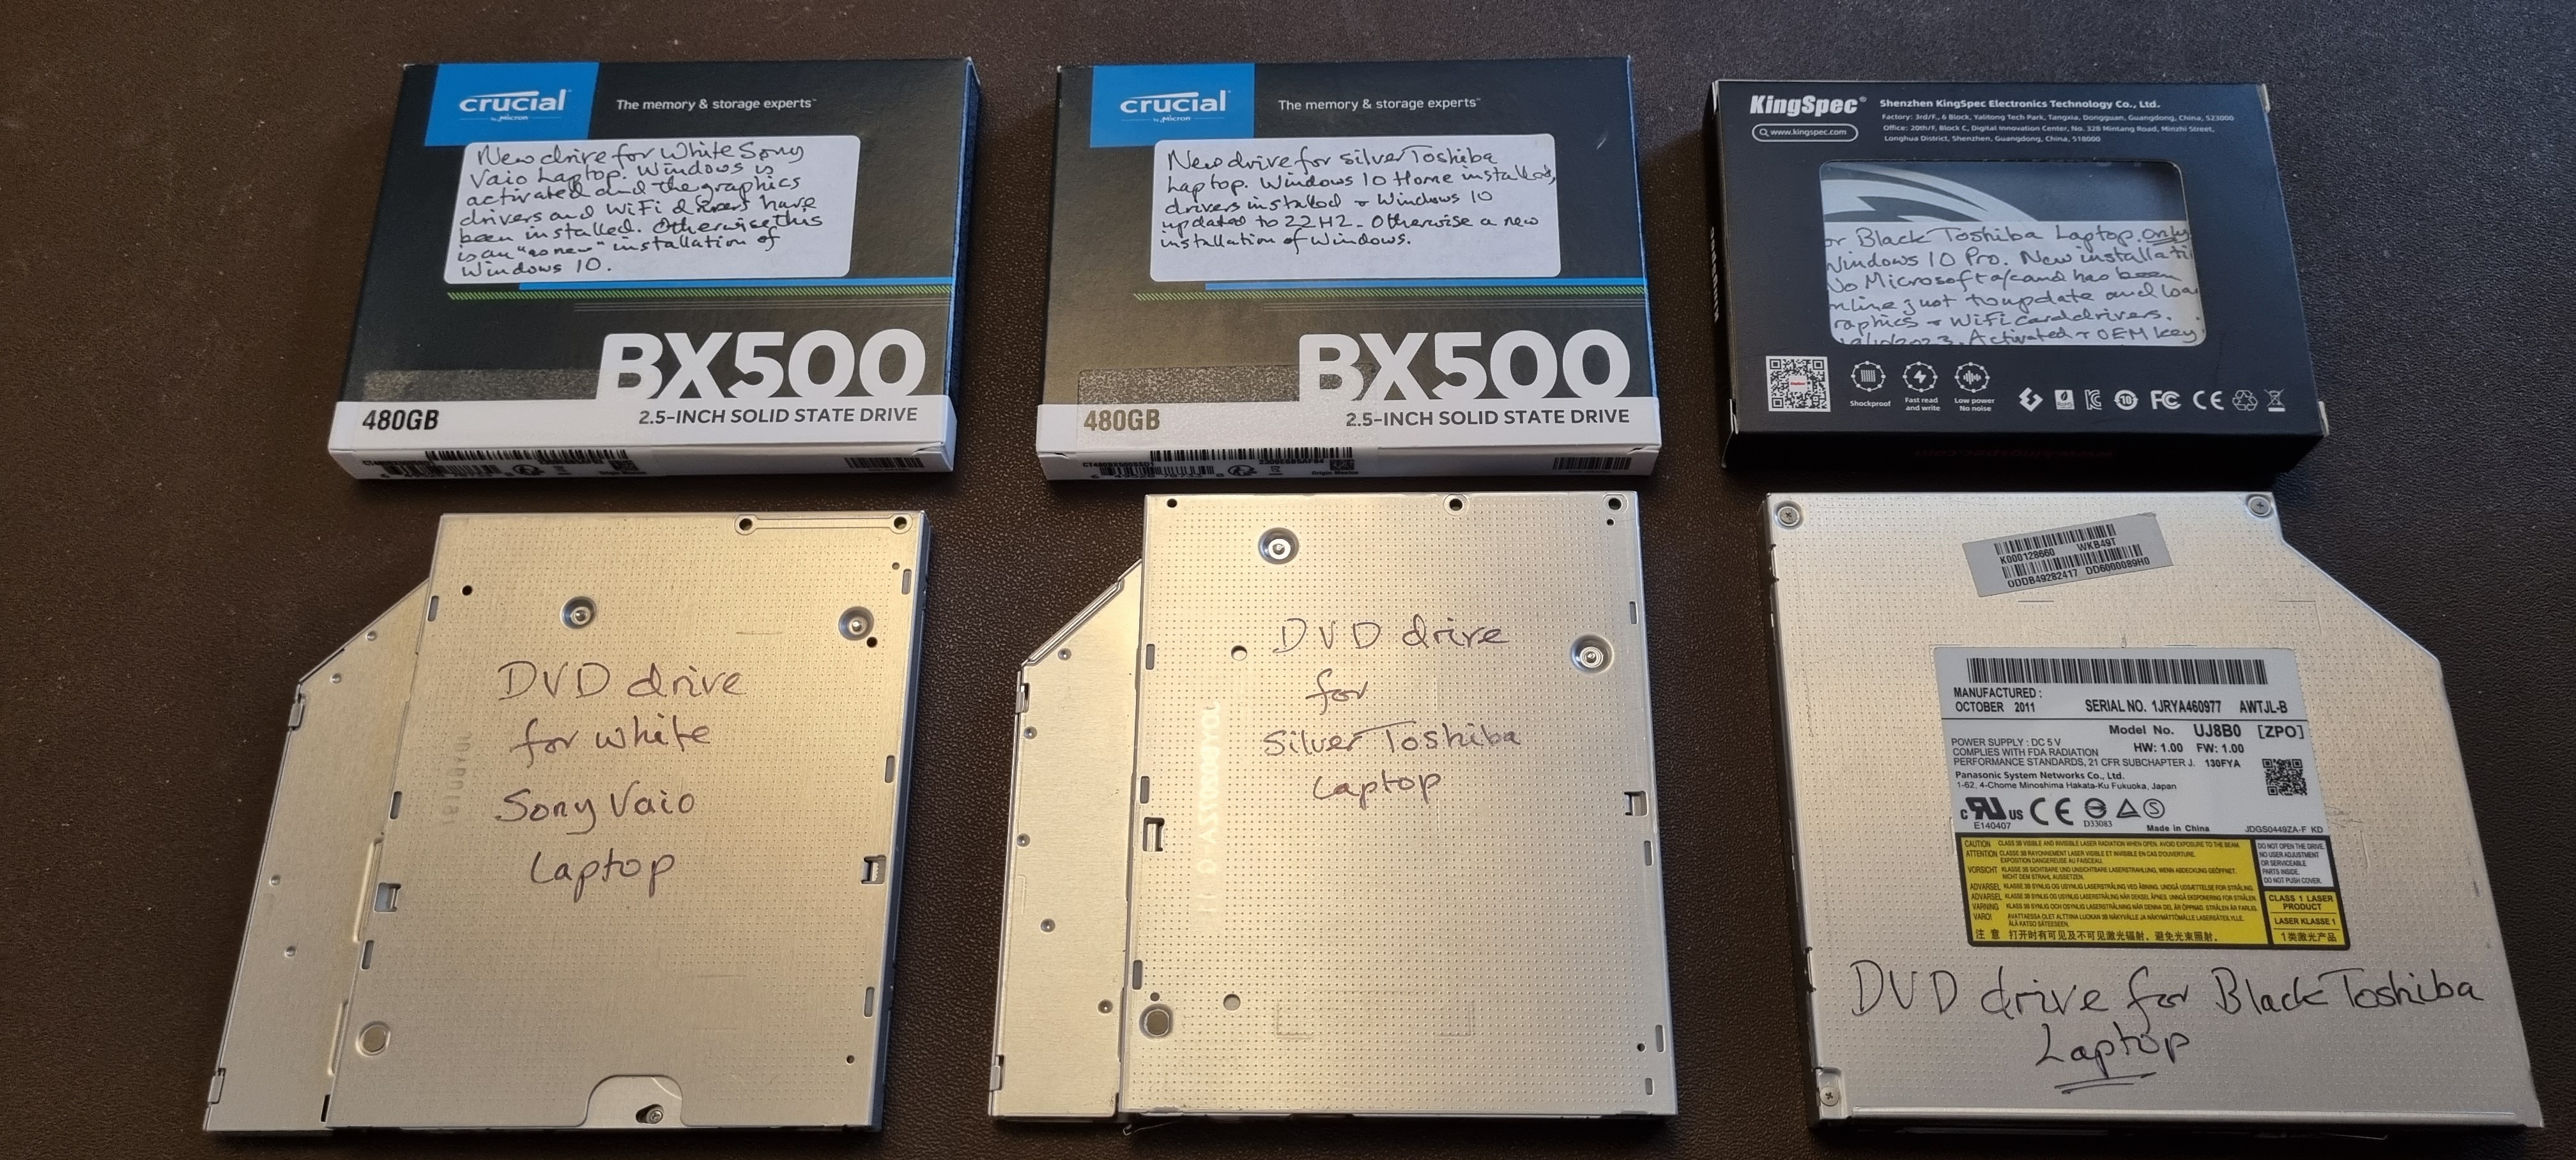
Now fit the DVD drive which is kept in
the box on the top shelf
to the right of the serving hatch,
along with the other DVD drives and the
new harddrives, which
are for when you sell/give away the computers.
Make sure you chose the
correct drive (they are all marked).
It’s the right hand
silver one in the picture below.
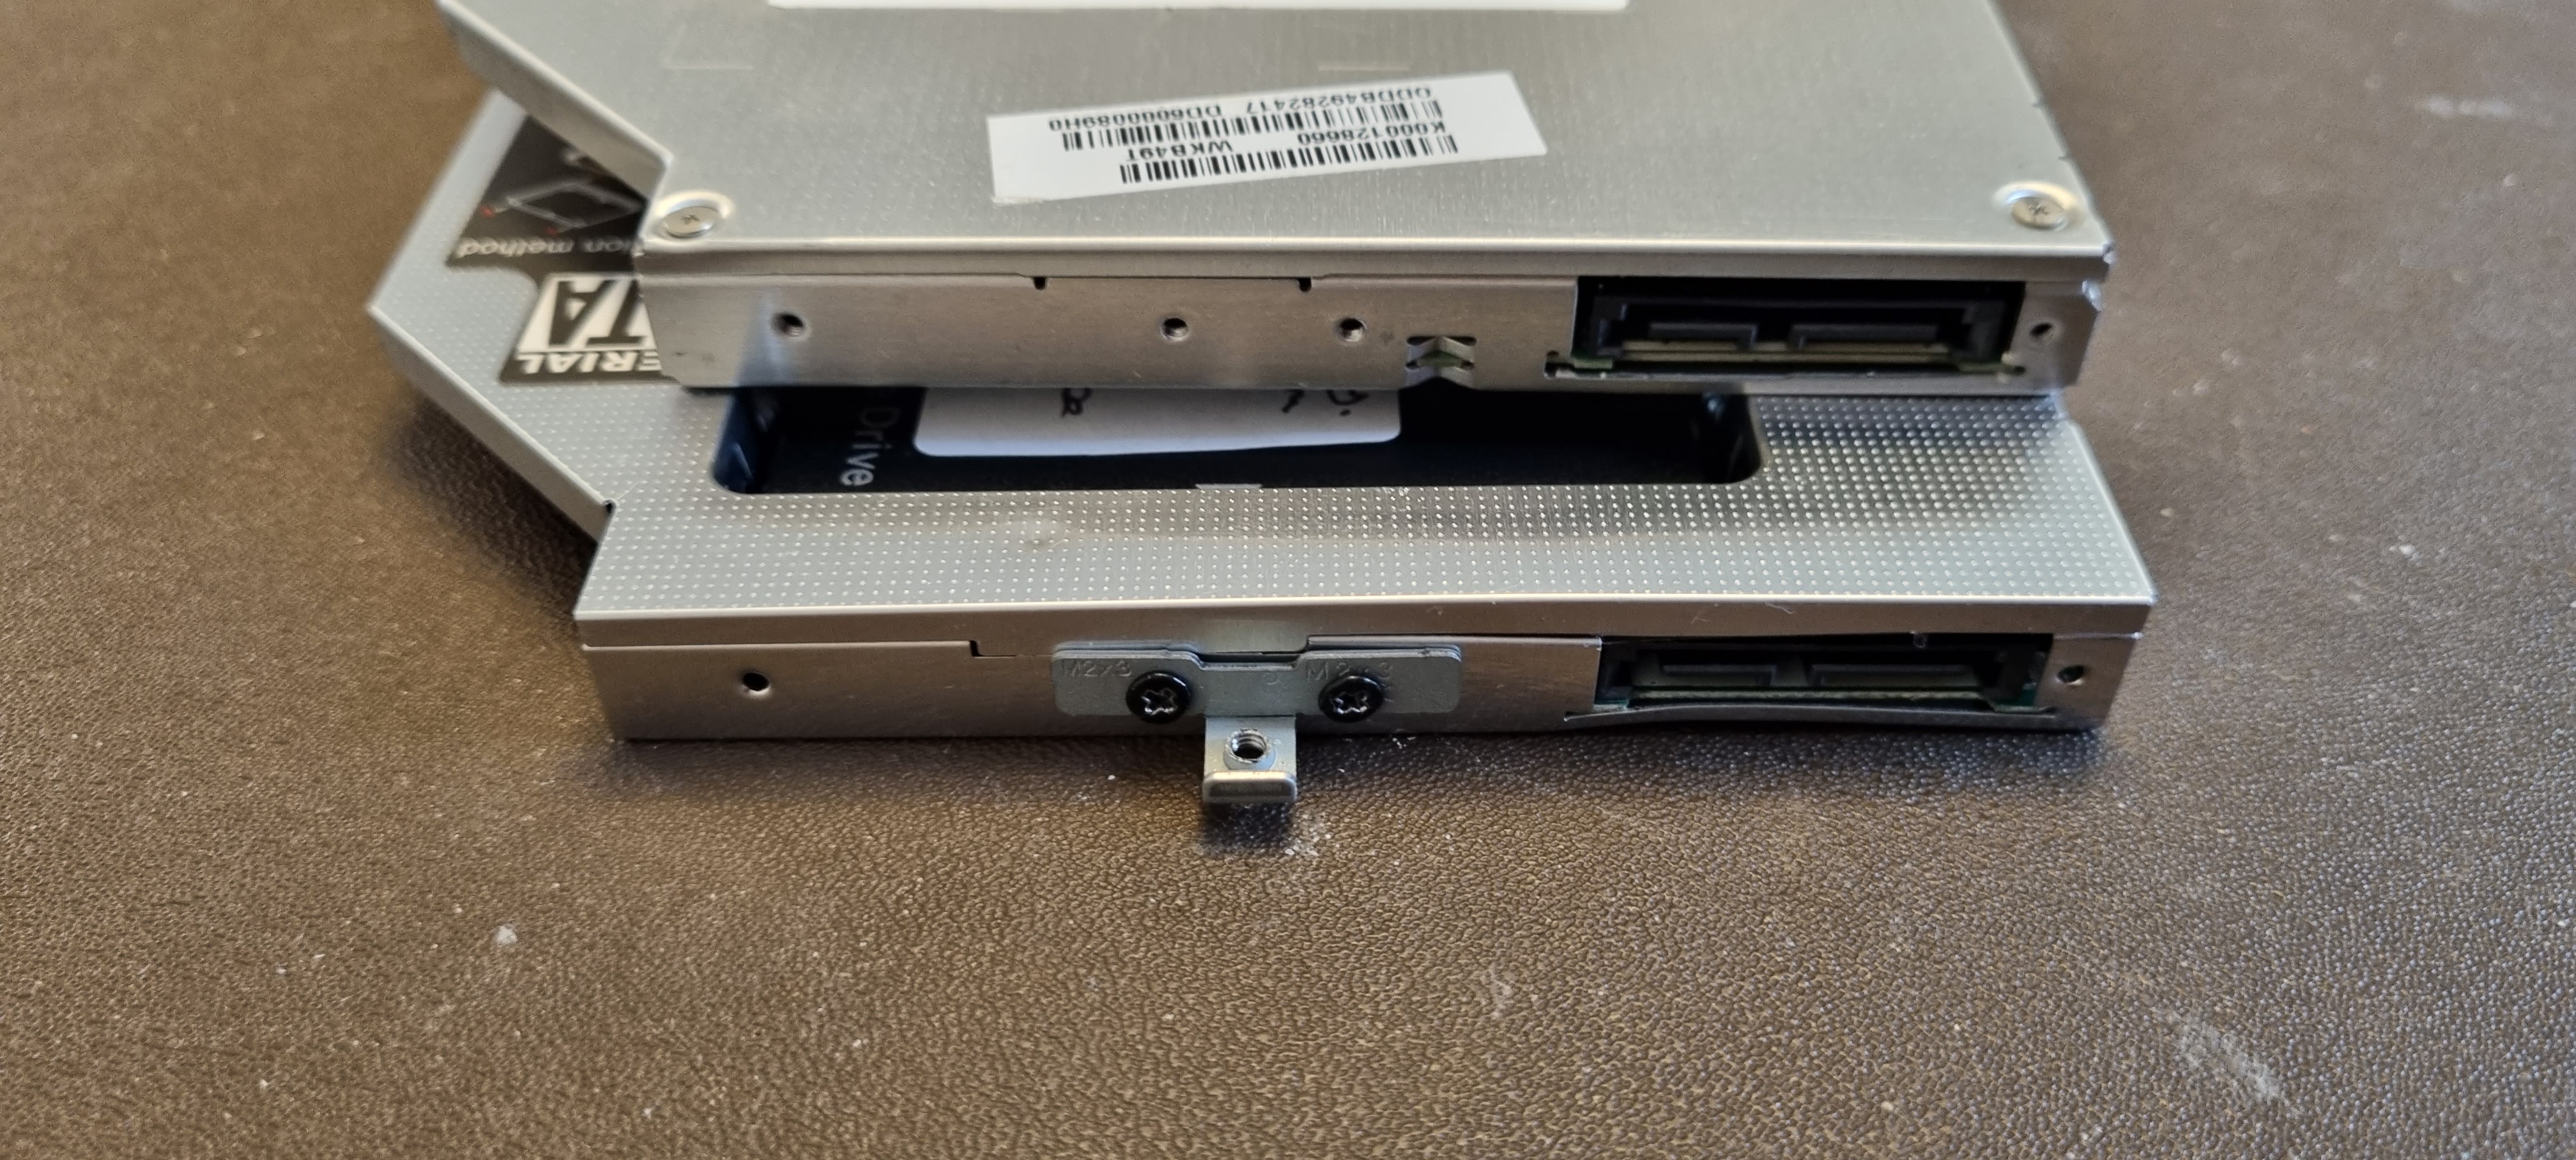
To fit the drive
you need to remove the small
bracket on the end of the harddrive
holder that you took out of
the computer, and fit
it in the same place on the
DVD drive. Make sure you fit it the
correct way up – below you can see it on
the harddrive
holder and the DVD drive above ready to have it fitted.
(You
need to be very gentle with the screws as the metal used in the
holder and
DVD drive is very thin and the threads strip
easily.)
Also remove the
black plastic end piece from the harddrive holder and fit it to the
DVD drive.
(You‘ll have to remove the blue tack, but it
should then clip properly onto the
DVD drive as it was
originally meant to be on that.)
After fitting the DVD drive
back in the computer, don’t forget to secure it with the screw
shown in
the 4th picture.
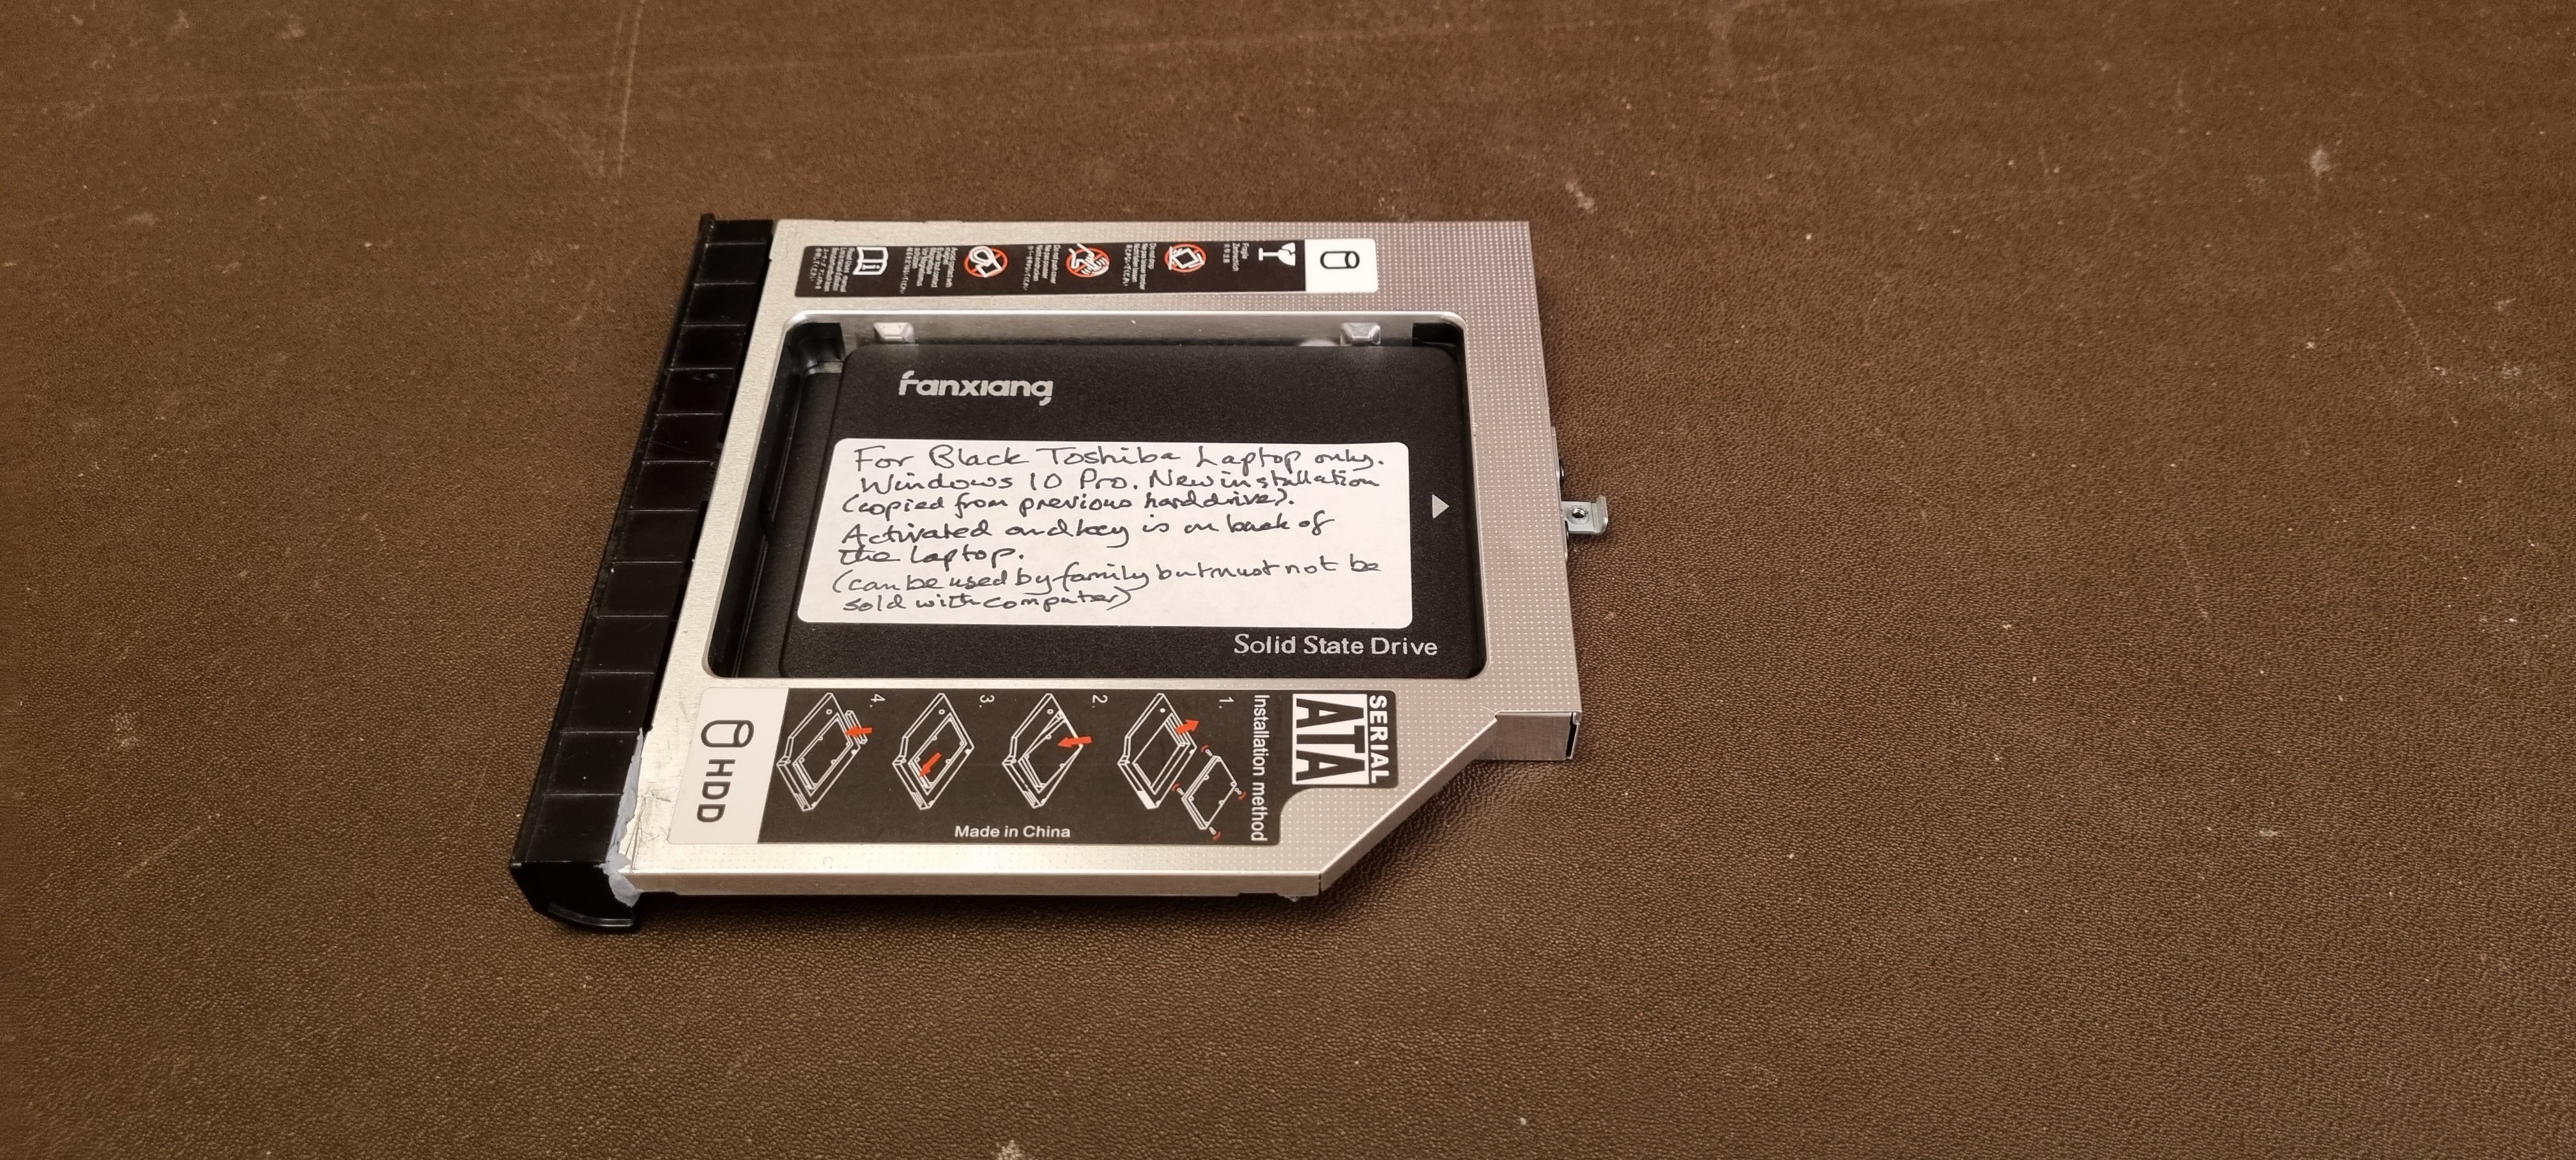
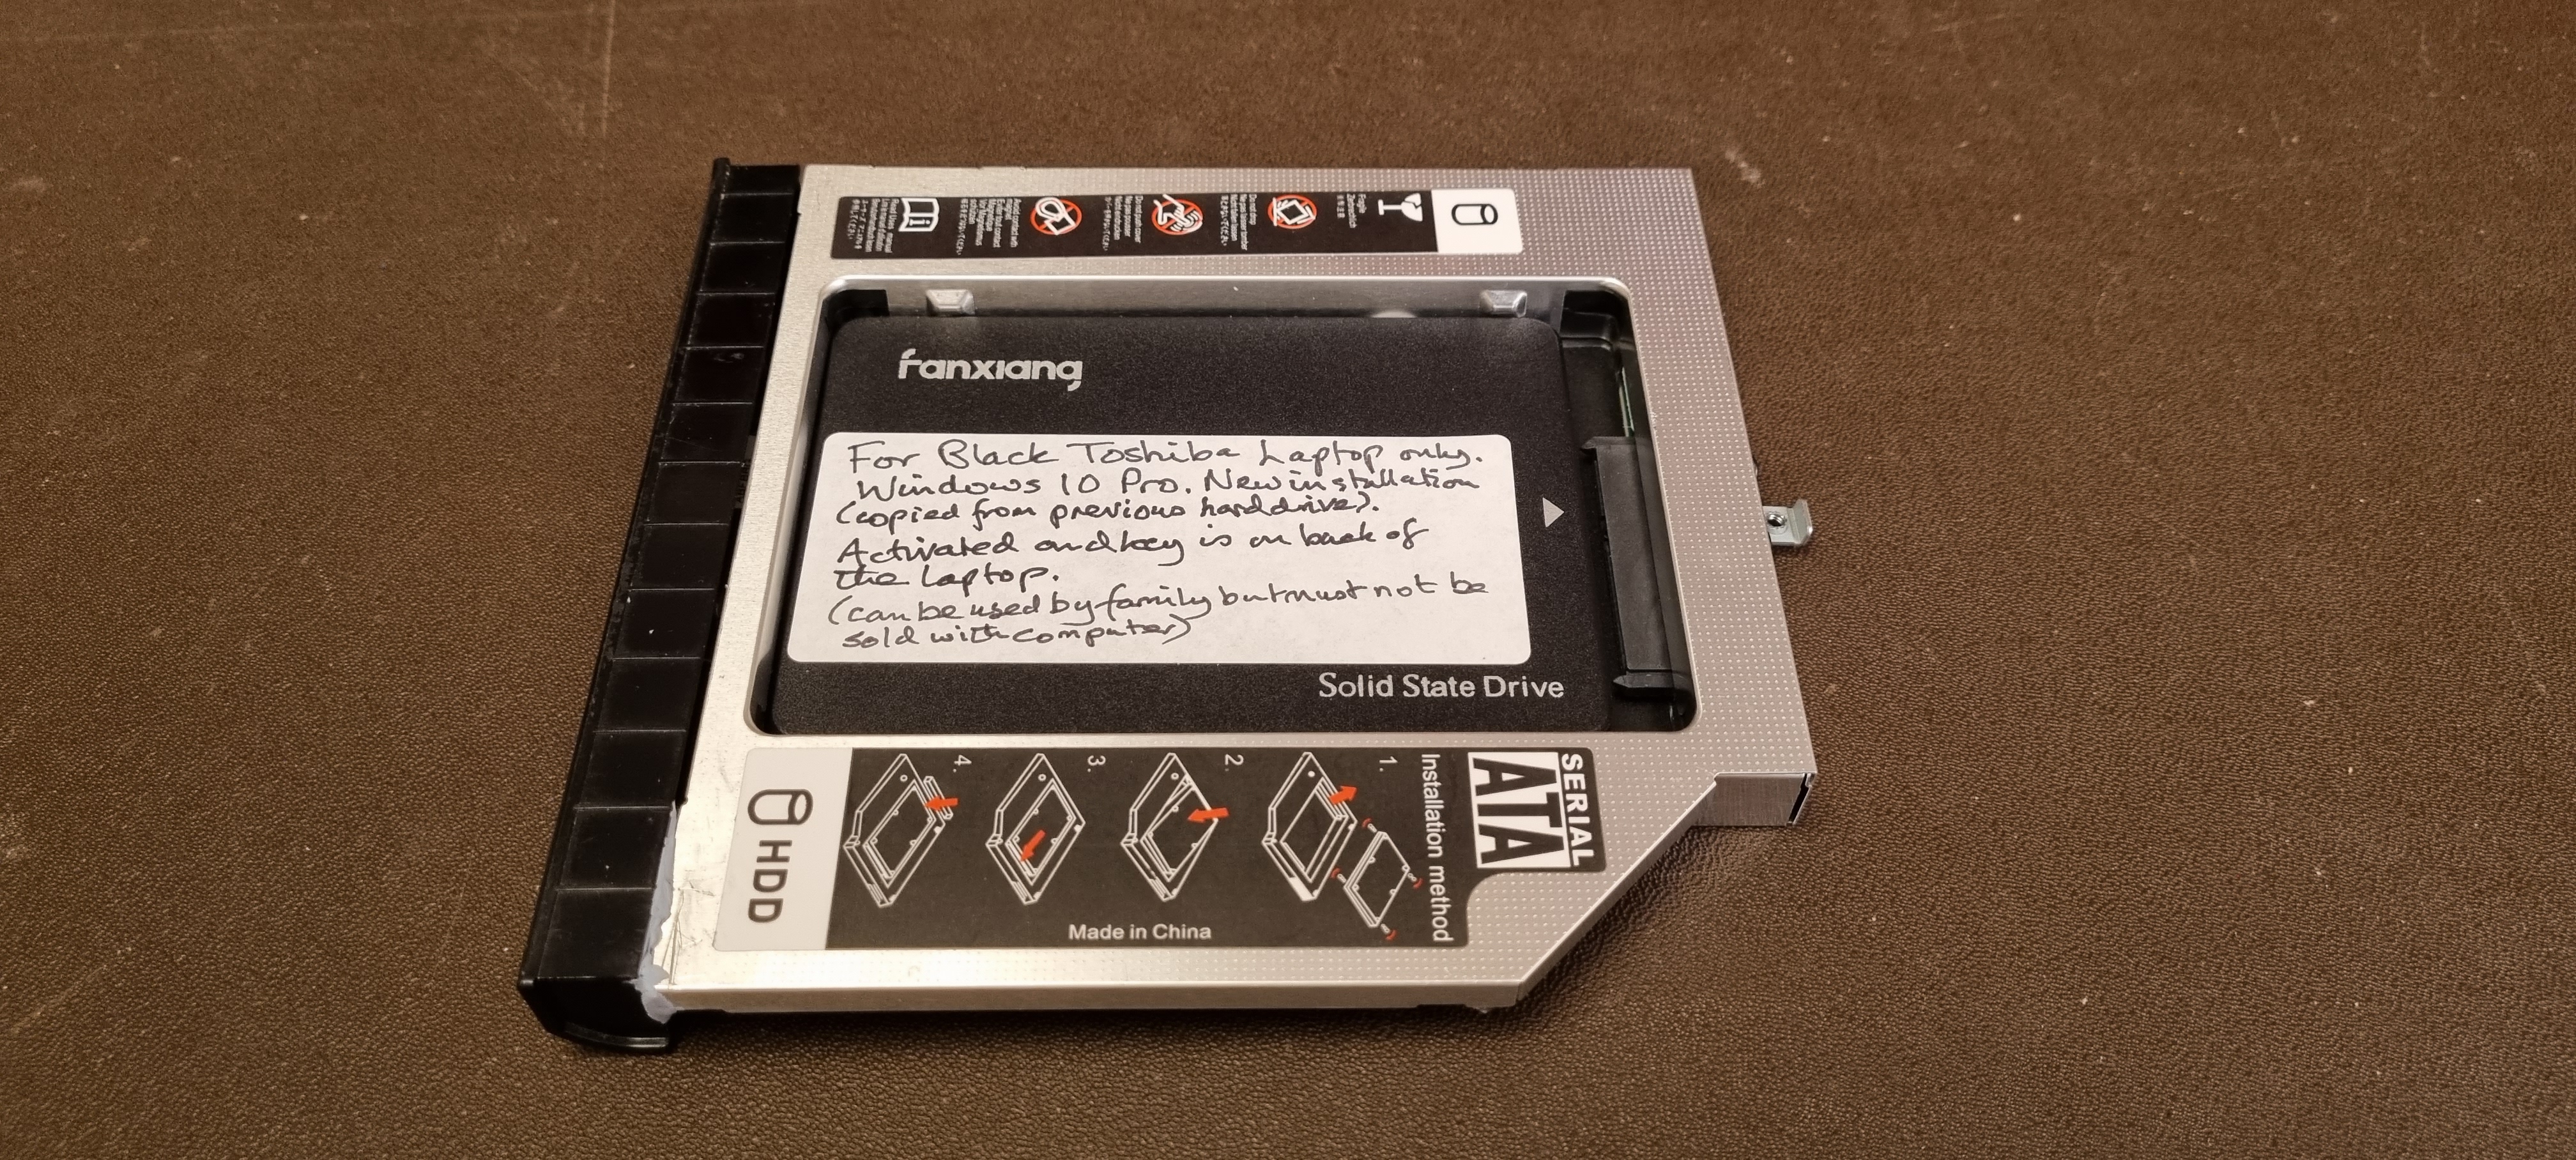
When it’s
time to get rid of the computer, you just need to remove the main
hard drive, as shown at the start
of these instructions, and
replace it with the one shown below, which is kept in the box with
the DVD drives.
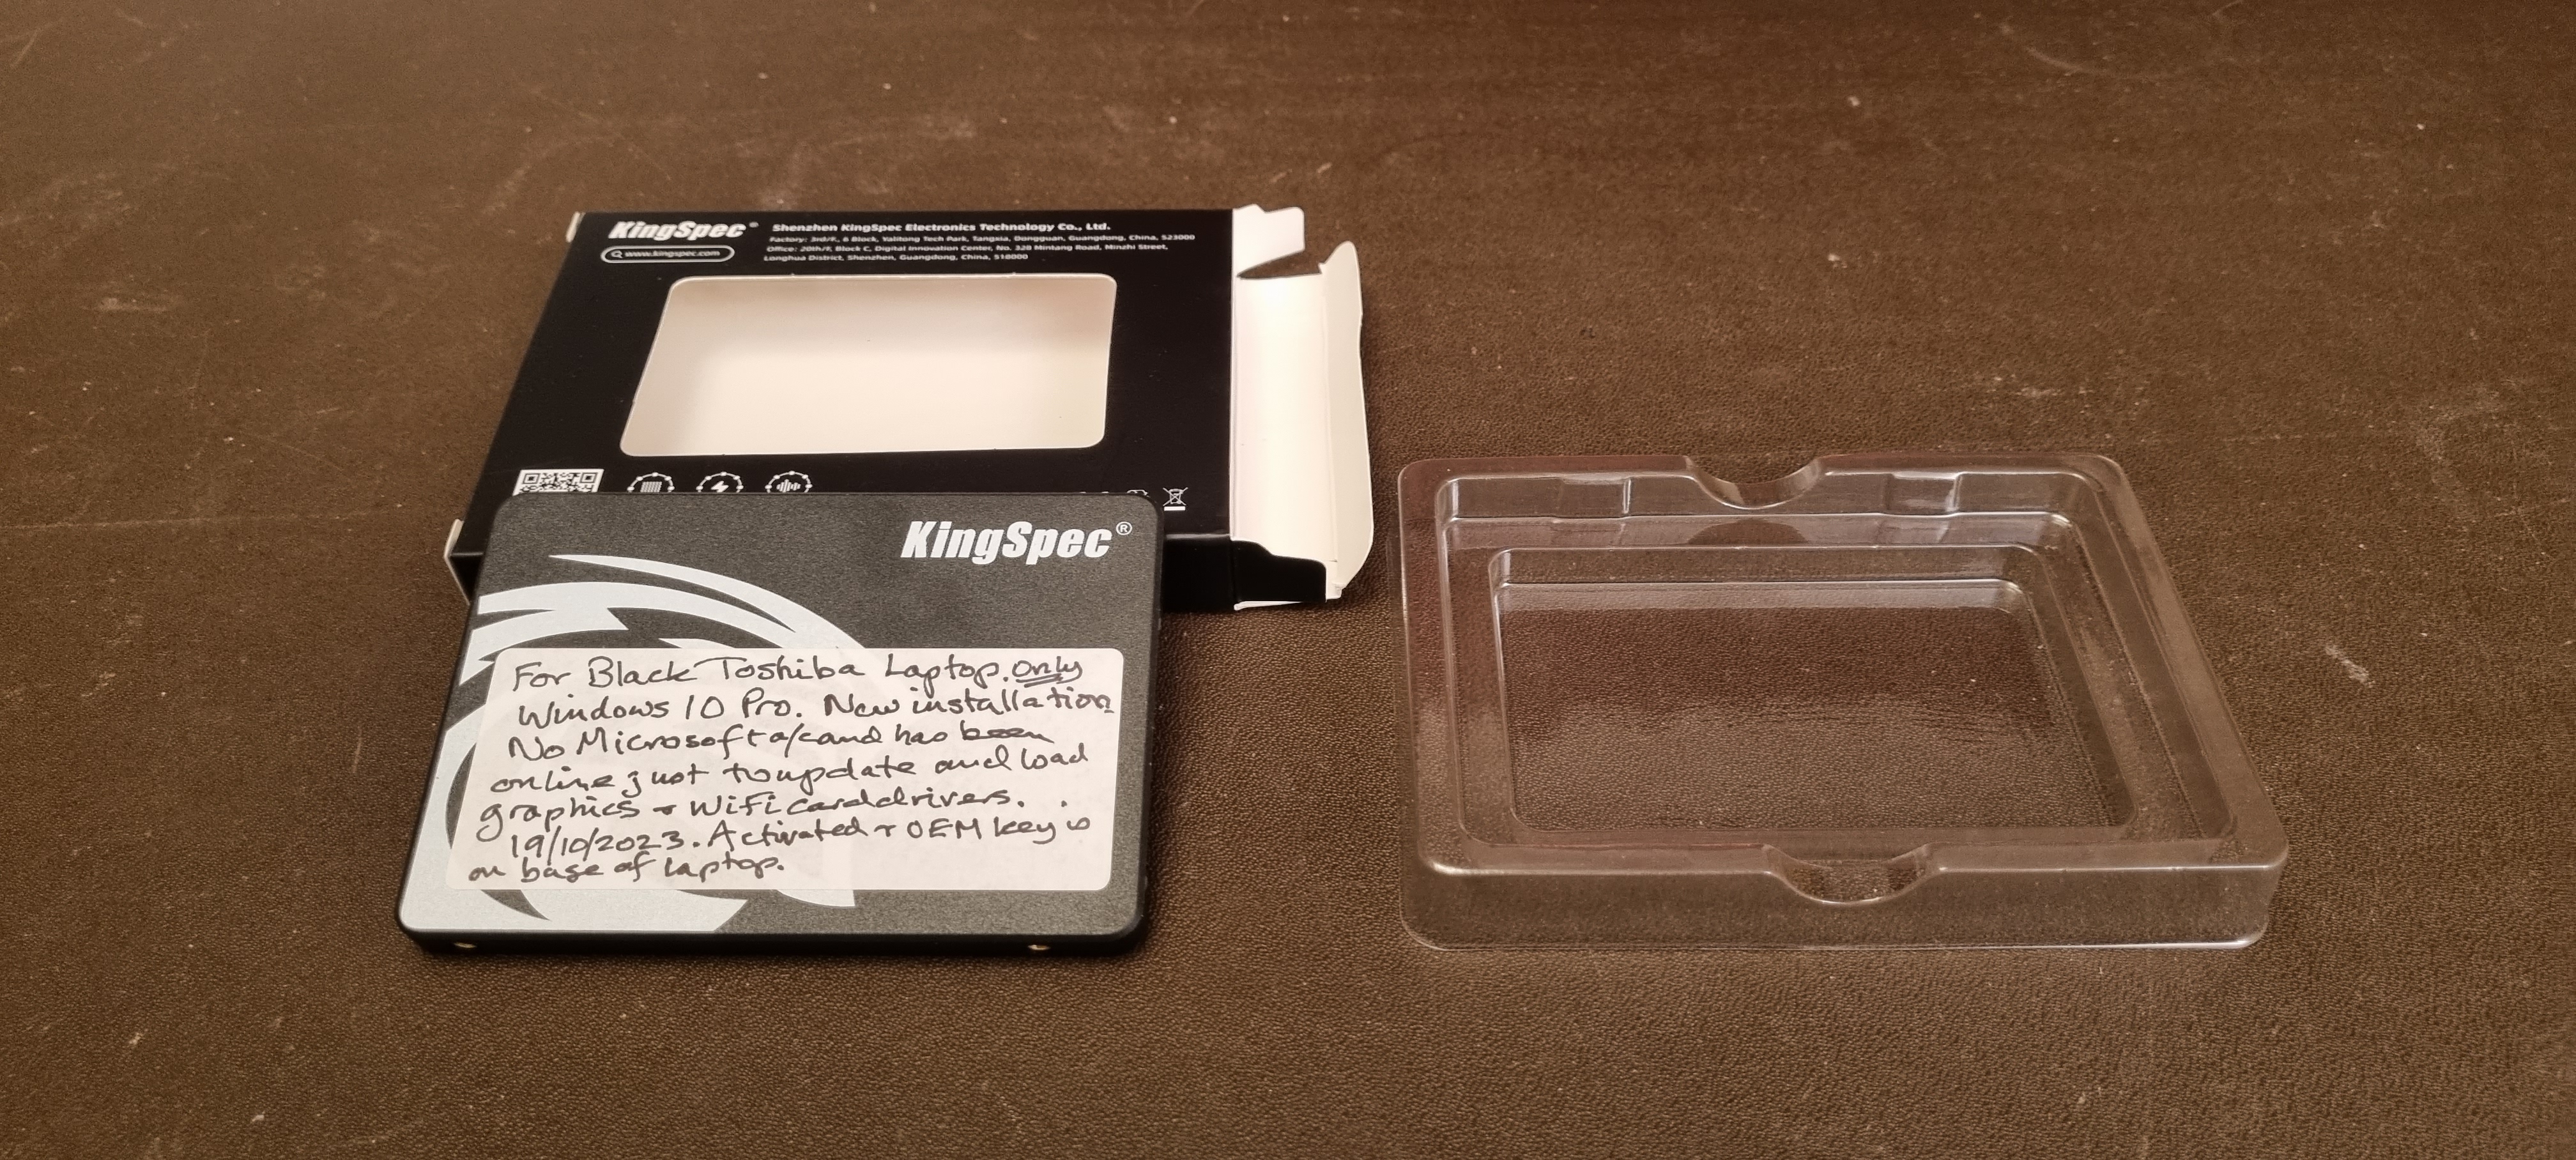
This
computer does not need any changes made to the BIOS in order to start
up, and so it should boot
into either the Windows 10 for family
use, or the new clean Windows 10, after pressing the start button
on
the top of the computer depending on which drive you have fitted.